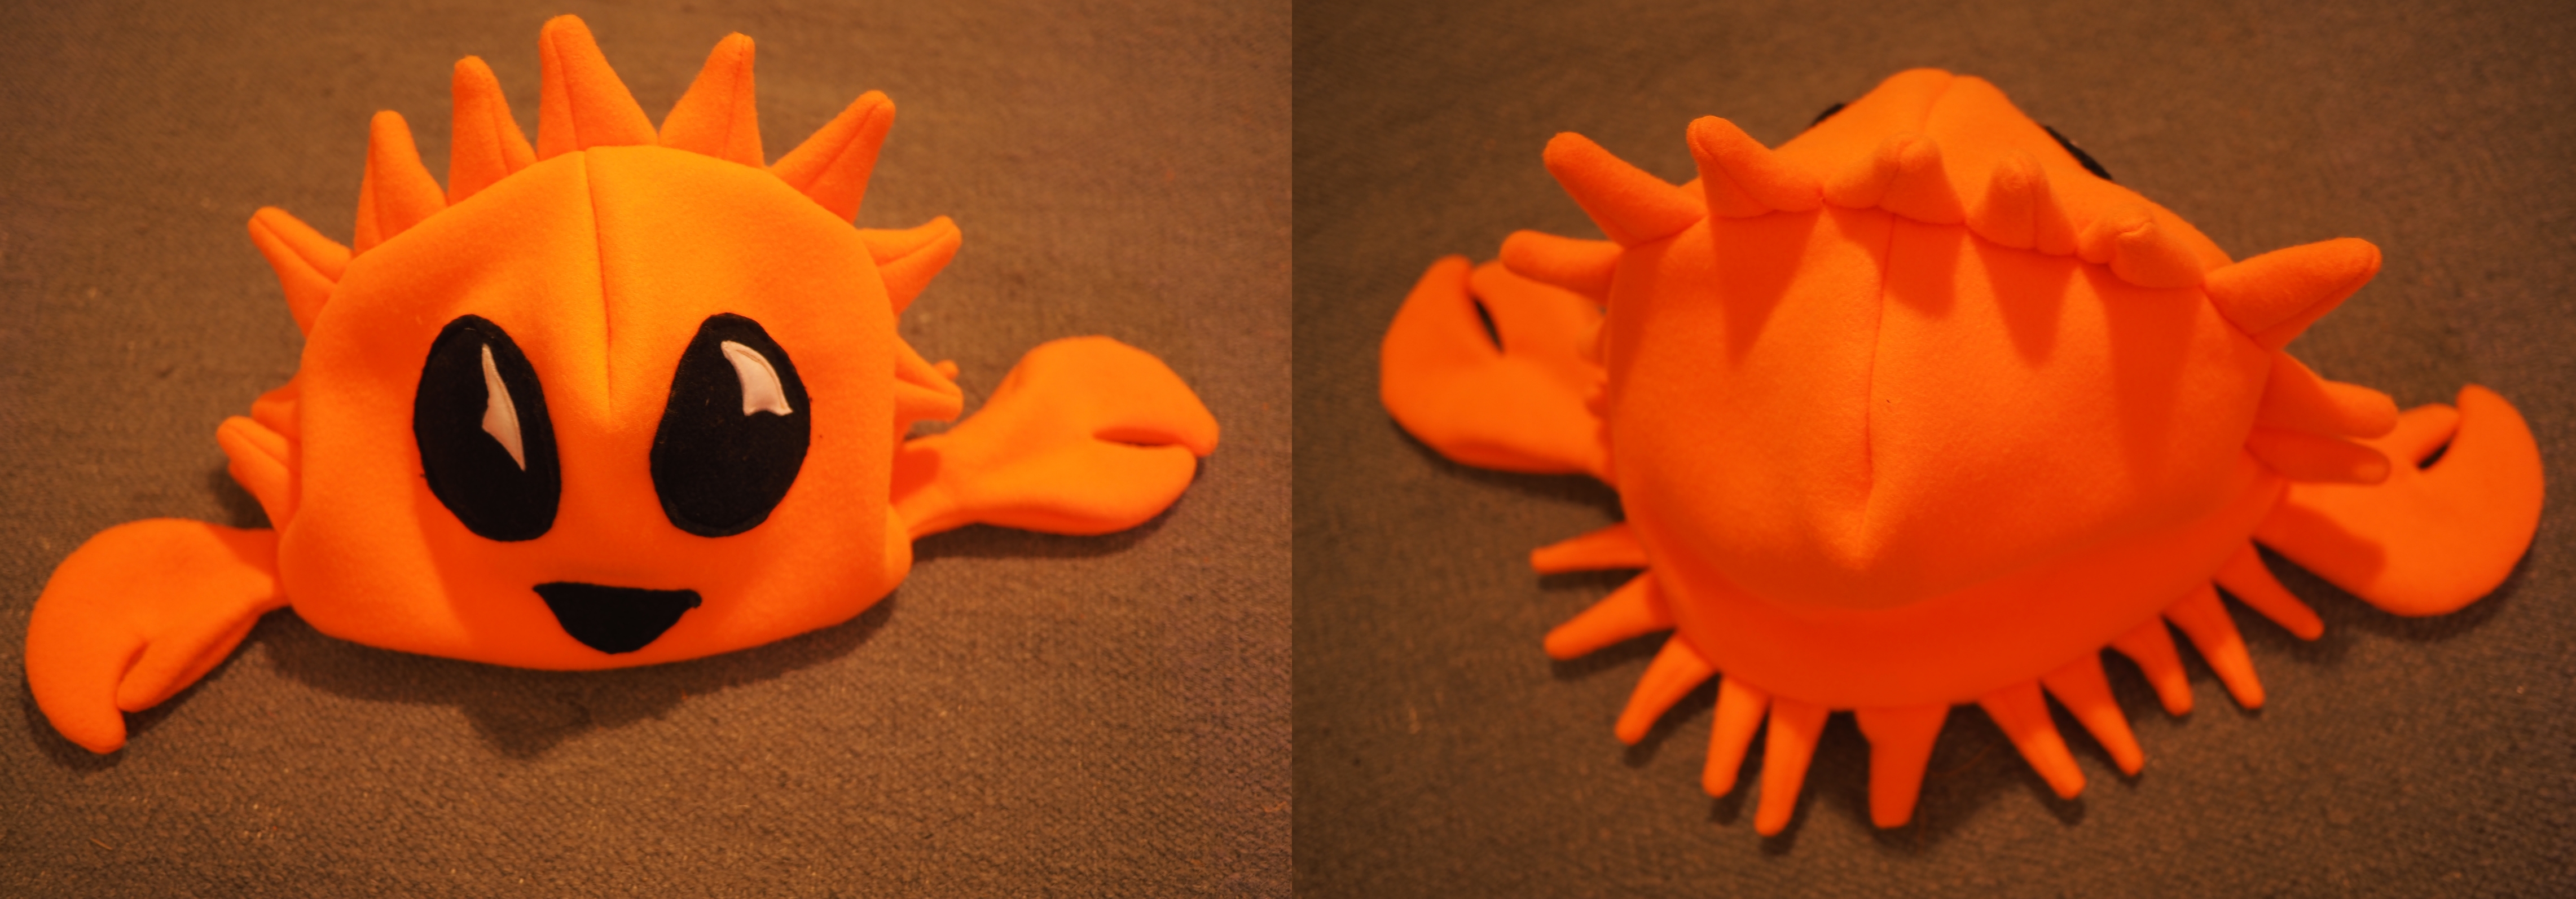
Rustacean Hat Pattern
Based on feedback from the crab plushie pattern, I took more pictures this time.
There are 40 pictures of the process below the fold.
Materials required
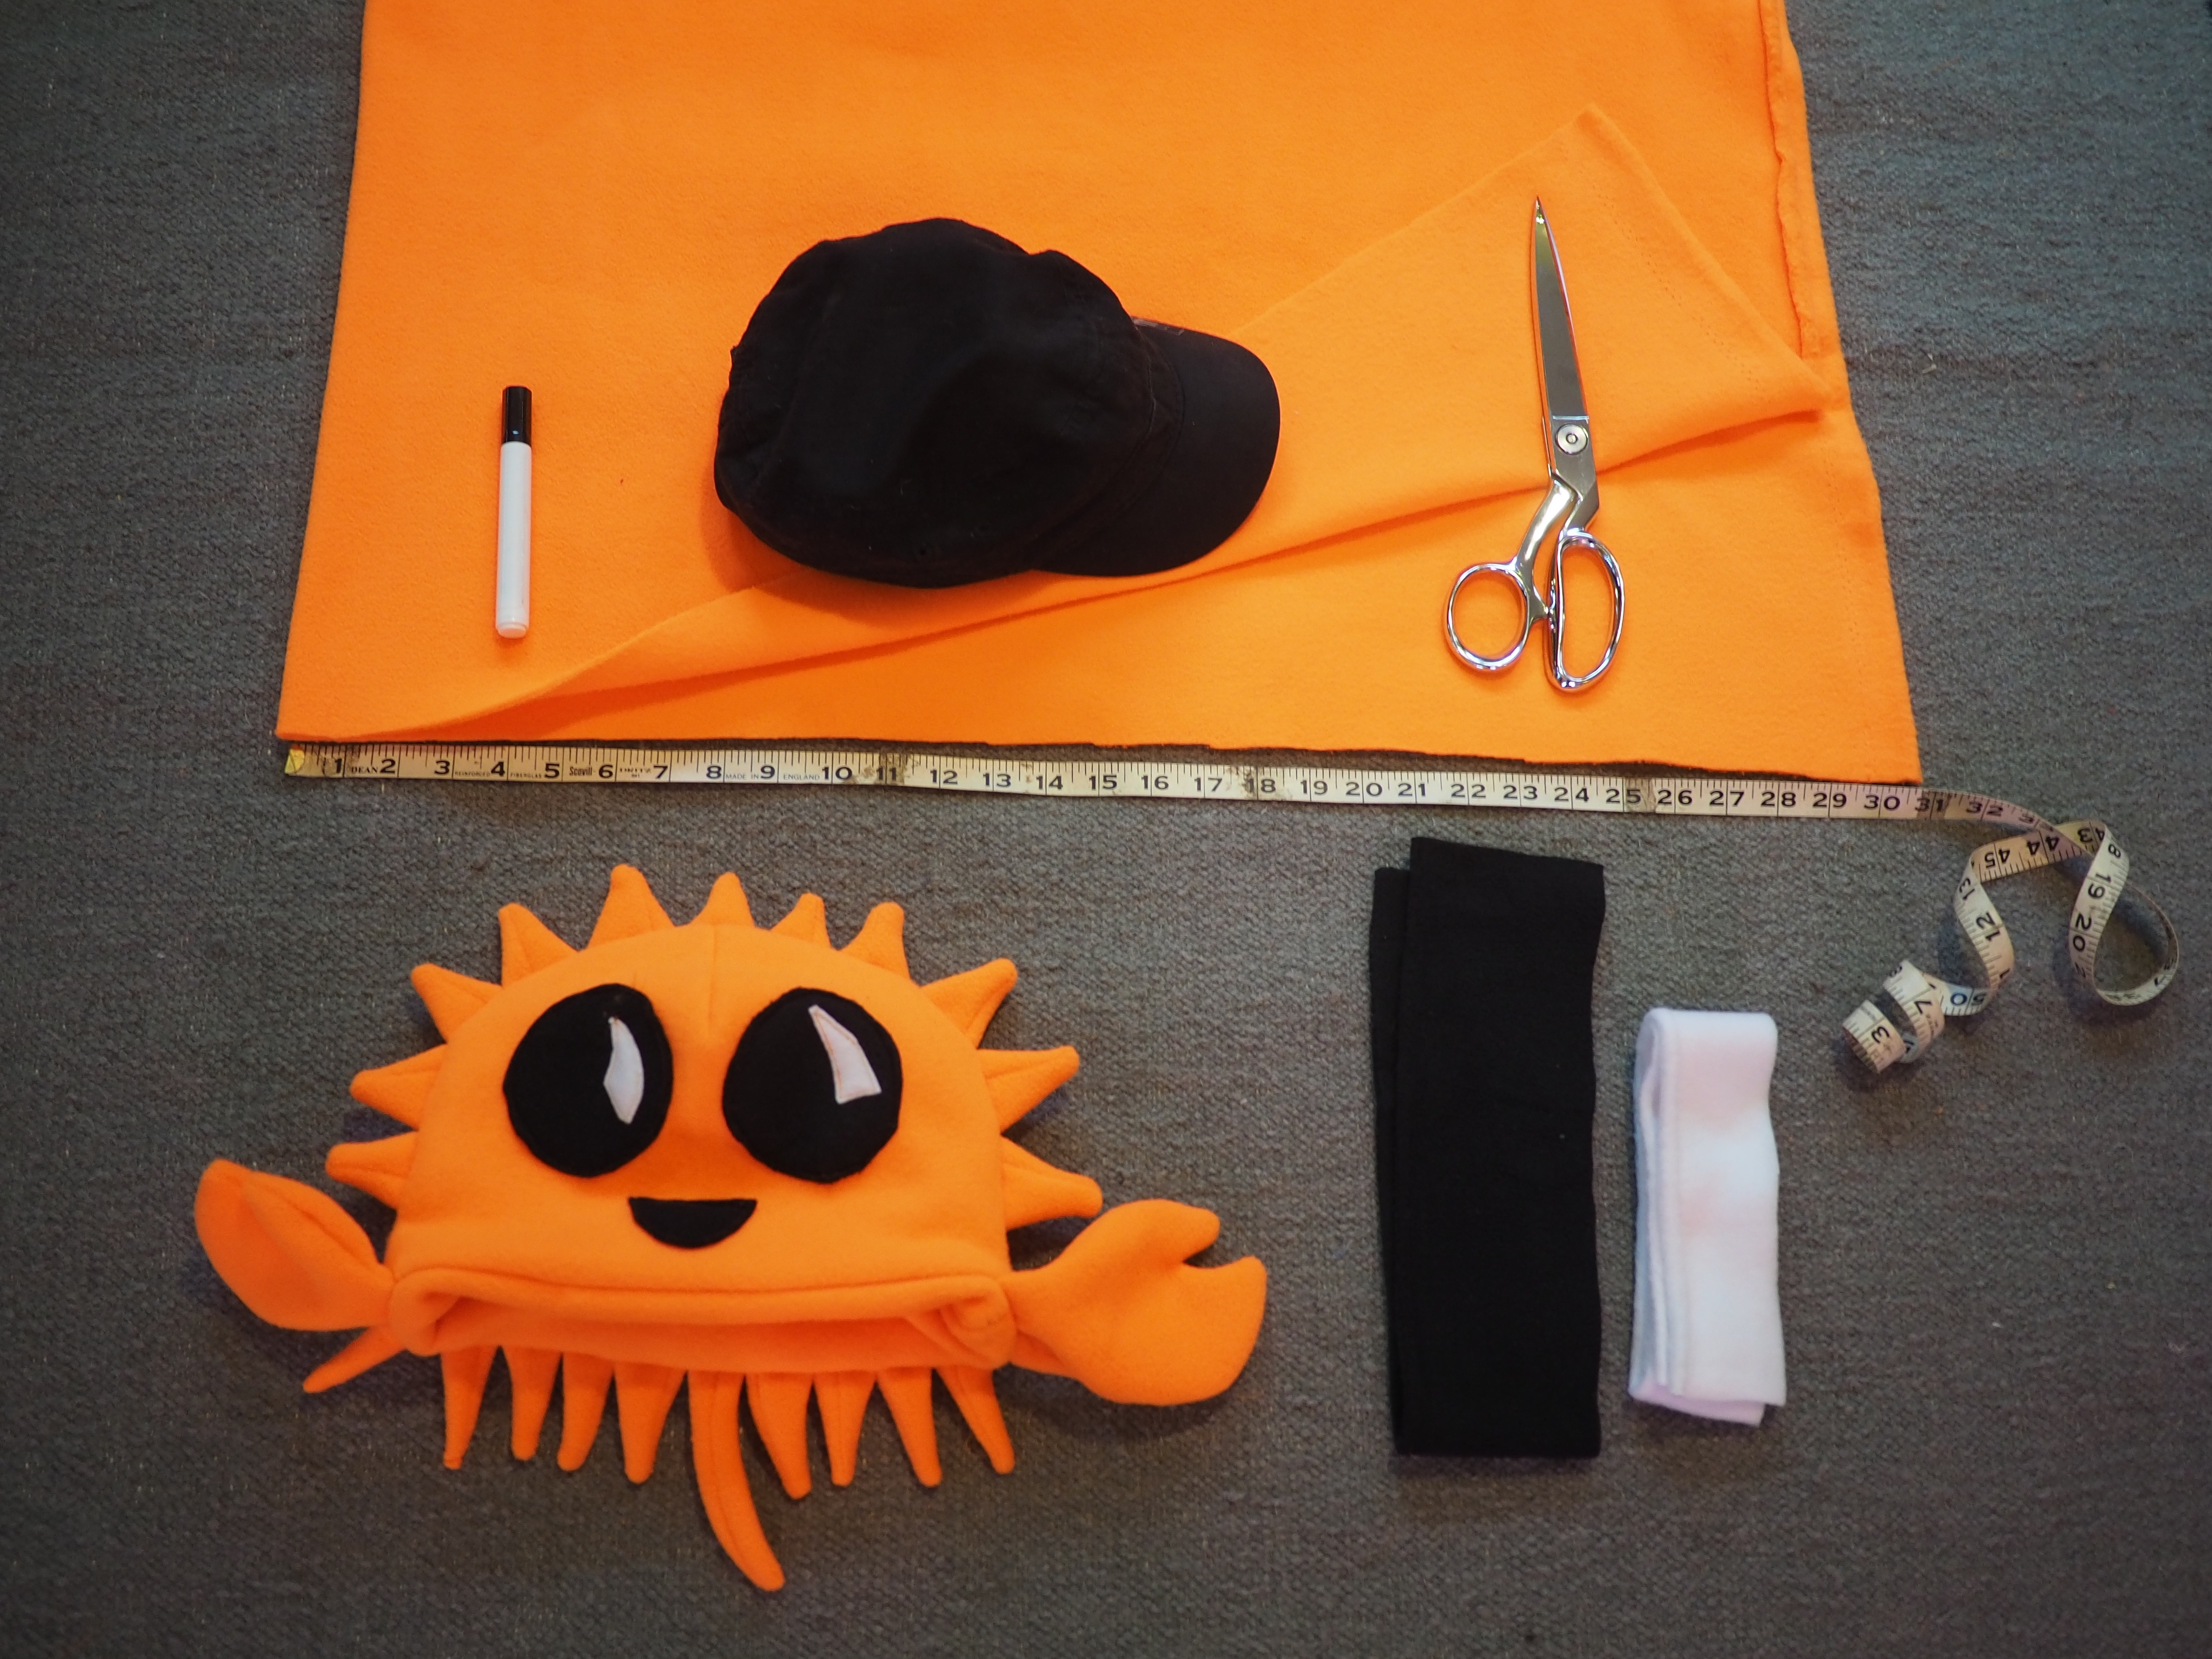
- About 1/4 yard or 1/4 meter of orange fabric. Maybe more if it's particularly narrow. Polar fleece is good because it stretches a little and does not fray near seams.
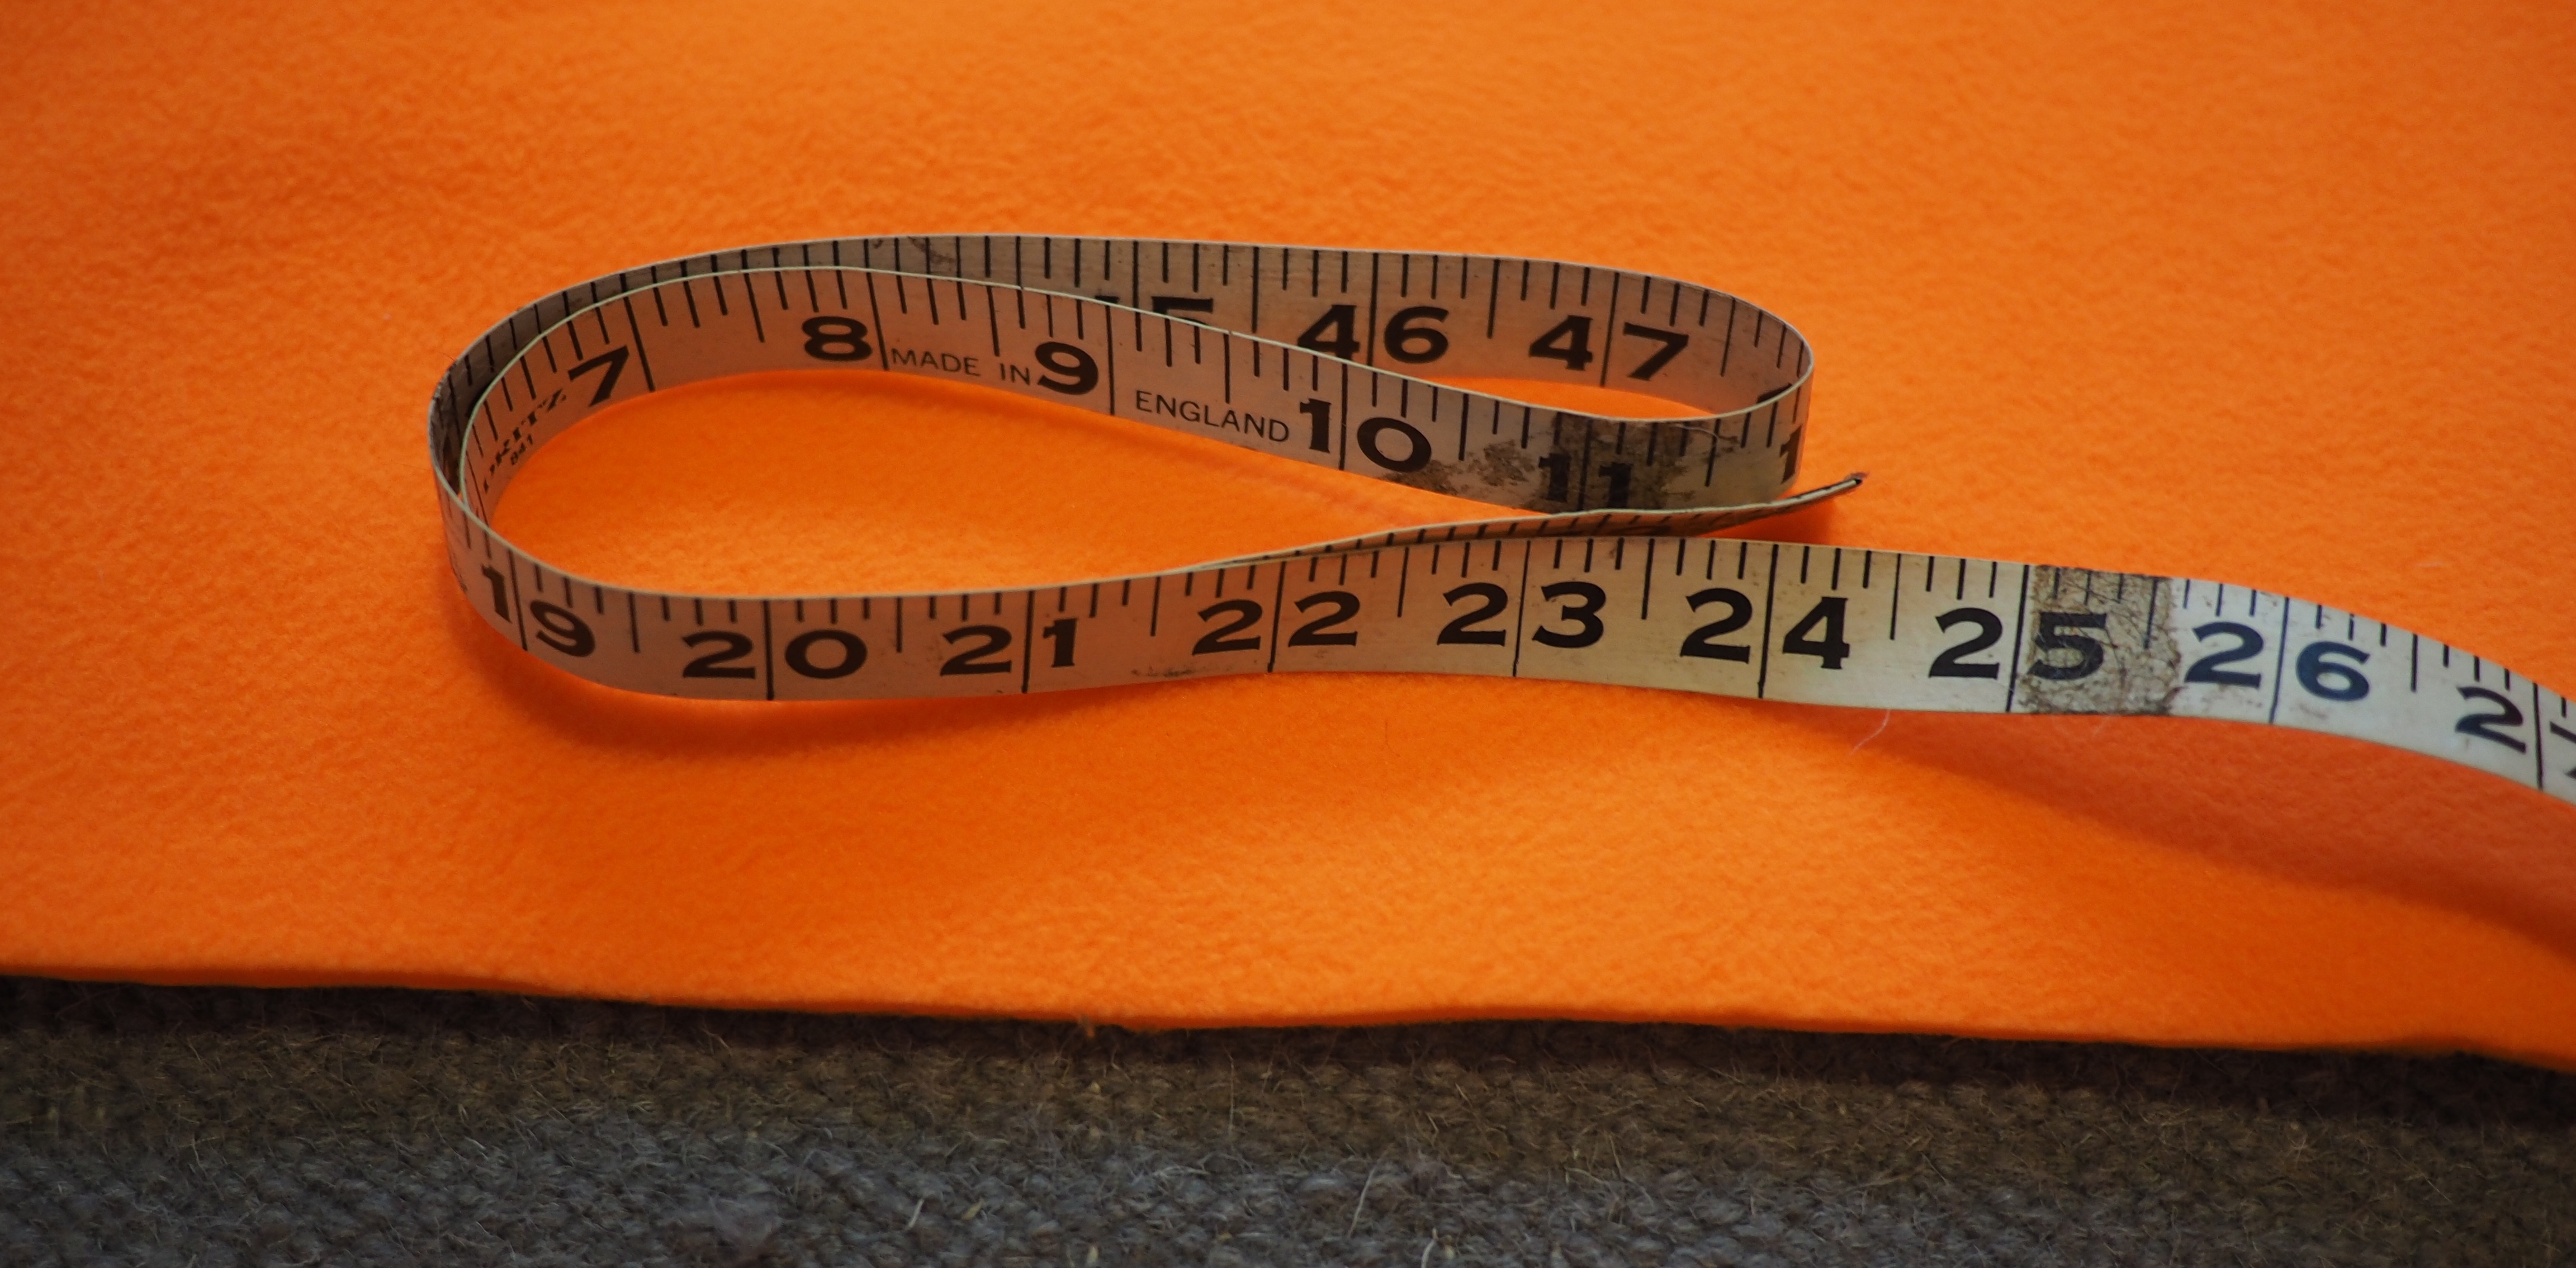
- A measuring device. You can just use a piece of string and mark it.
- Scissors, a sewing machine, pins, orange thread
- Scraps of black and white cloth to make the face
- The measurements of the hat wearer's head. I'm using a hat to guess the measurements from.
- A pen or something to mark the fabric with is handy.
Constructing the pattern pieces
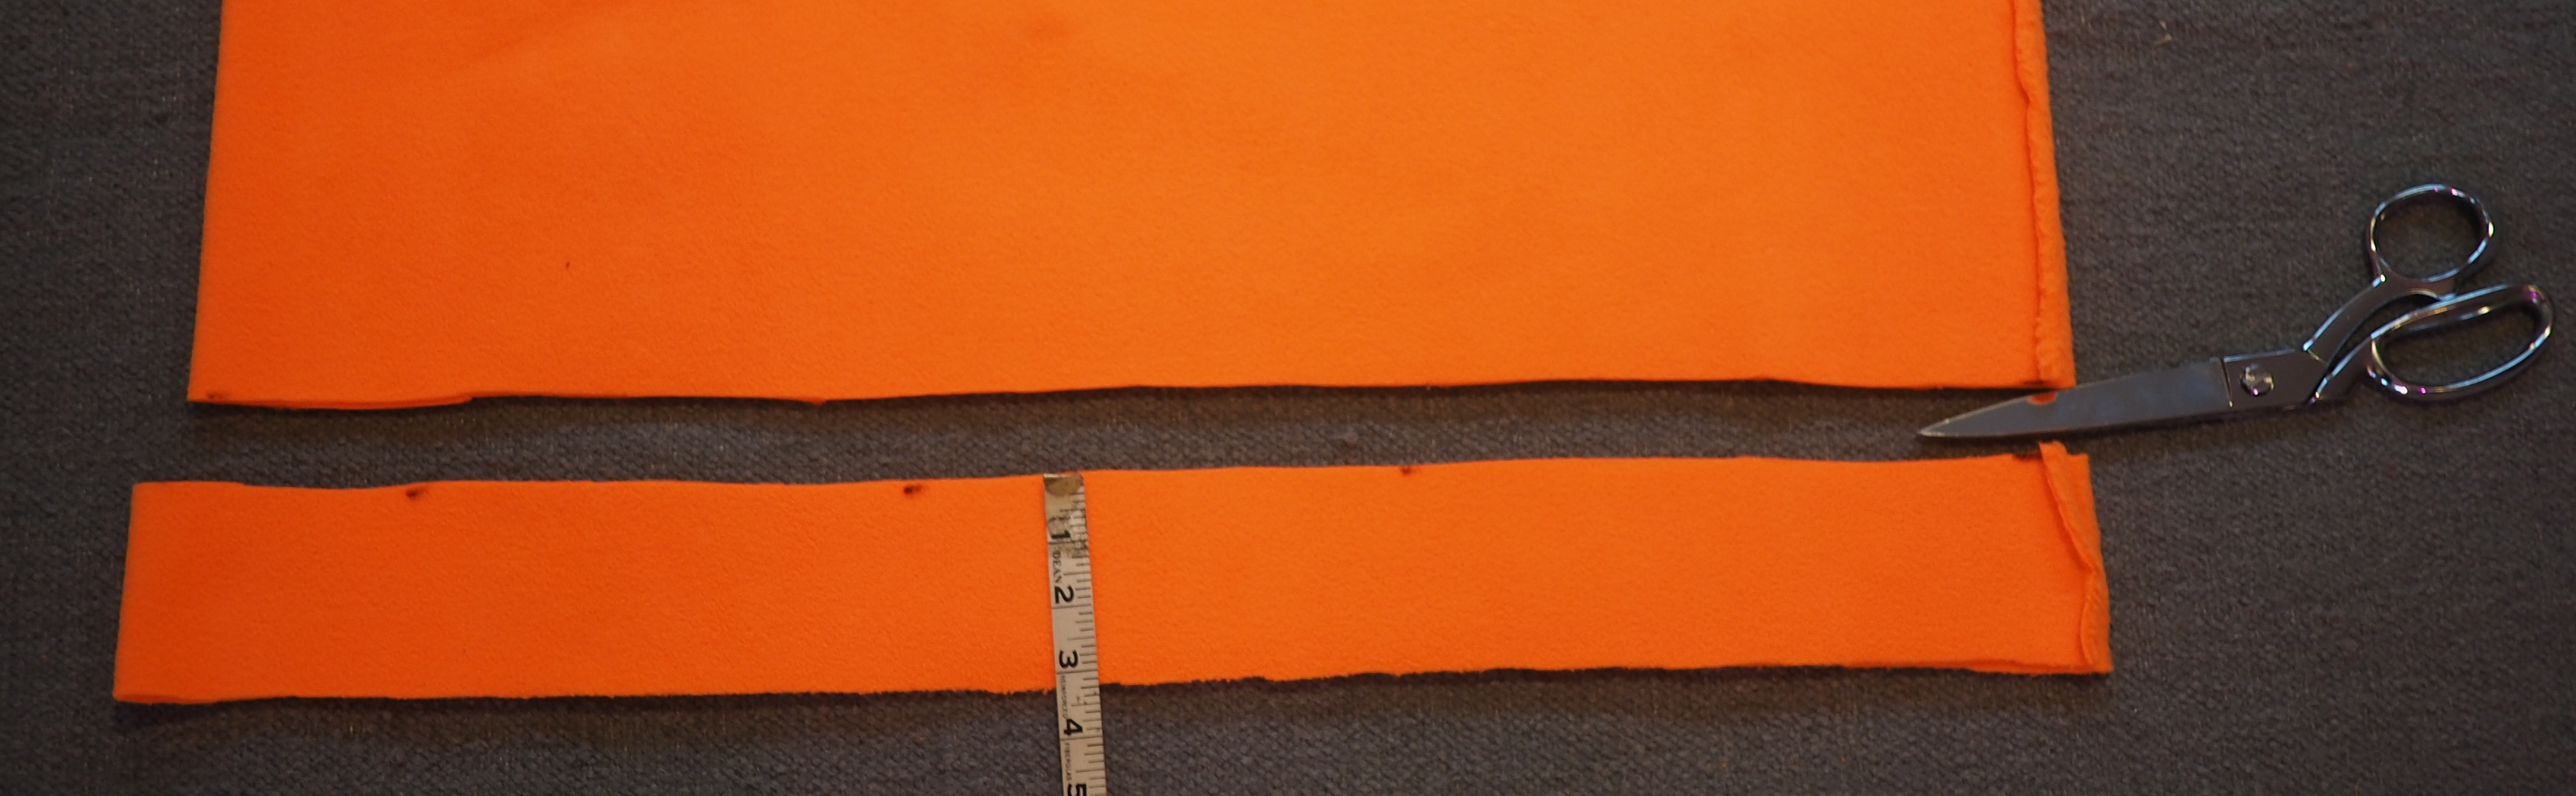
If you're using polar fleece, you don't have to pre-wash it. Fold it in half. In these pictures, I have the fold on the left and the selvedges on the right.
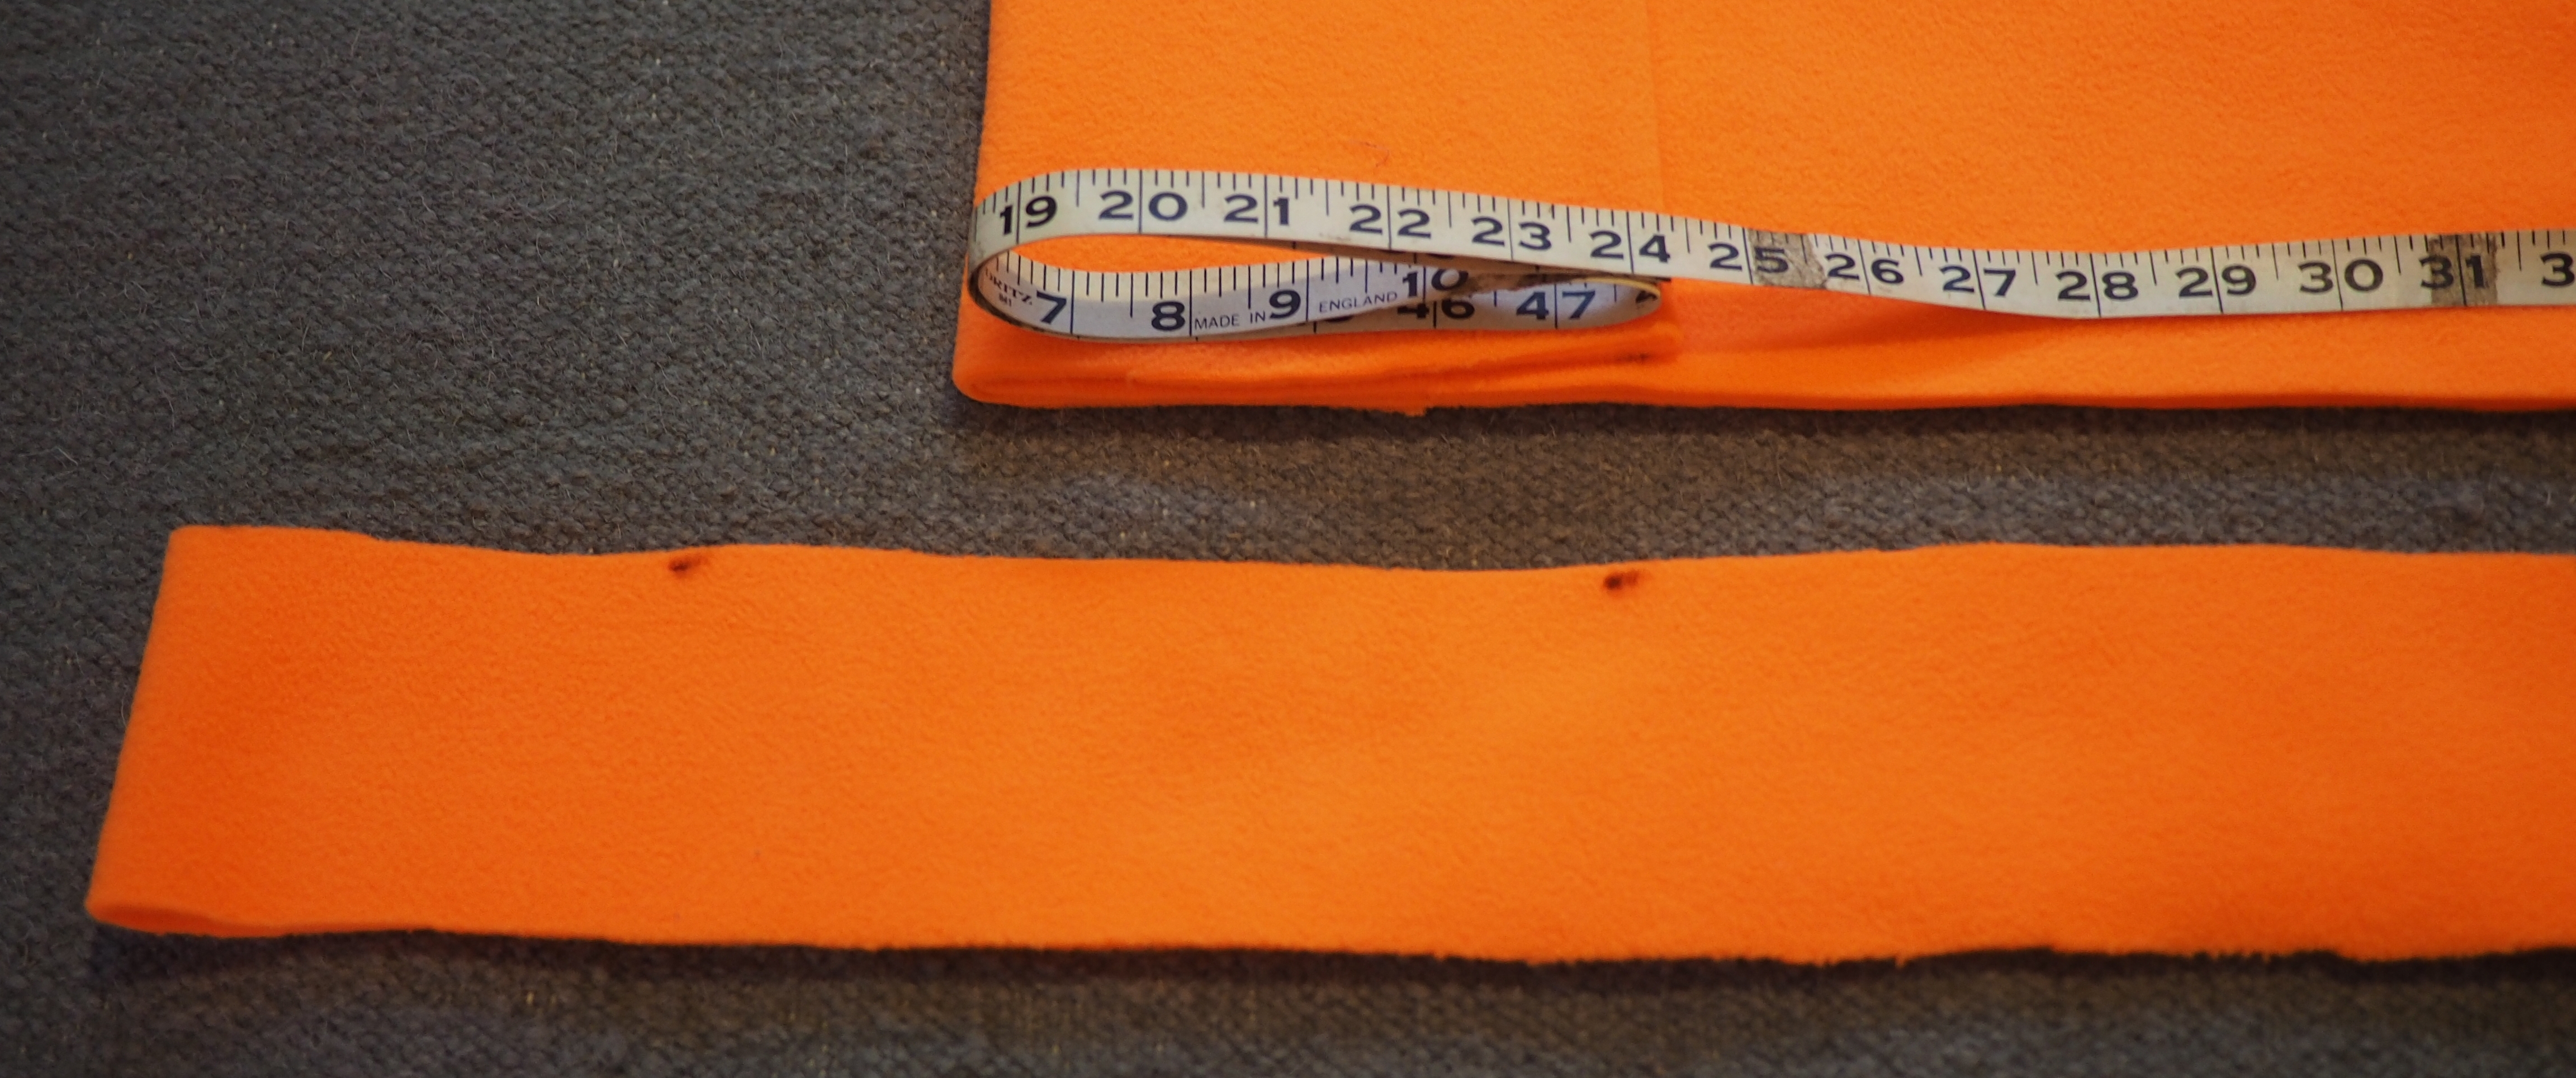
The first step is to chop off a piece from the bottom of the fleece. We'll use it to make the legs and spines later. Basically like this:
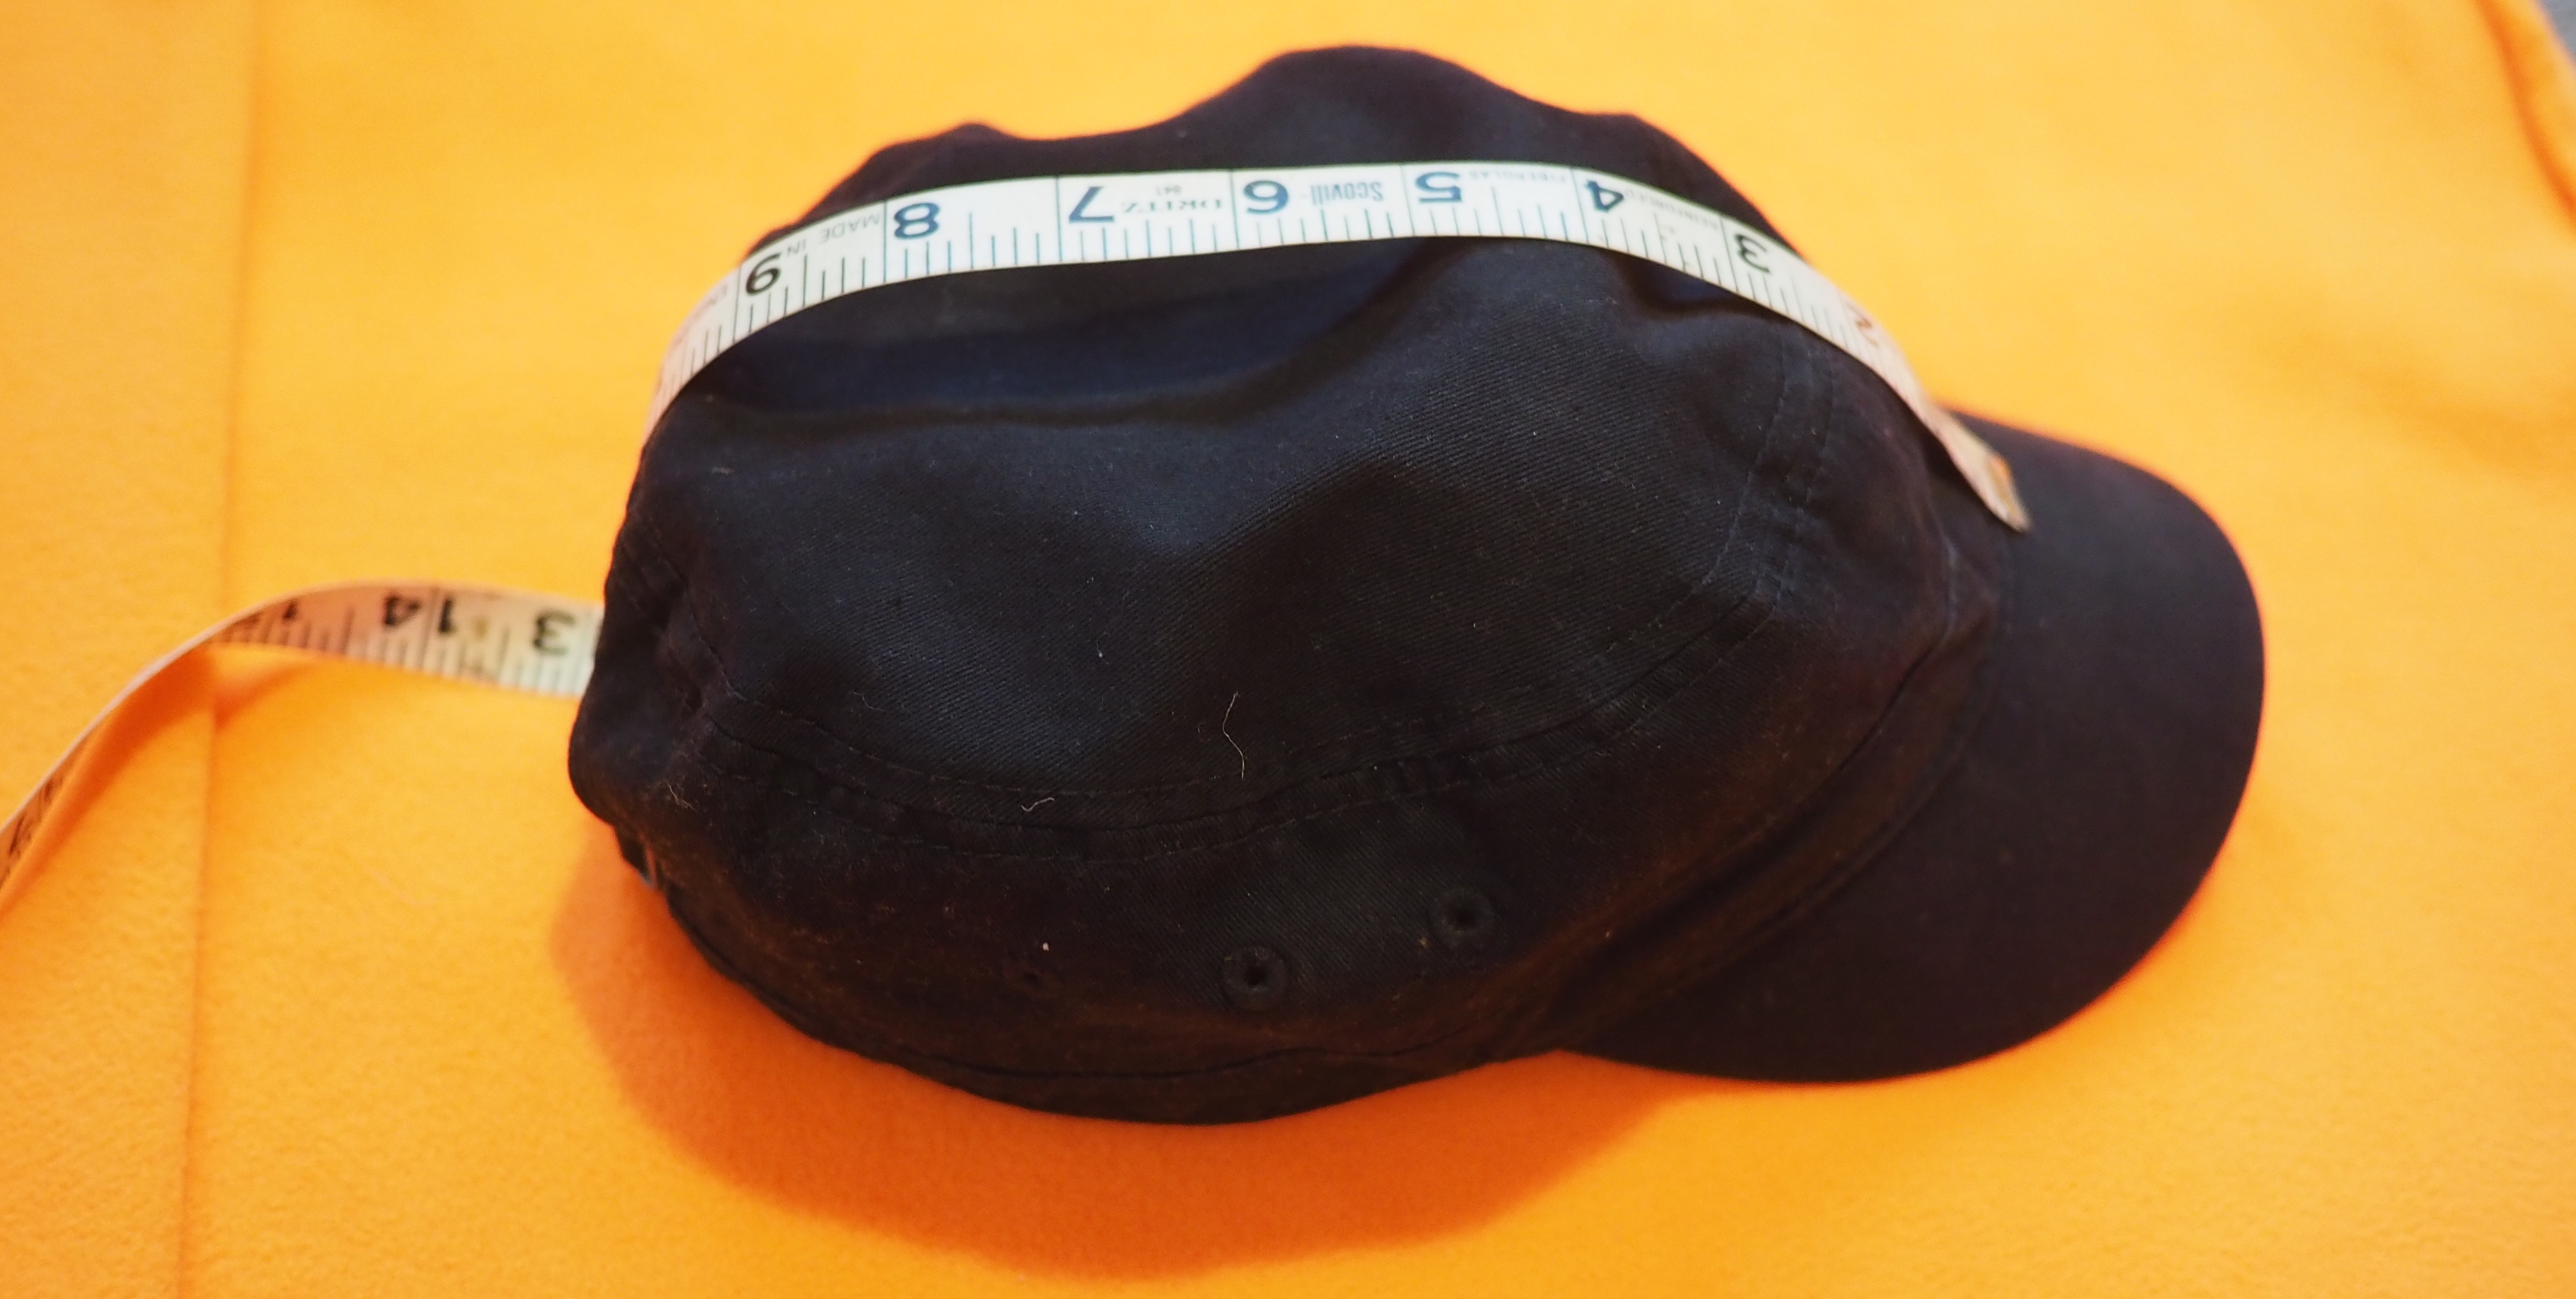
Next, measure the circumference you want the hat to be. I've measured on a hat to show you.
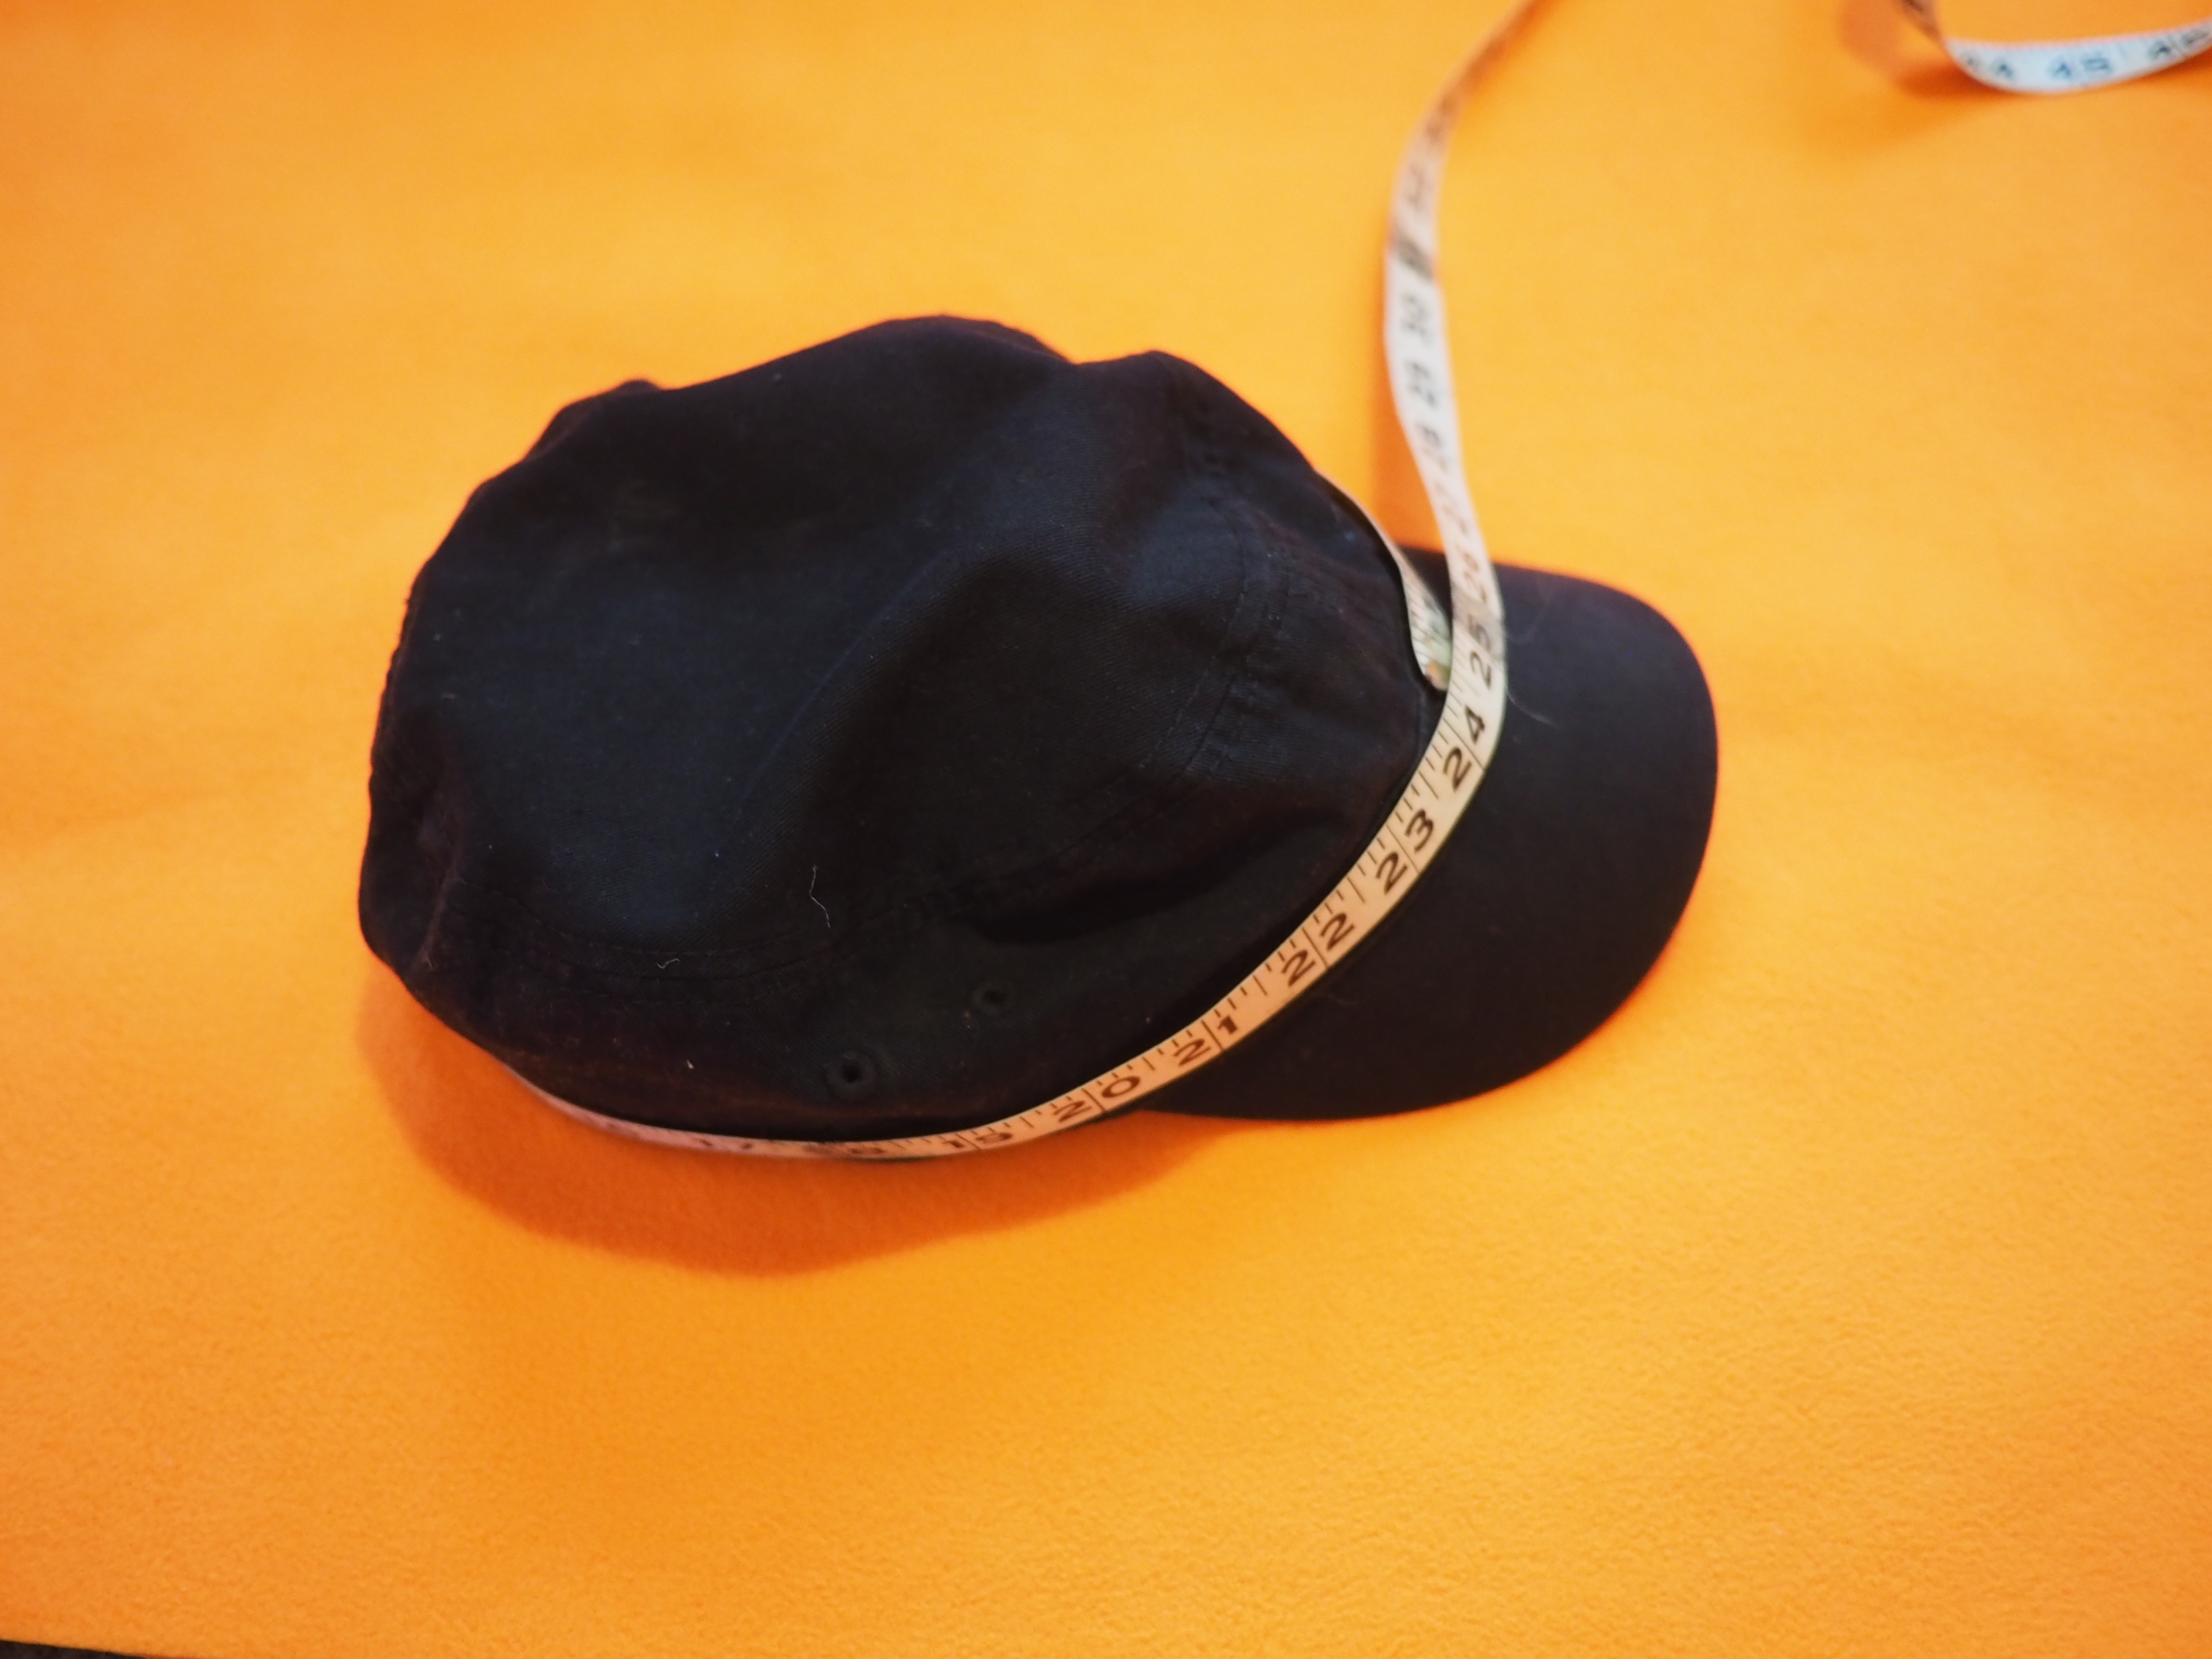
Find 1/4 of that circumference. If you measured with a string, you can just fold it, like I folded the tape measure. Or you could use maths.
That quarter-of-the-circumference is the distance that you fold over the left side of the big piece of fabric. Like so:
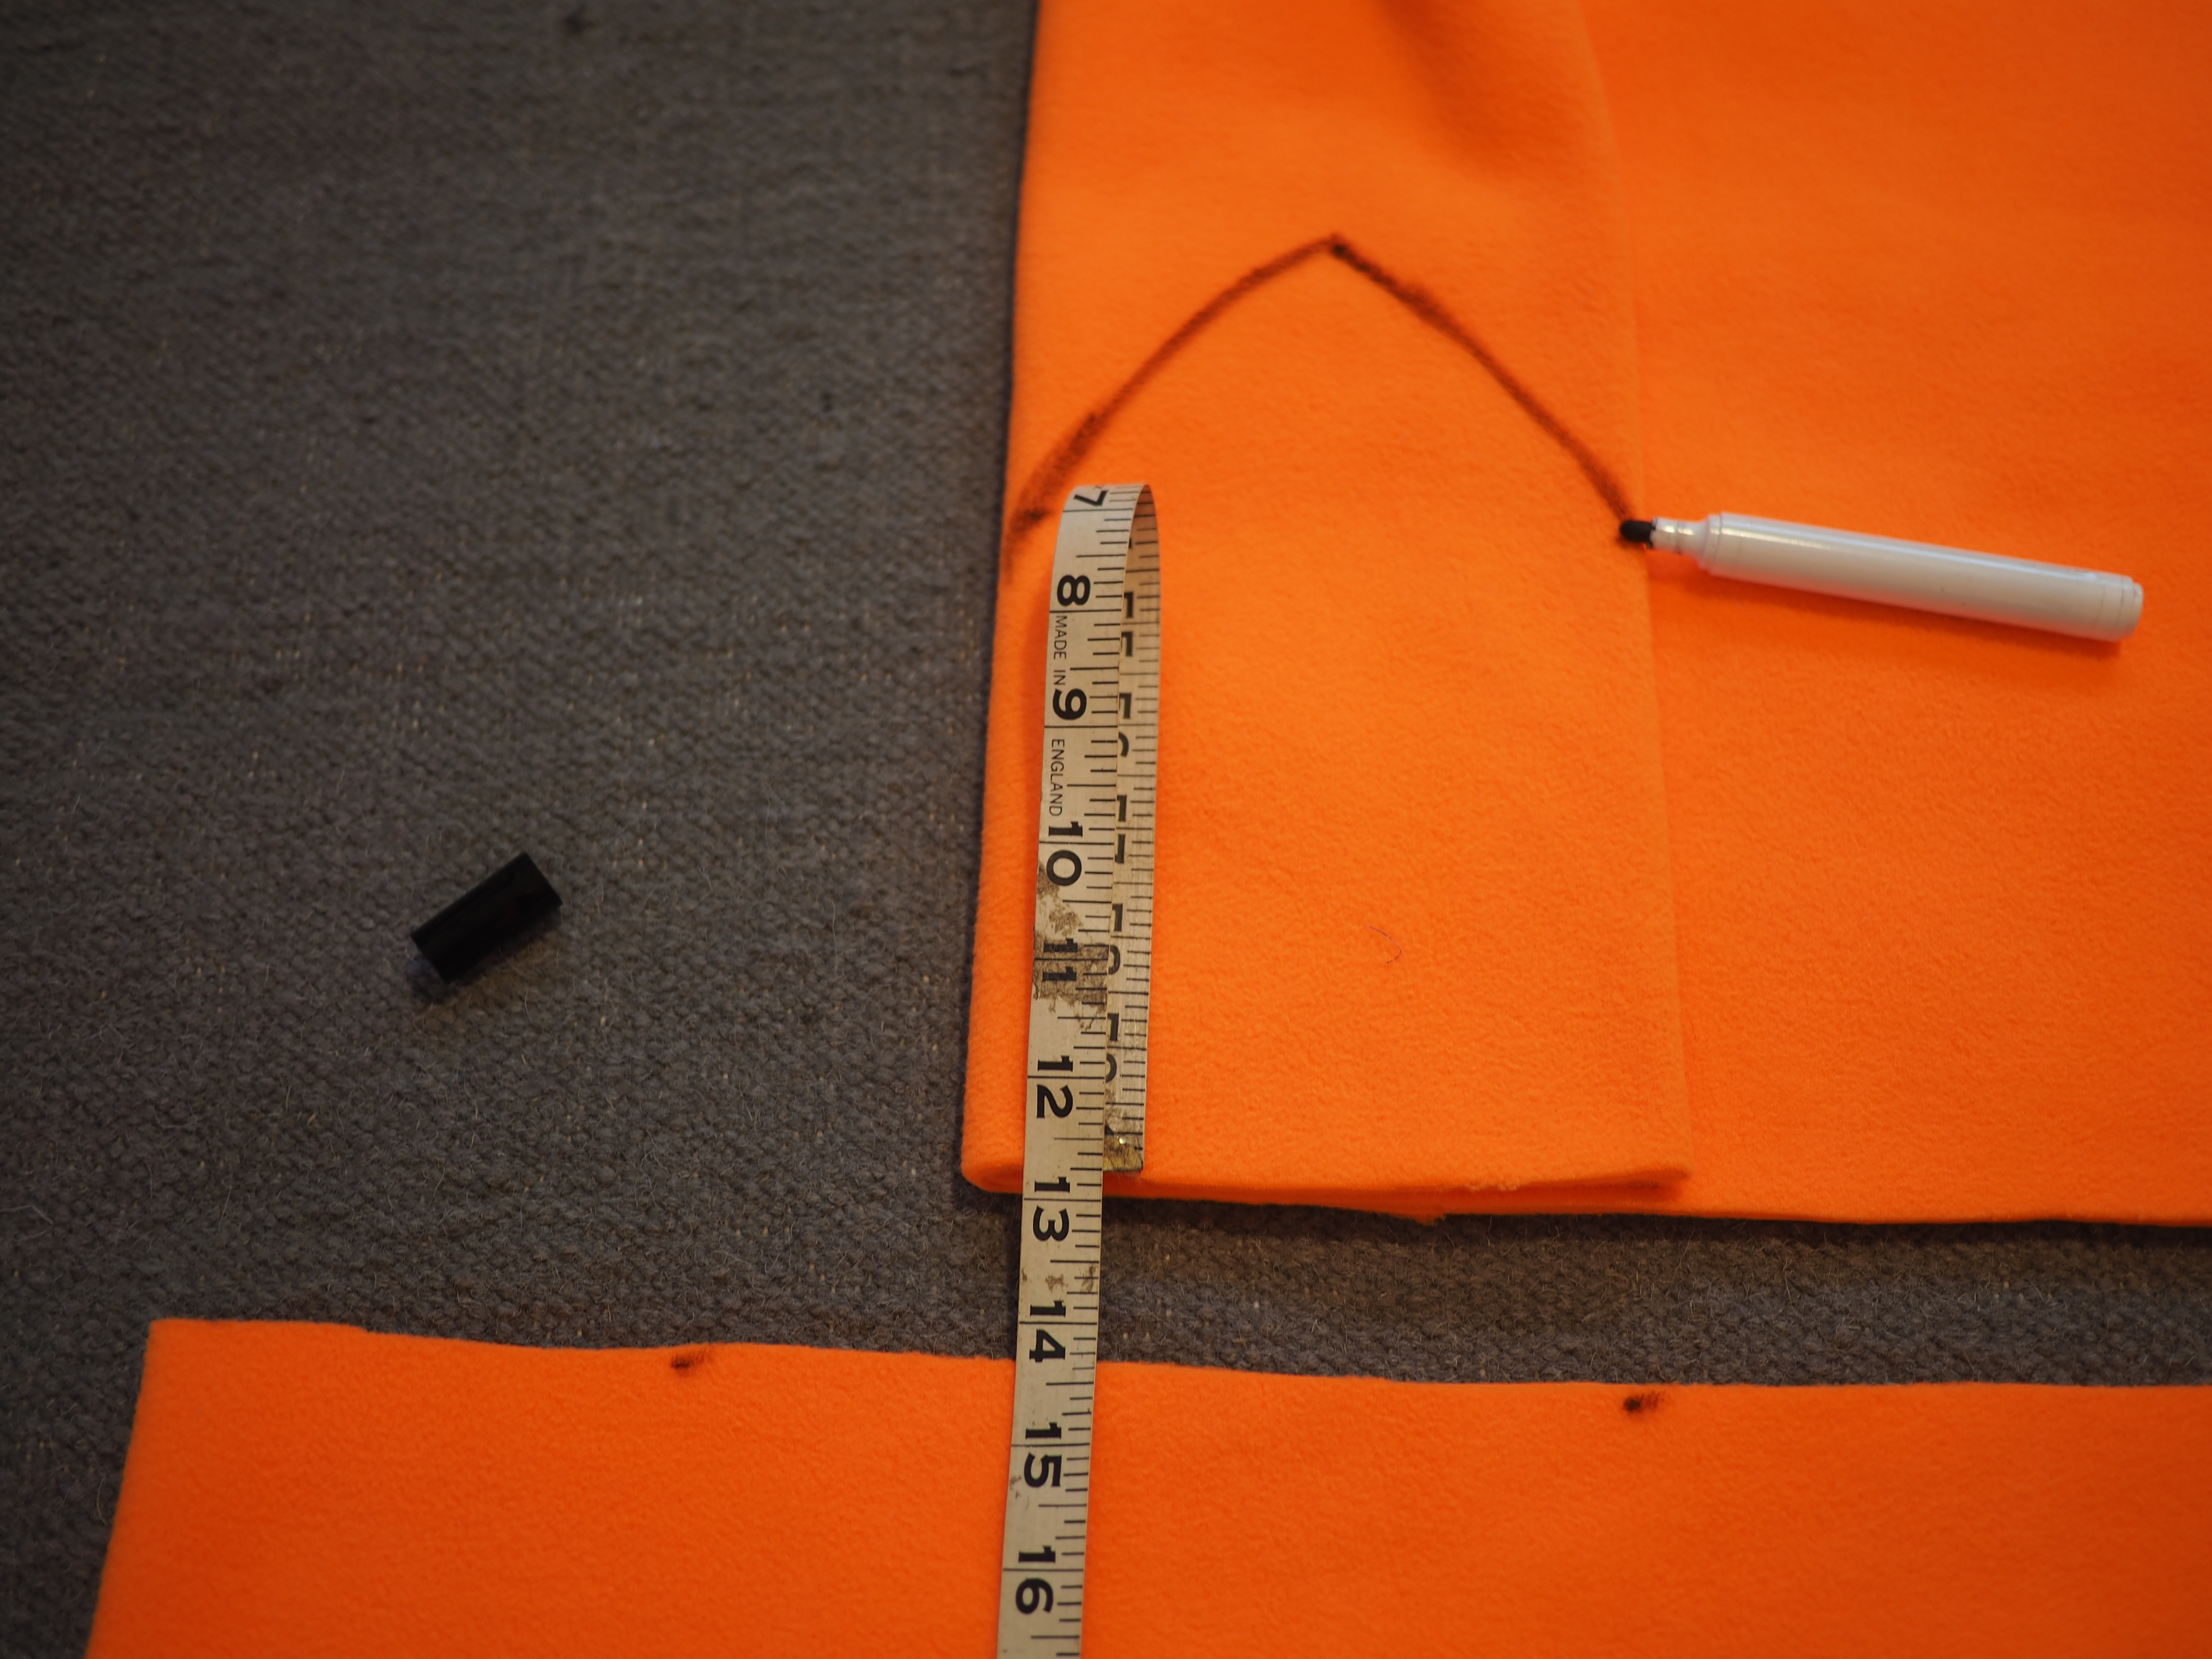
Leave it folded over, we'll get right back to it. Guesstimate the height that a hat piece might need to be, so that we can sketch a piece of the hat on it. I do this by measuring front to back on a hat and folding the string, I mean tape measure, in half:
Back on the piece we folded over, put down the measurement so we make sure not to cut the hat too short. That measurement tells you roughly where to draw a curvy triangle on the folded fabric, just like this:
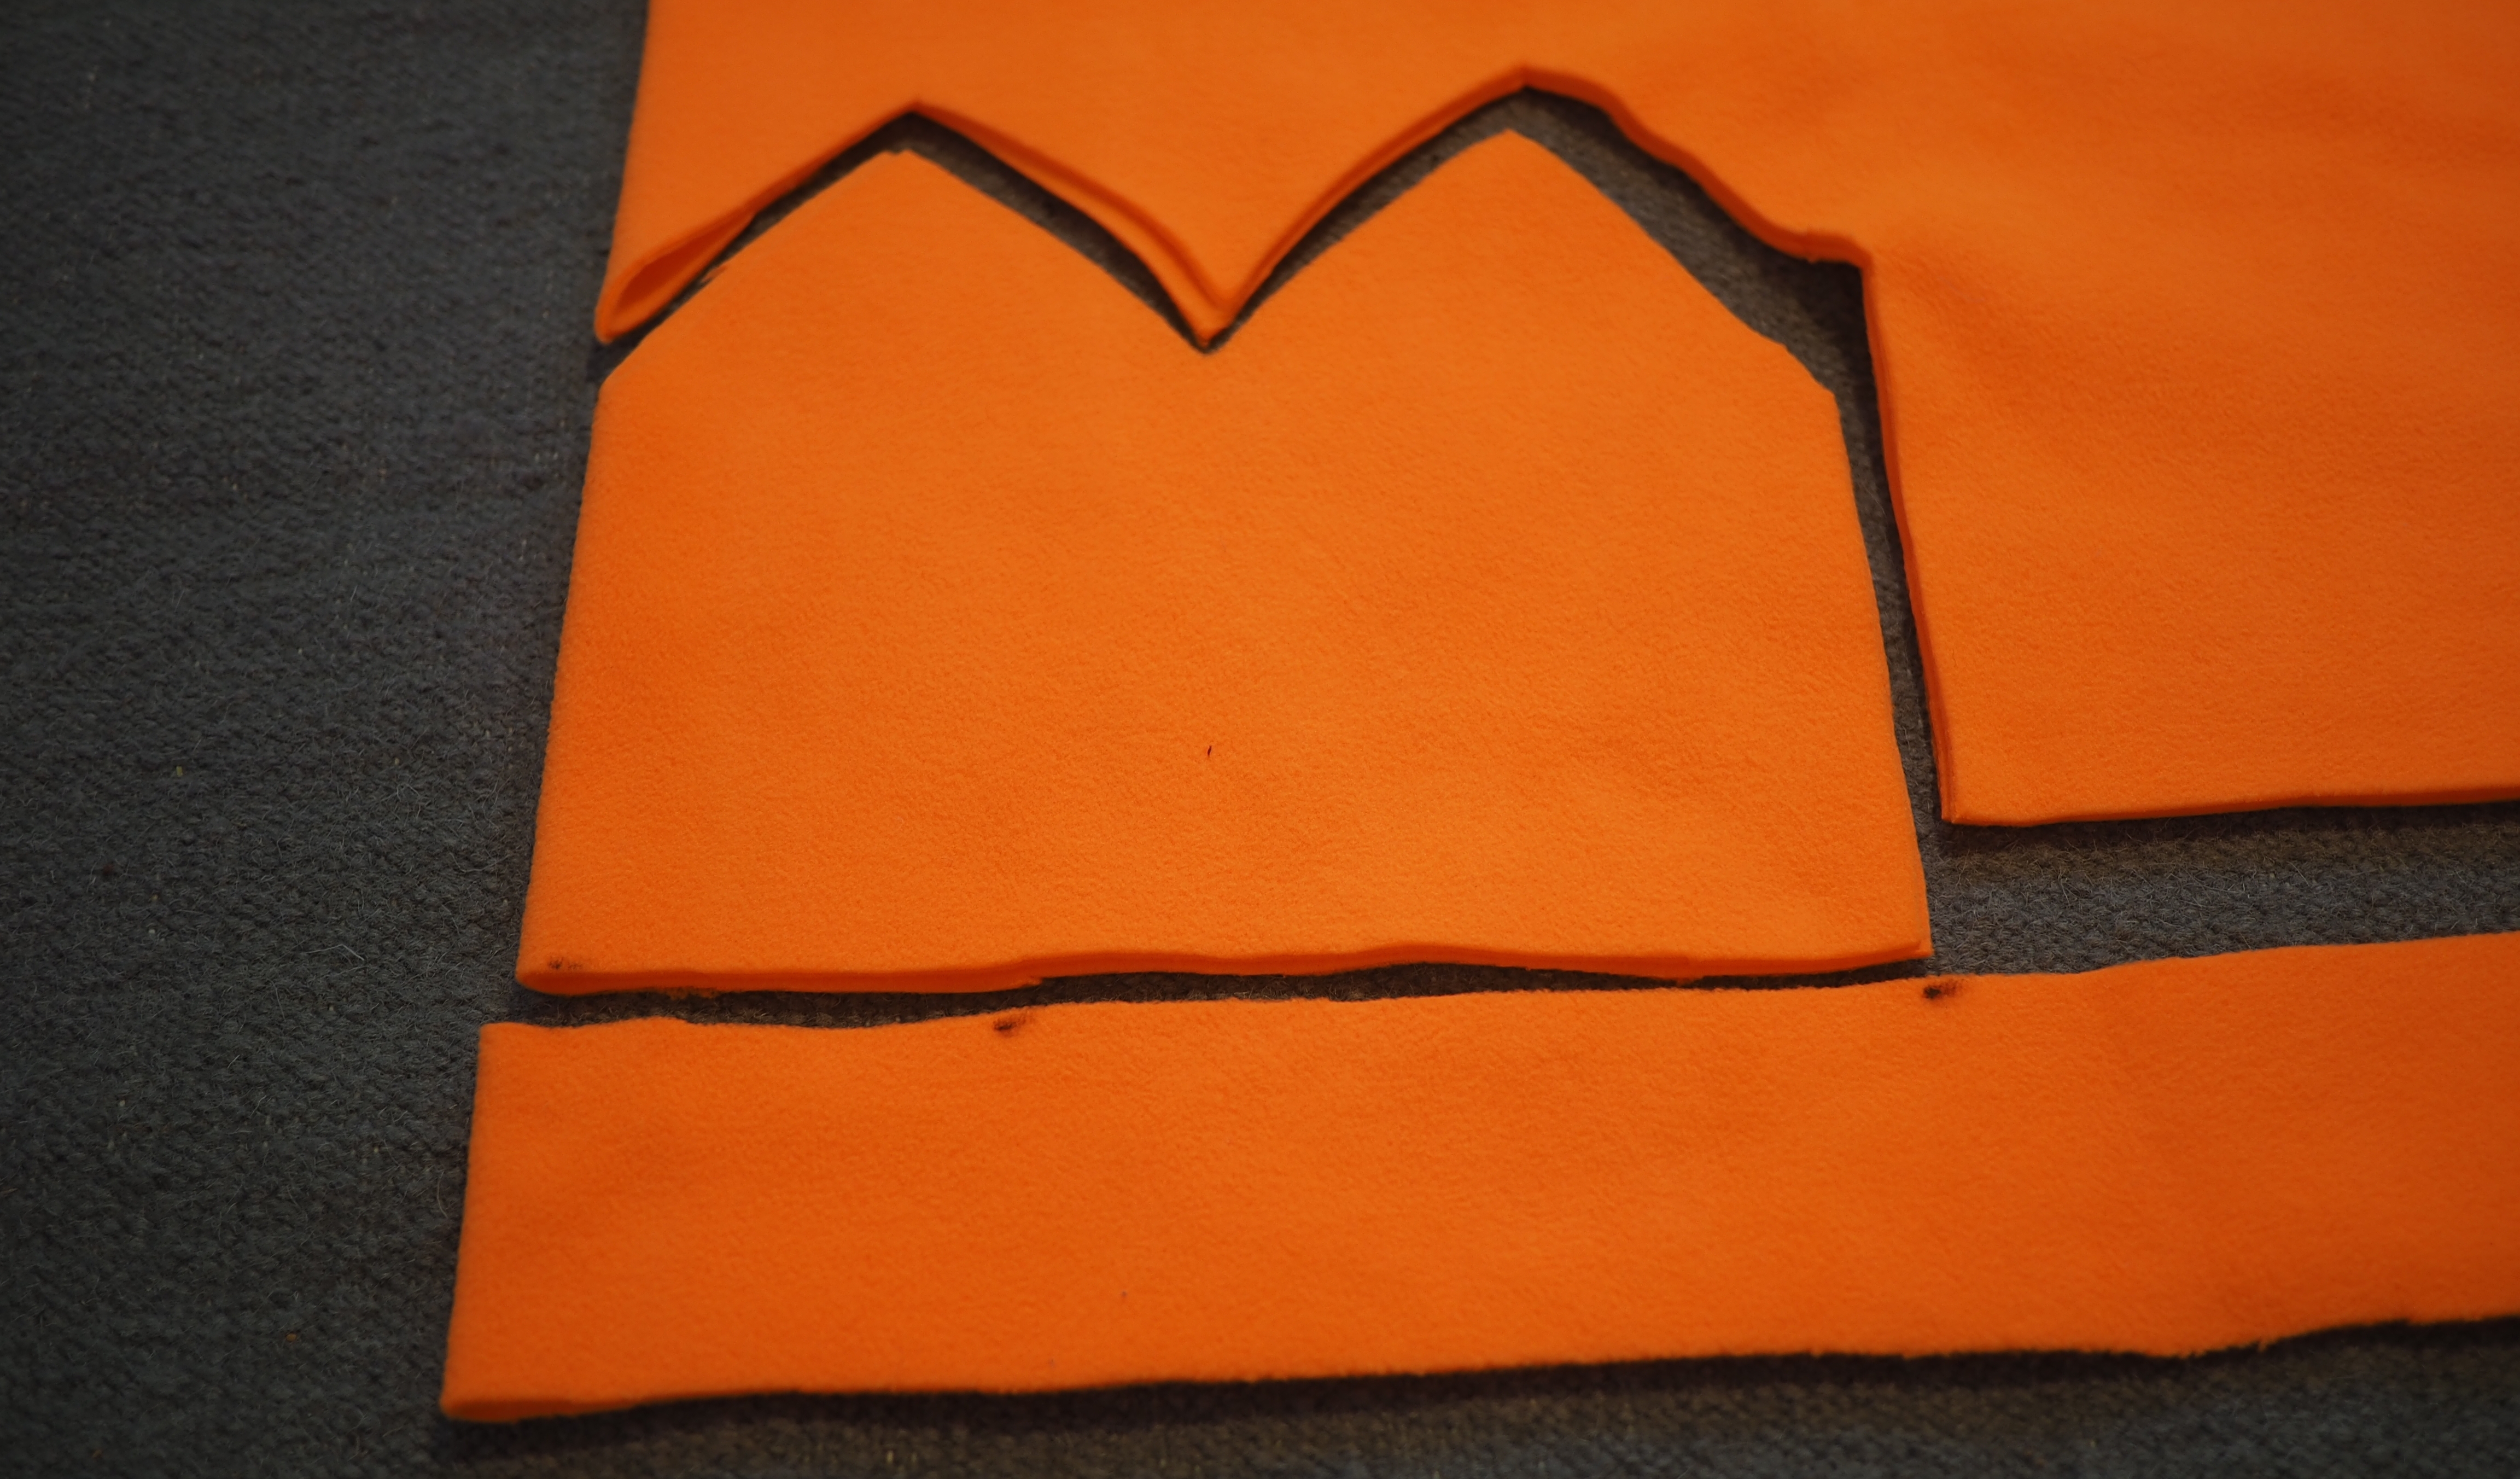
Now cut it out. Make sure not to cut off that folded edge. Like this:

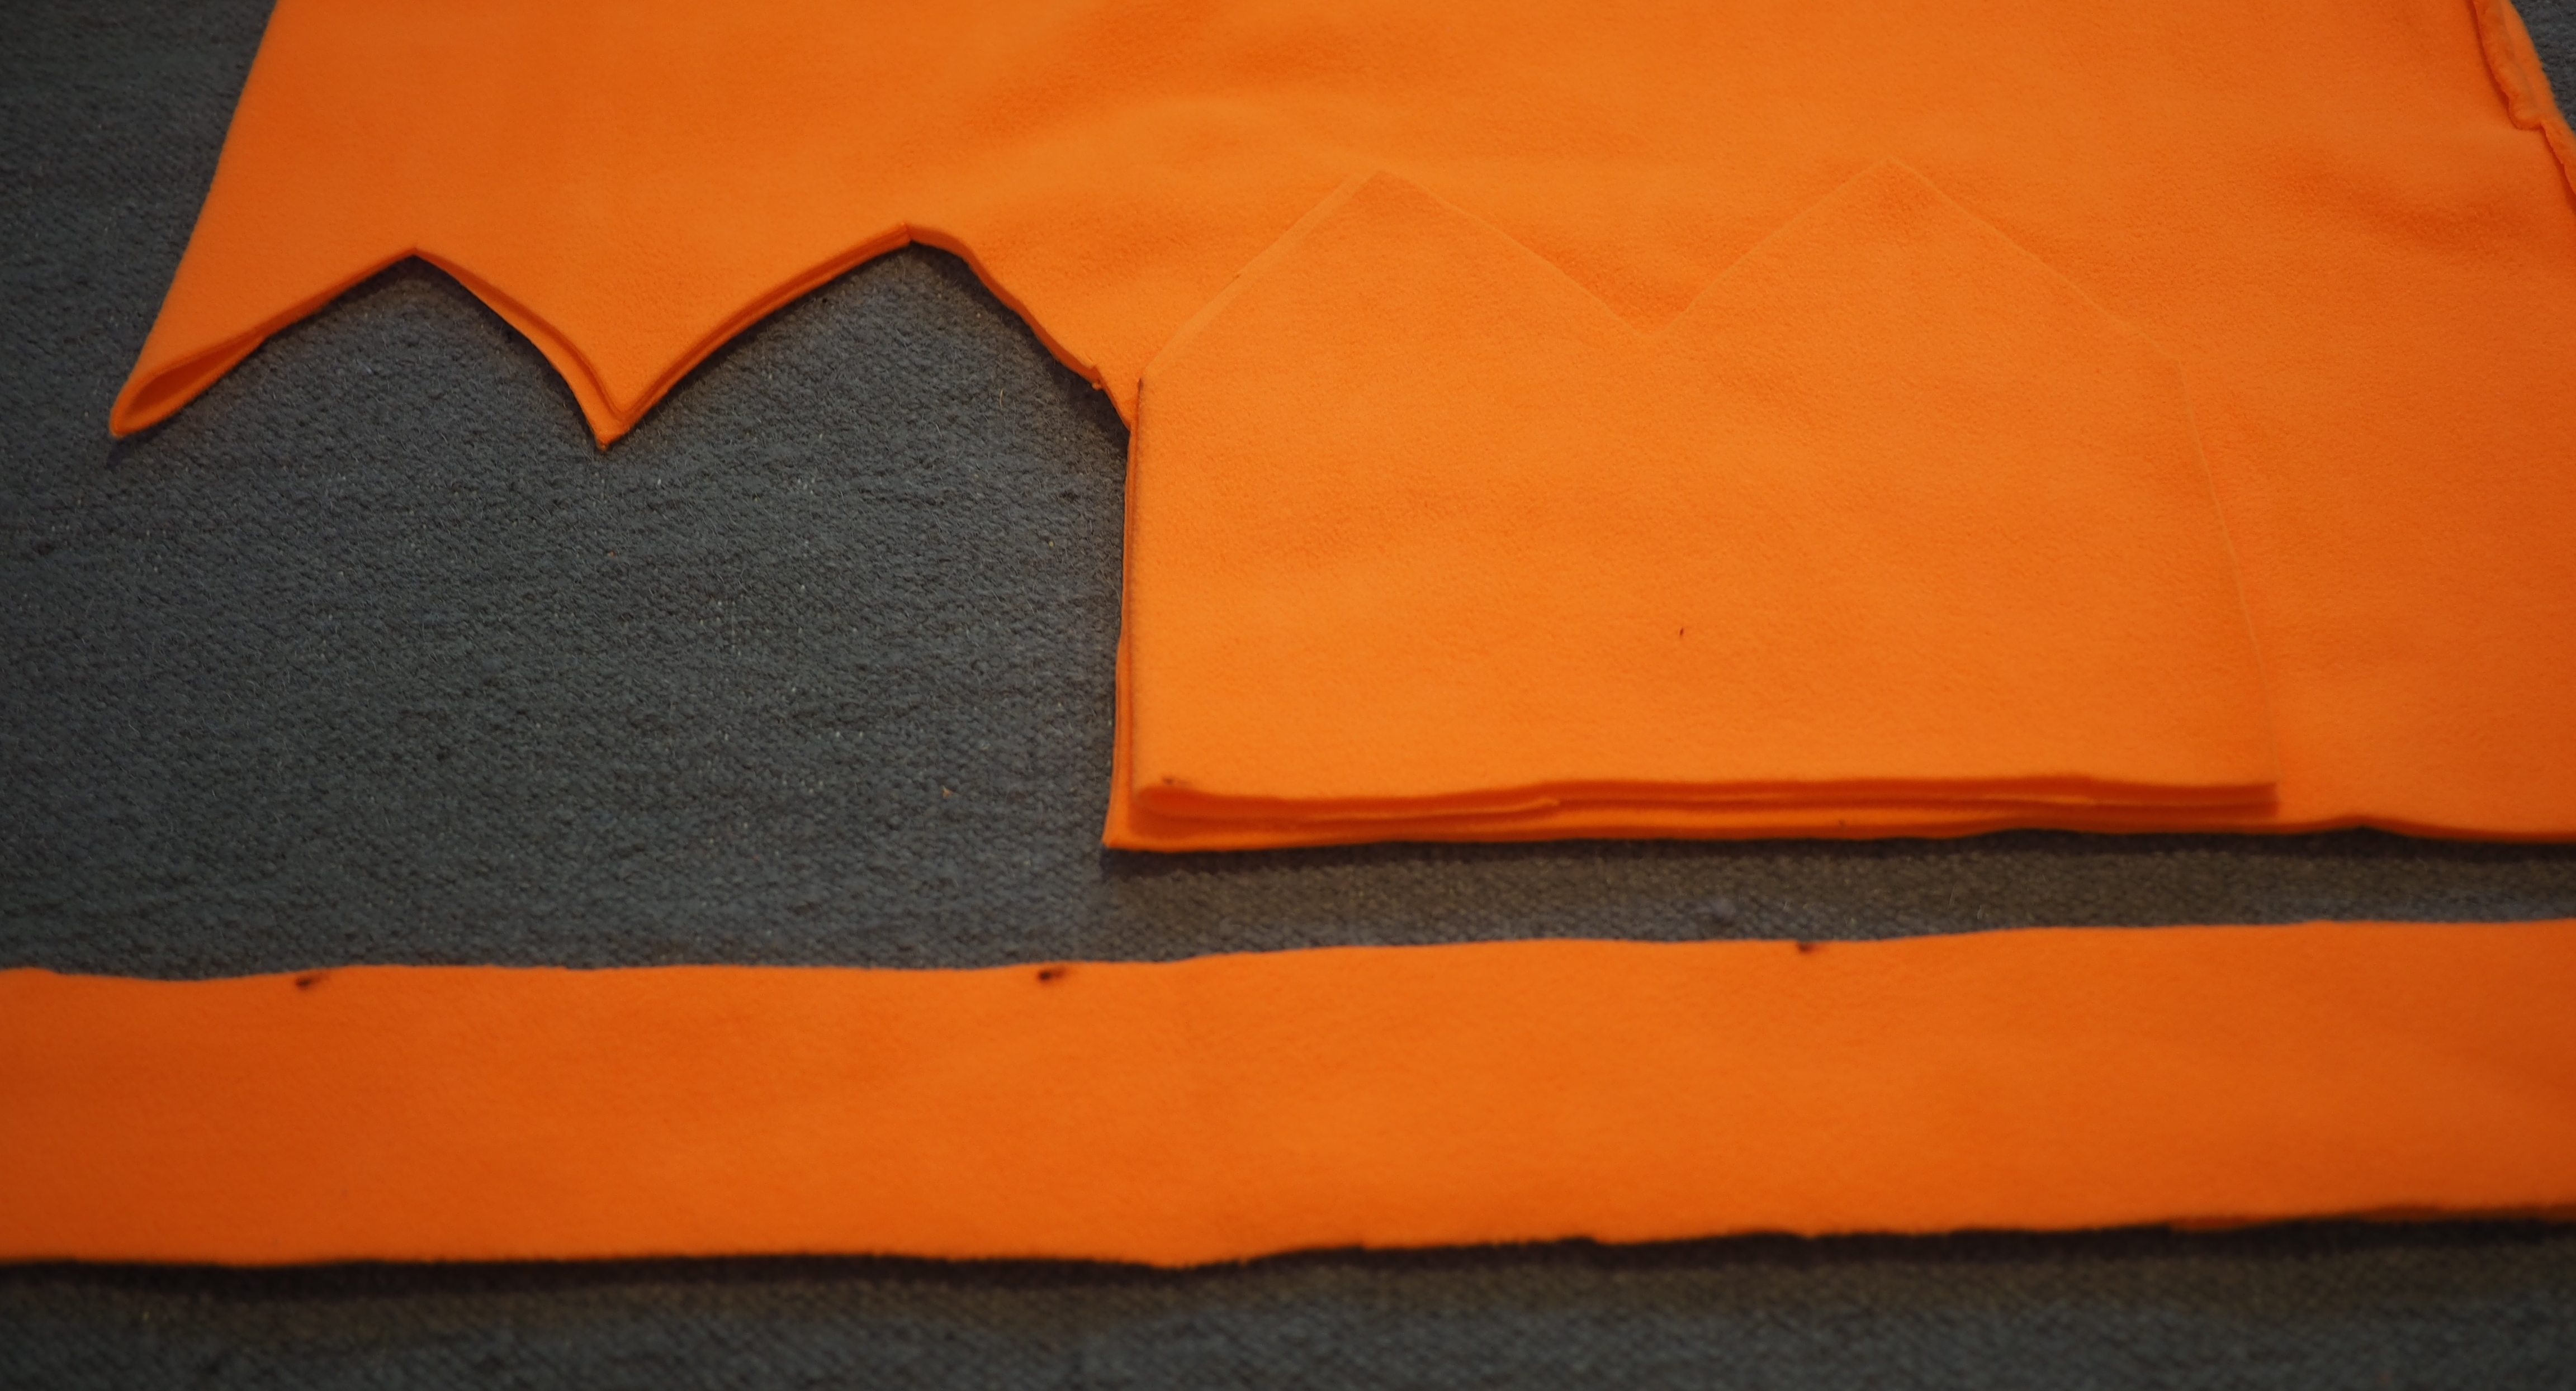
Congratulations, you just cut out the lining of the hat! It should be all one piece. If we unfold the bit we just cut and the bit we cut it from, it'll look like this:
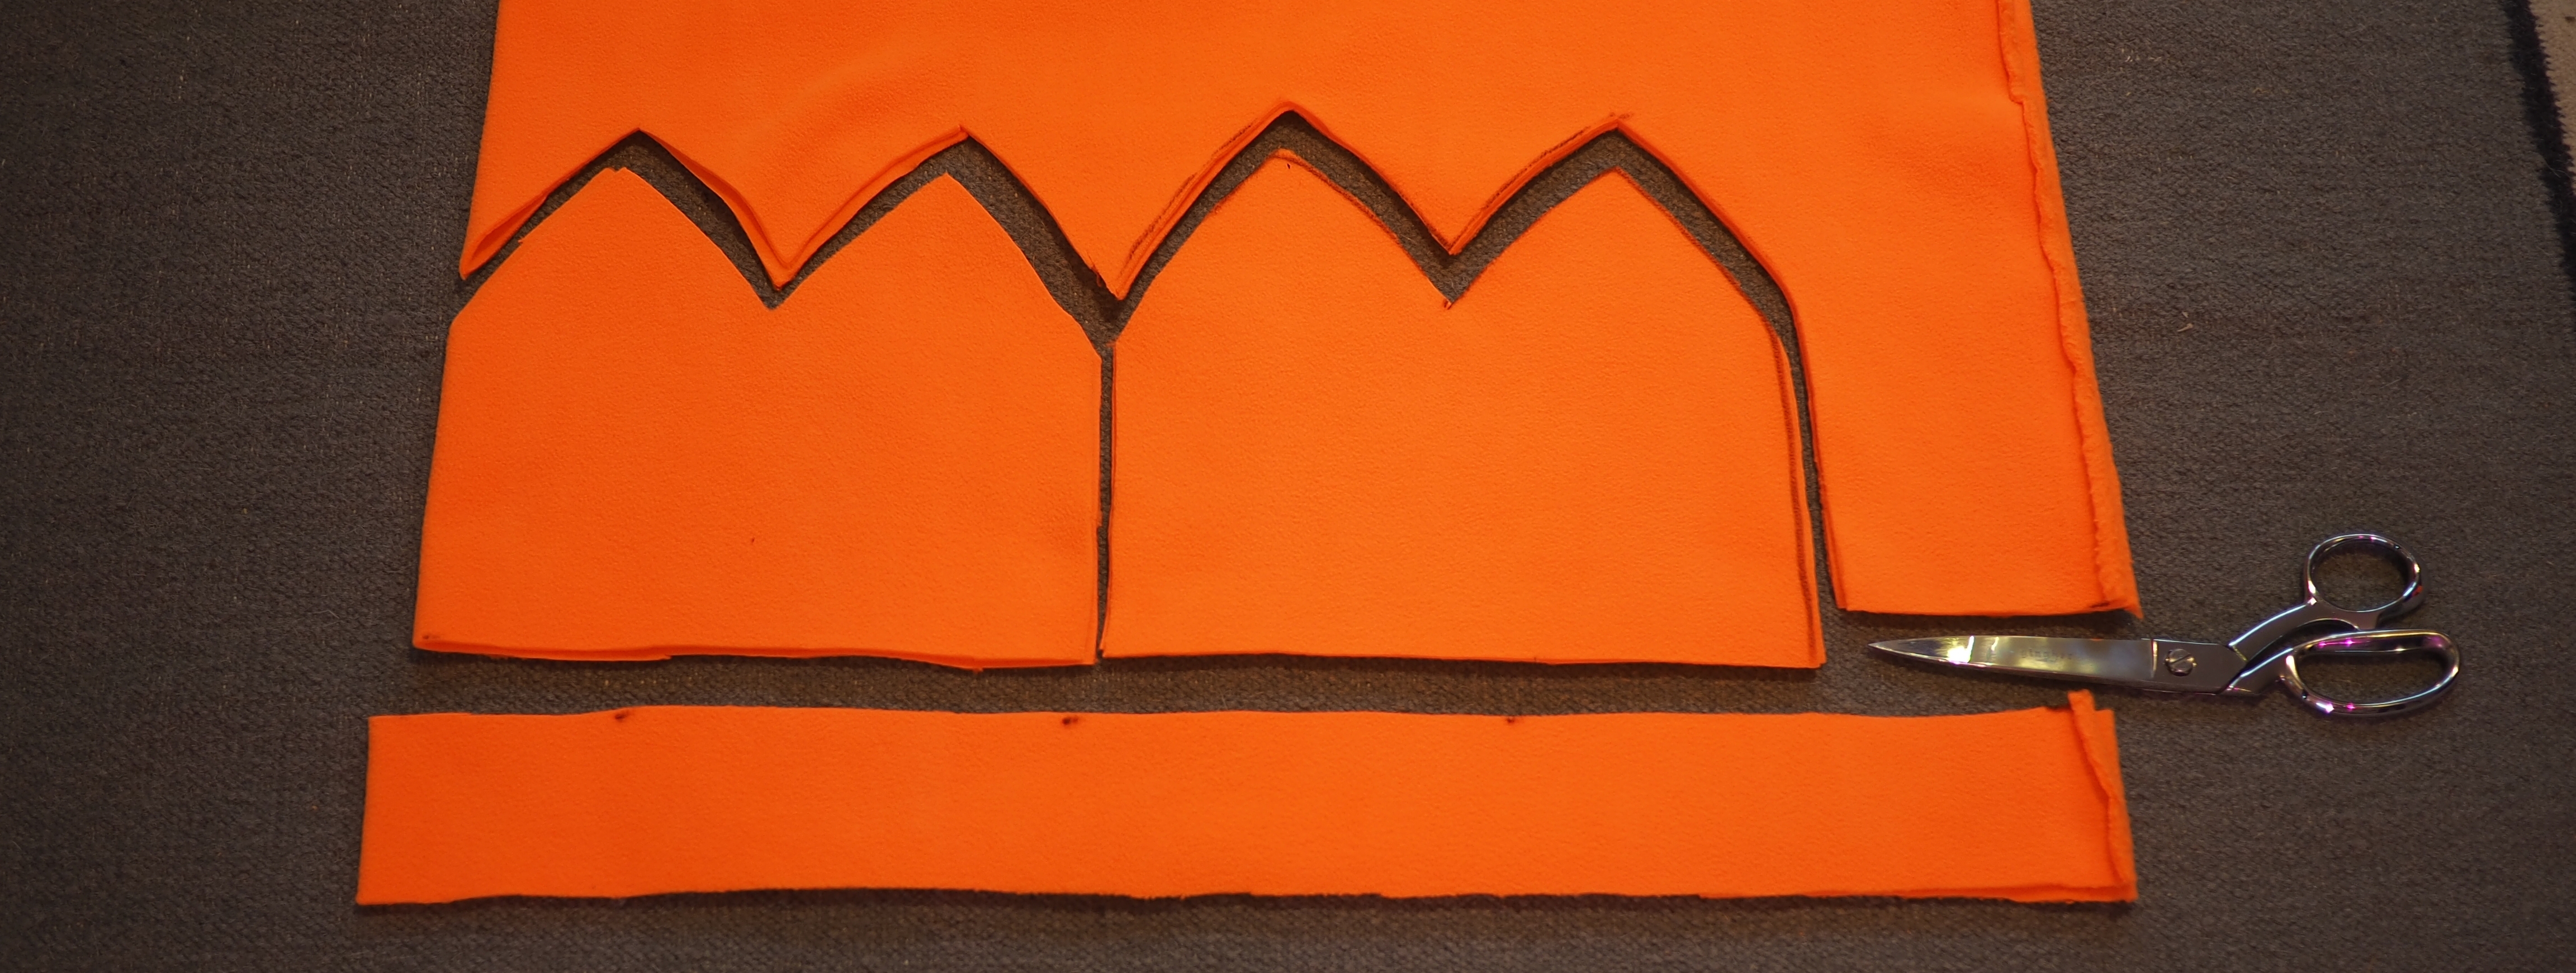
Now we're going to use that lining piece as a template to cut the outside pieces. Set it down on the fabric like so:
And cut around it. Afterwards you have 1 lining piece and 2 outer pieces:
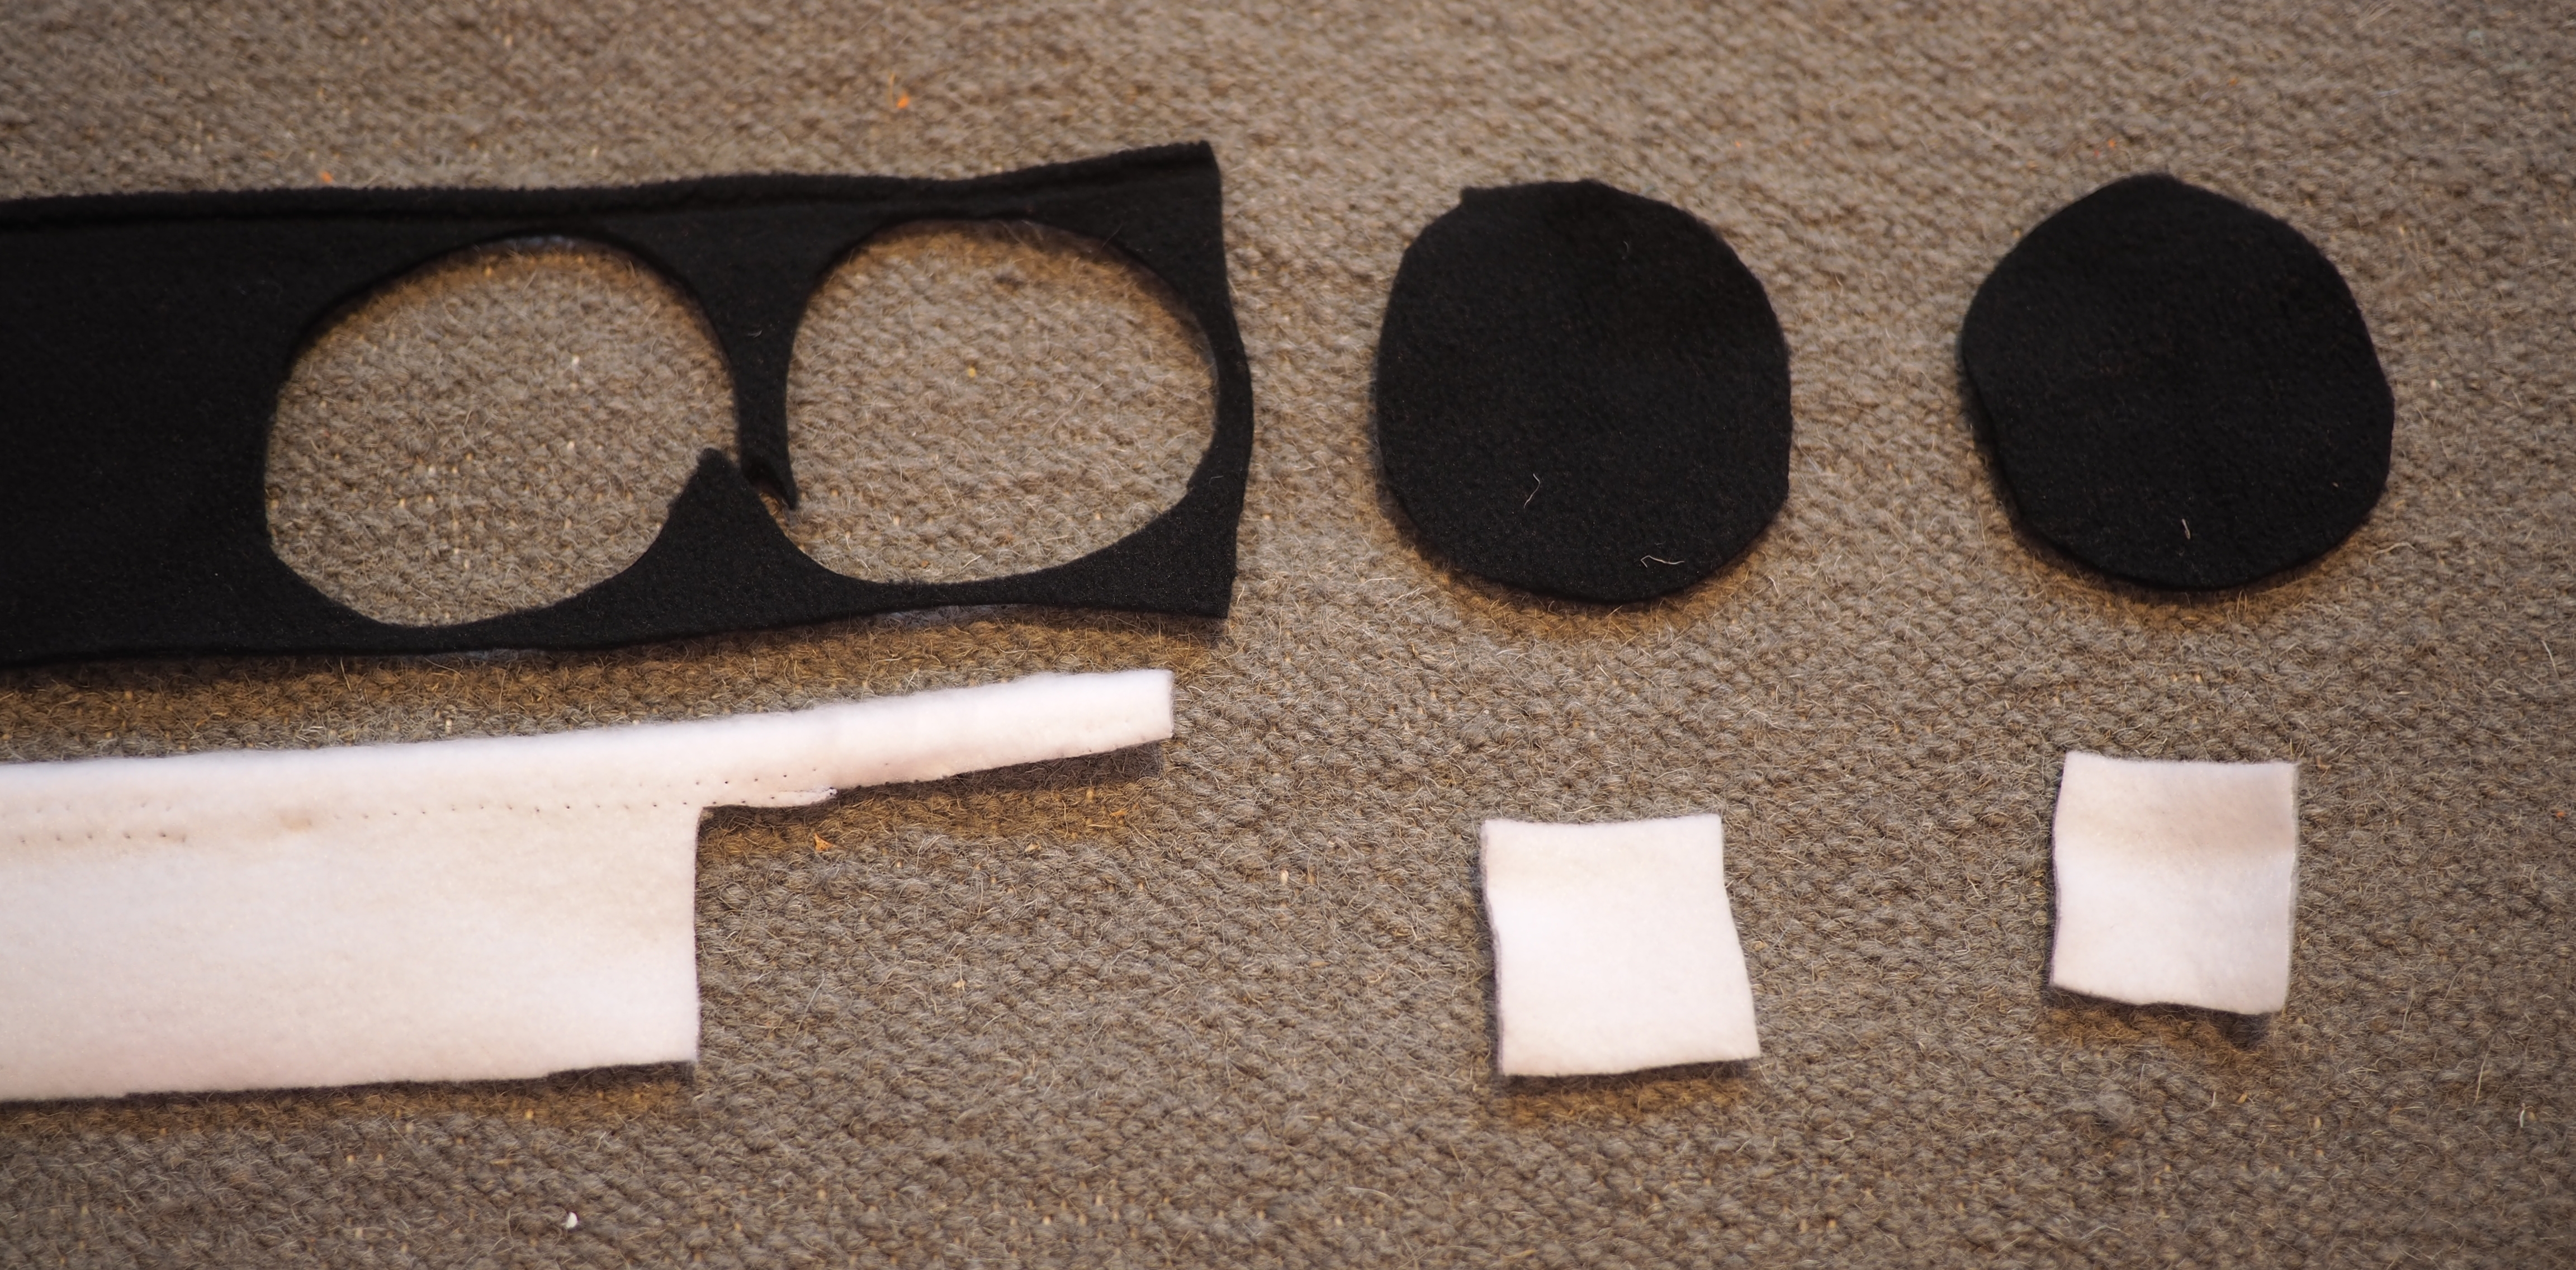
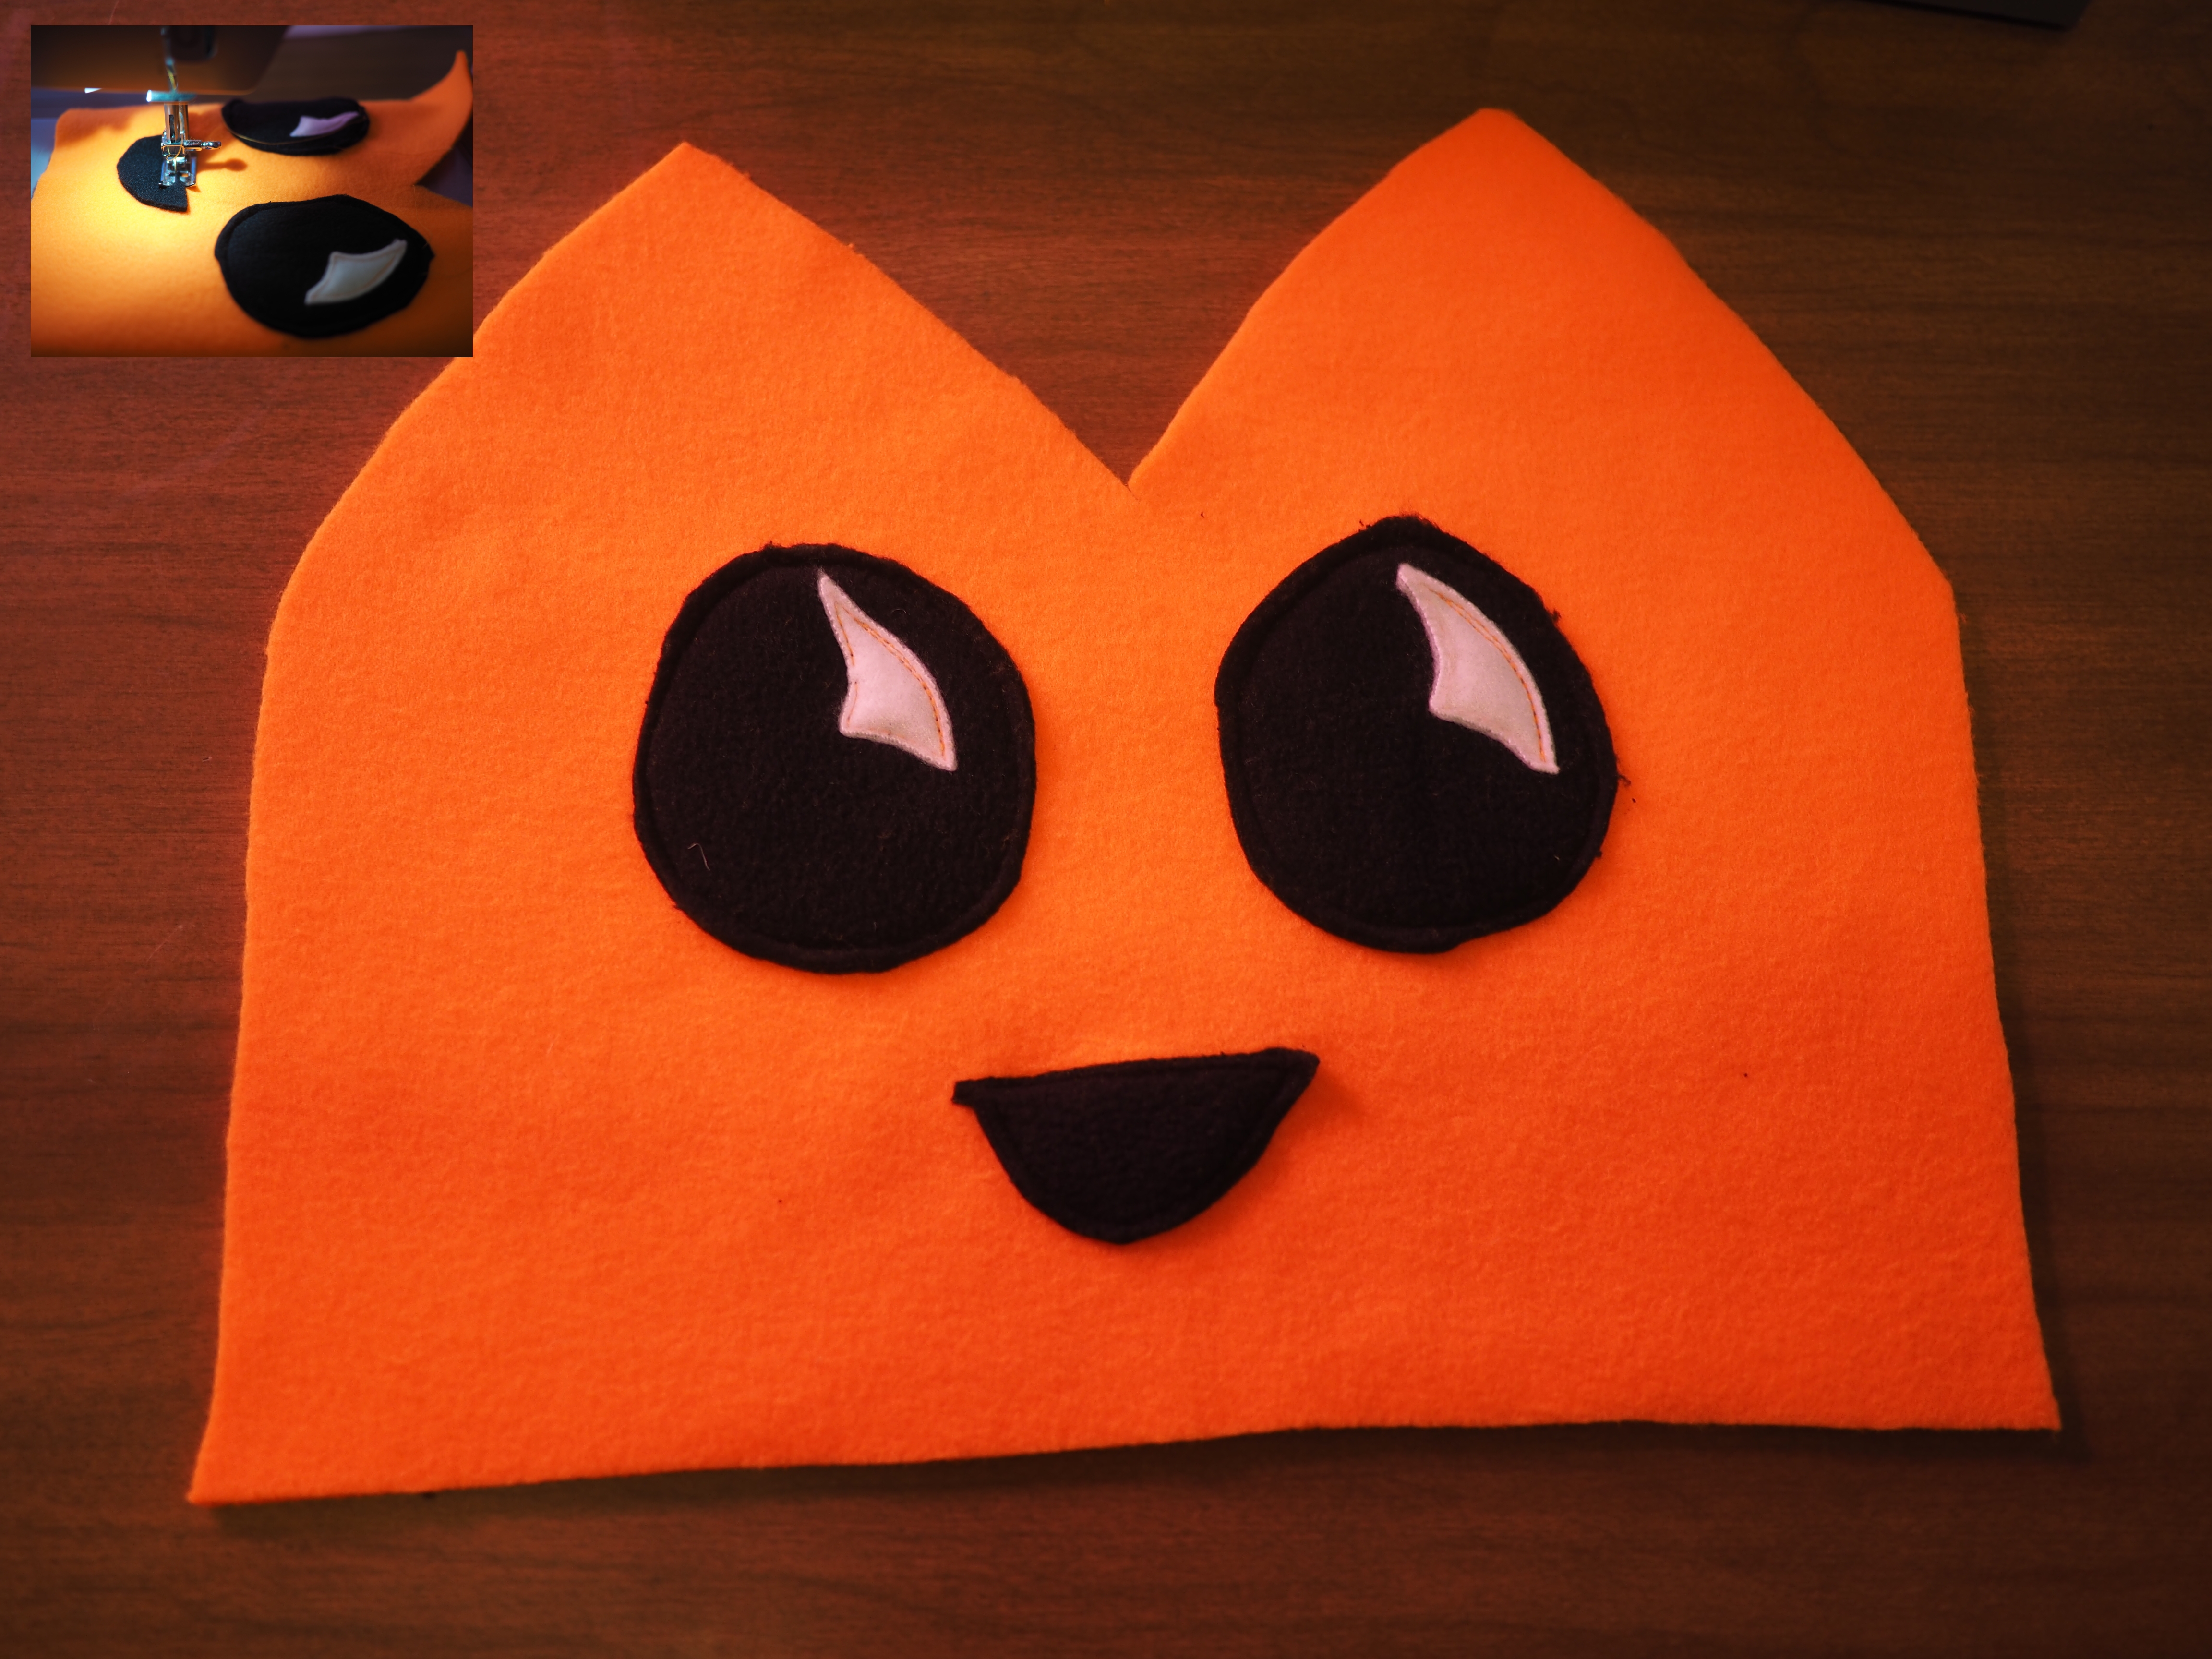
Now grab that black and white scrap fabric and cut a couple eye sized black circles, and a couple bits of white for the light glints on the eyes. Also cut a black D shape to be the mouth if you want your hat to have a happy little mouth as well as just eyes.
Construction
Put the black and white together, and sew an eye glint kind of shape in the same spot on both, like so:
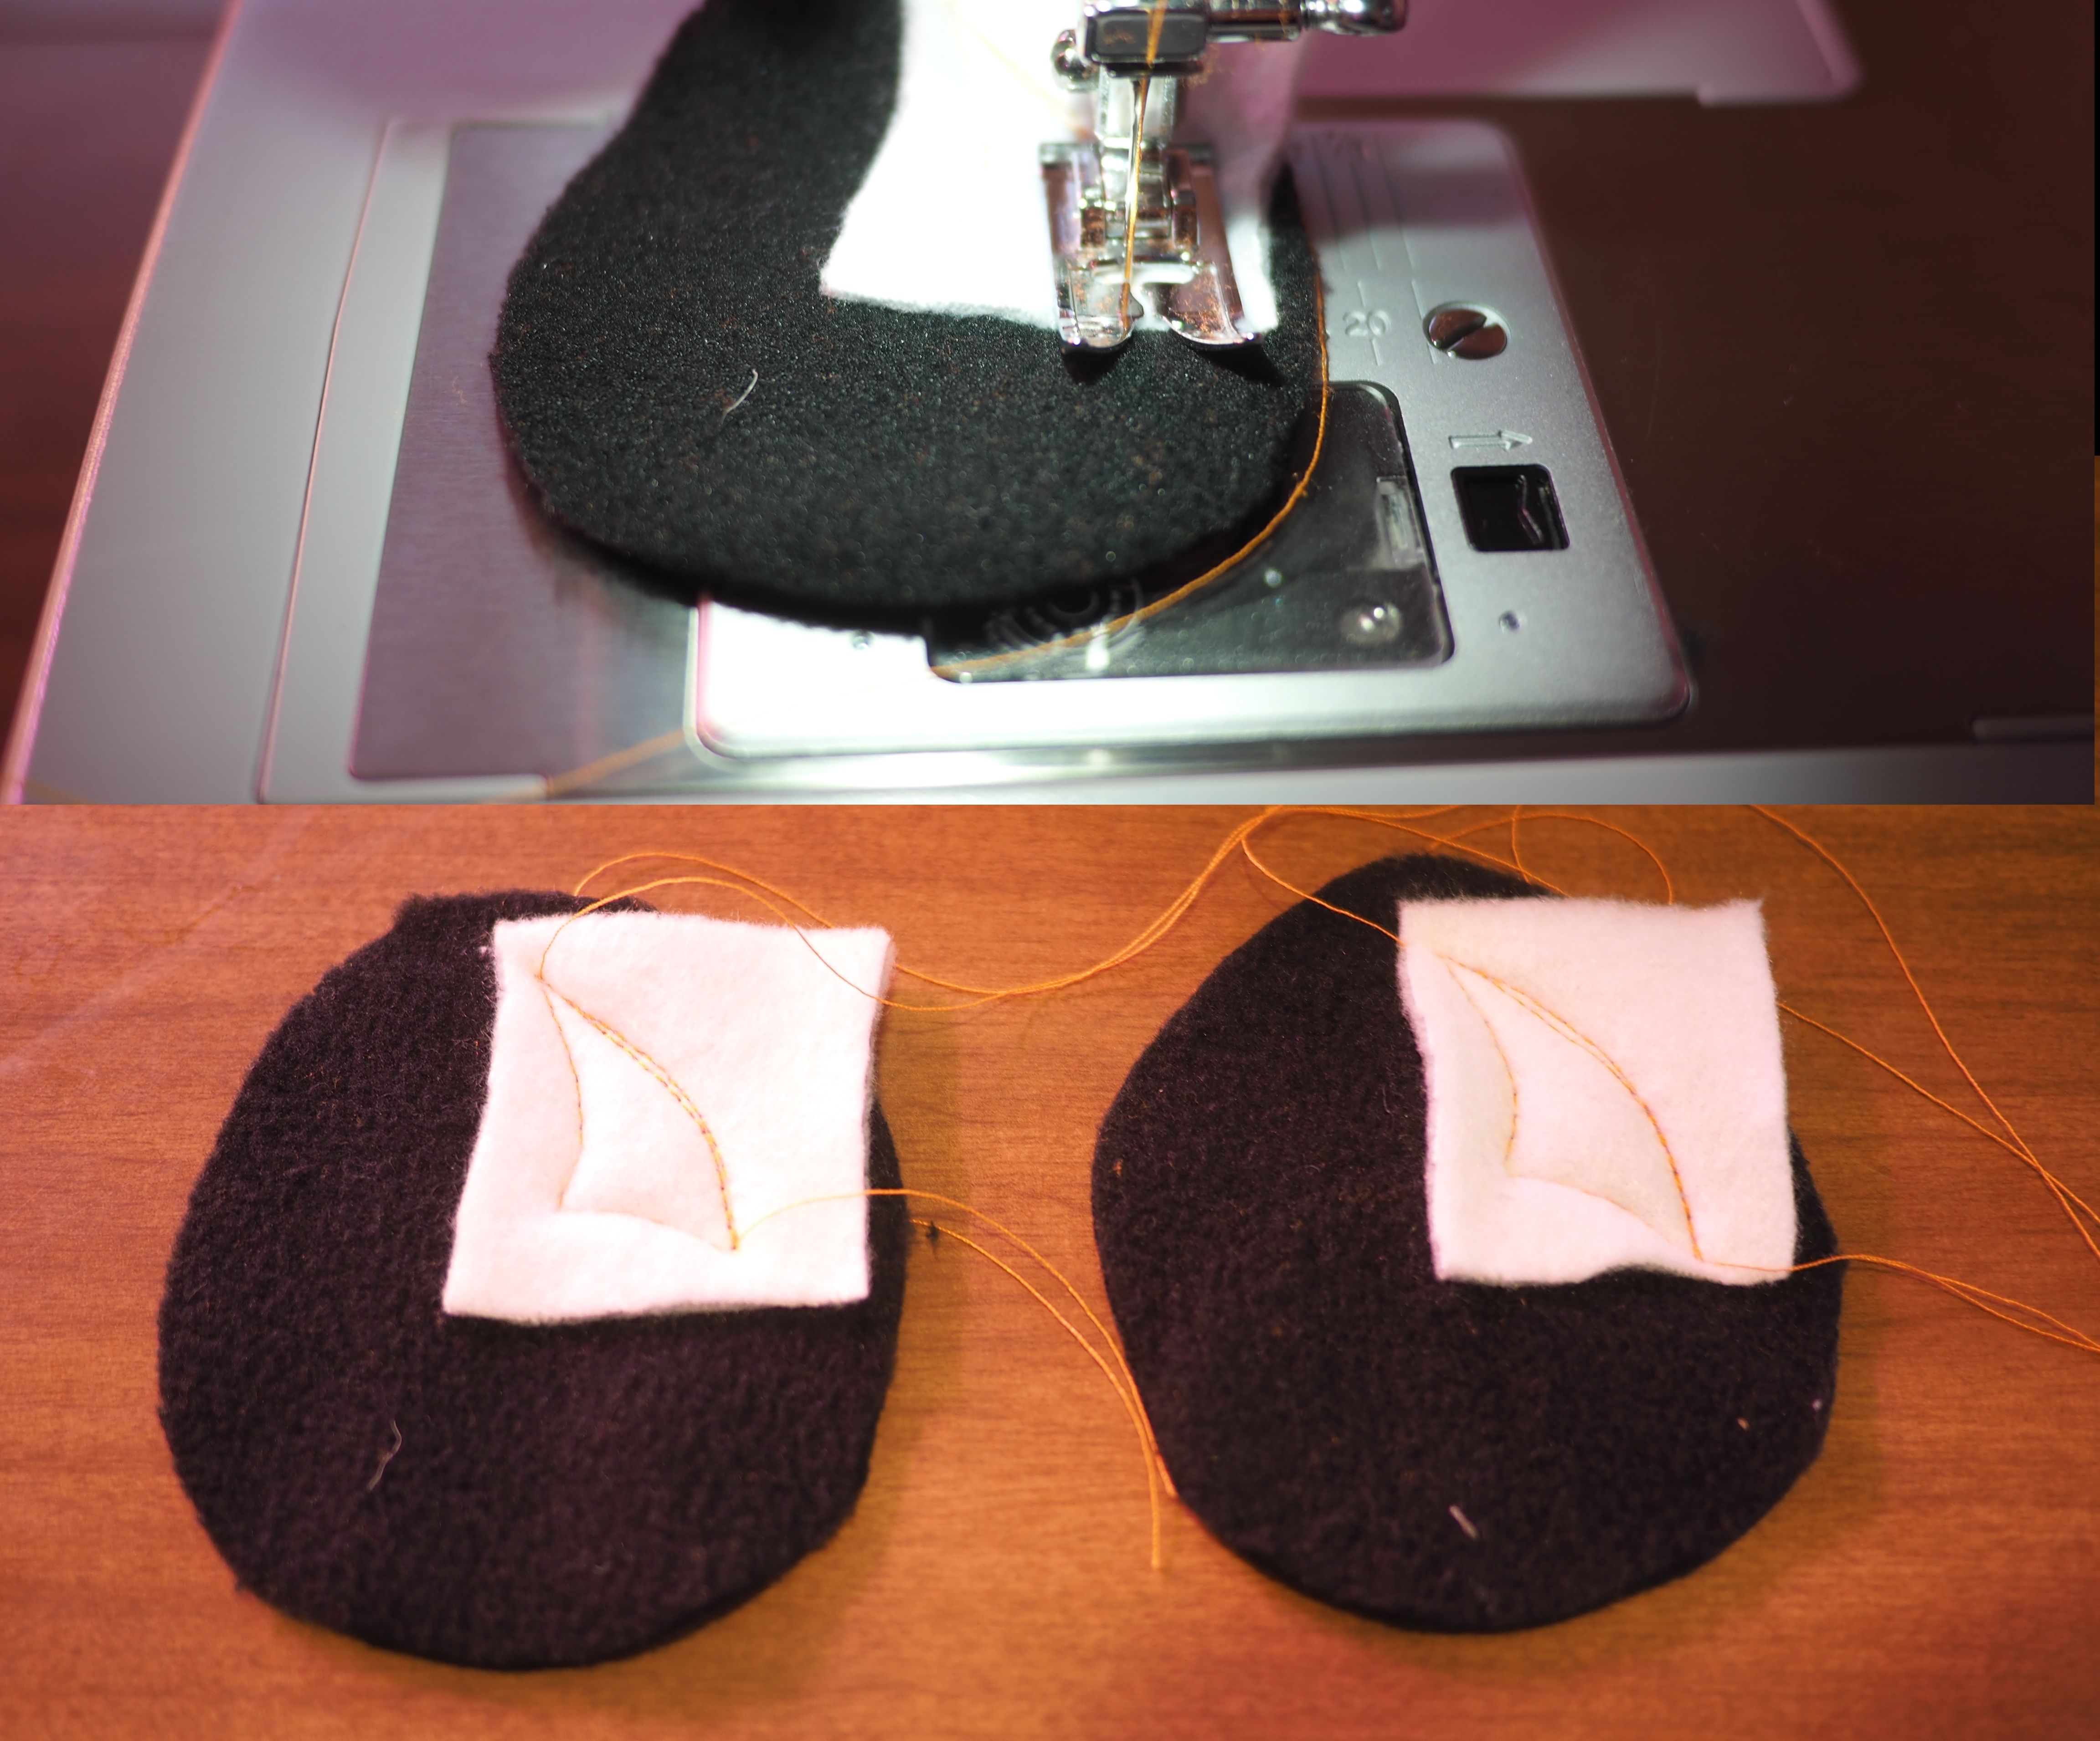
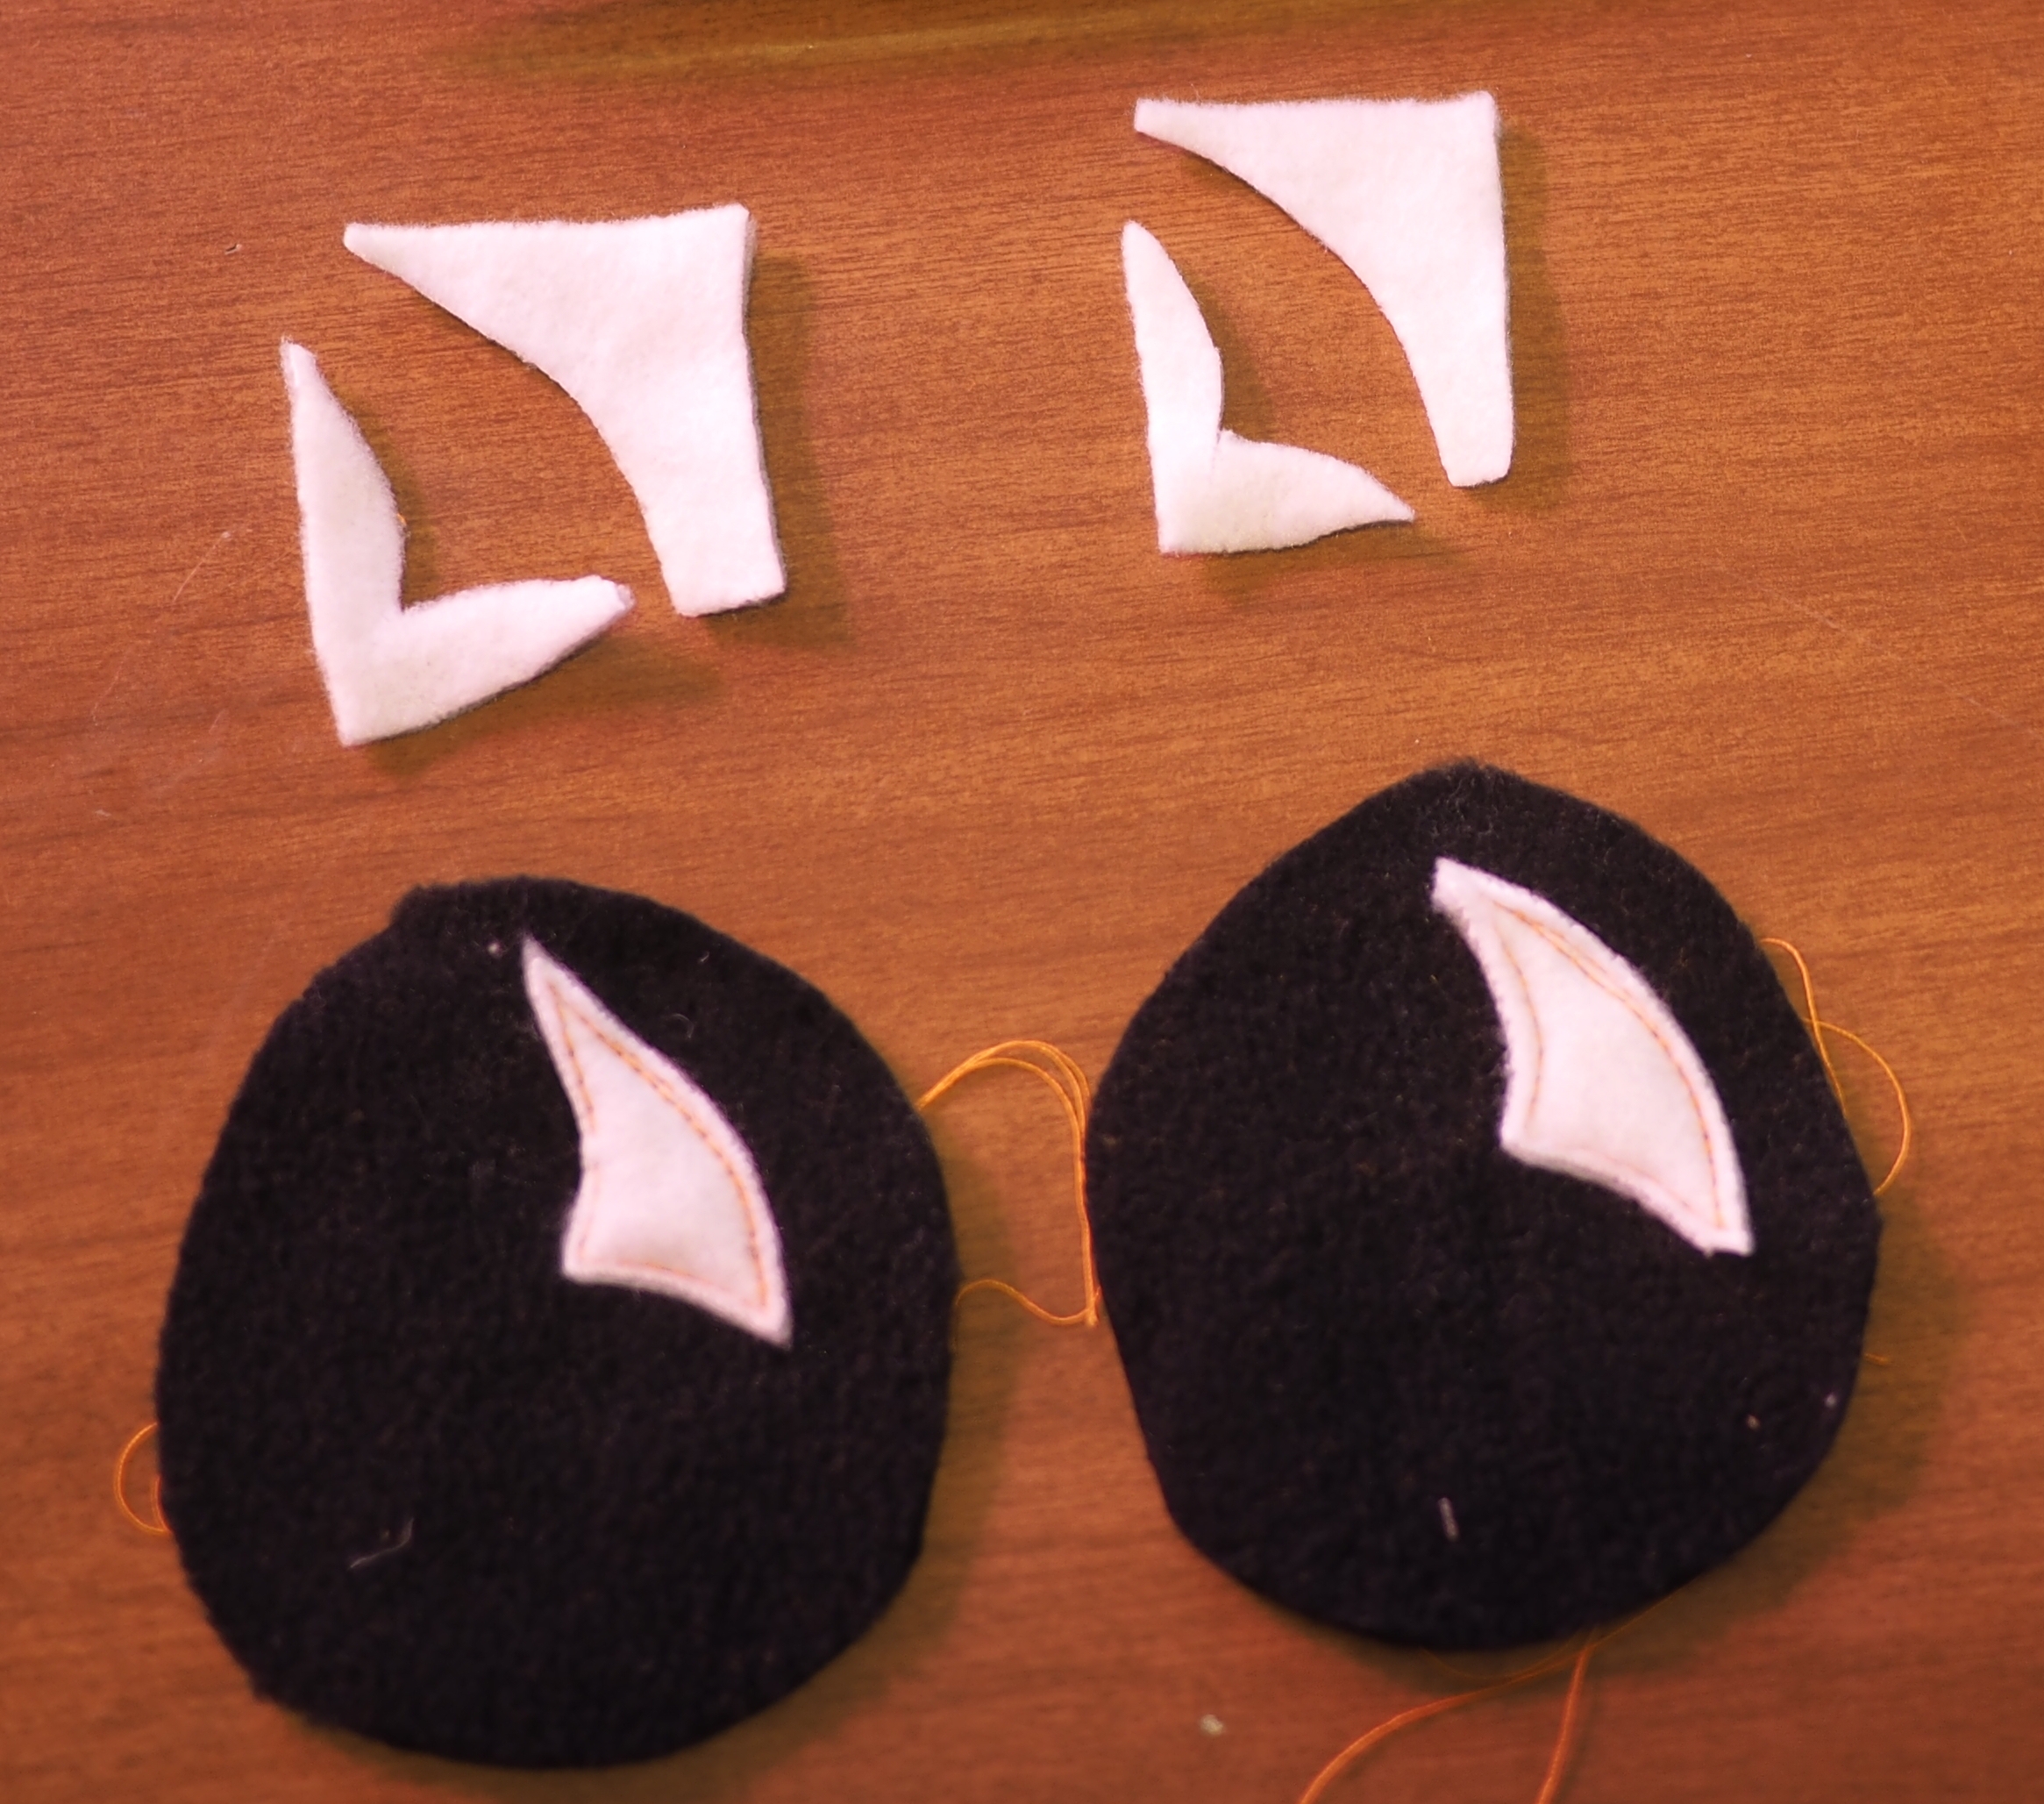
Pull the top threads to the back so the stitching looks all tidy. Then cut off the excess white fabric so it looks all pretty:
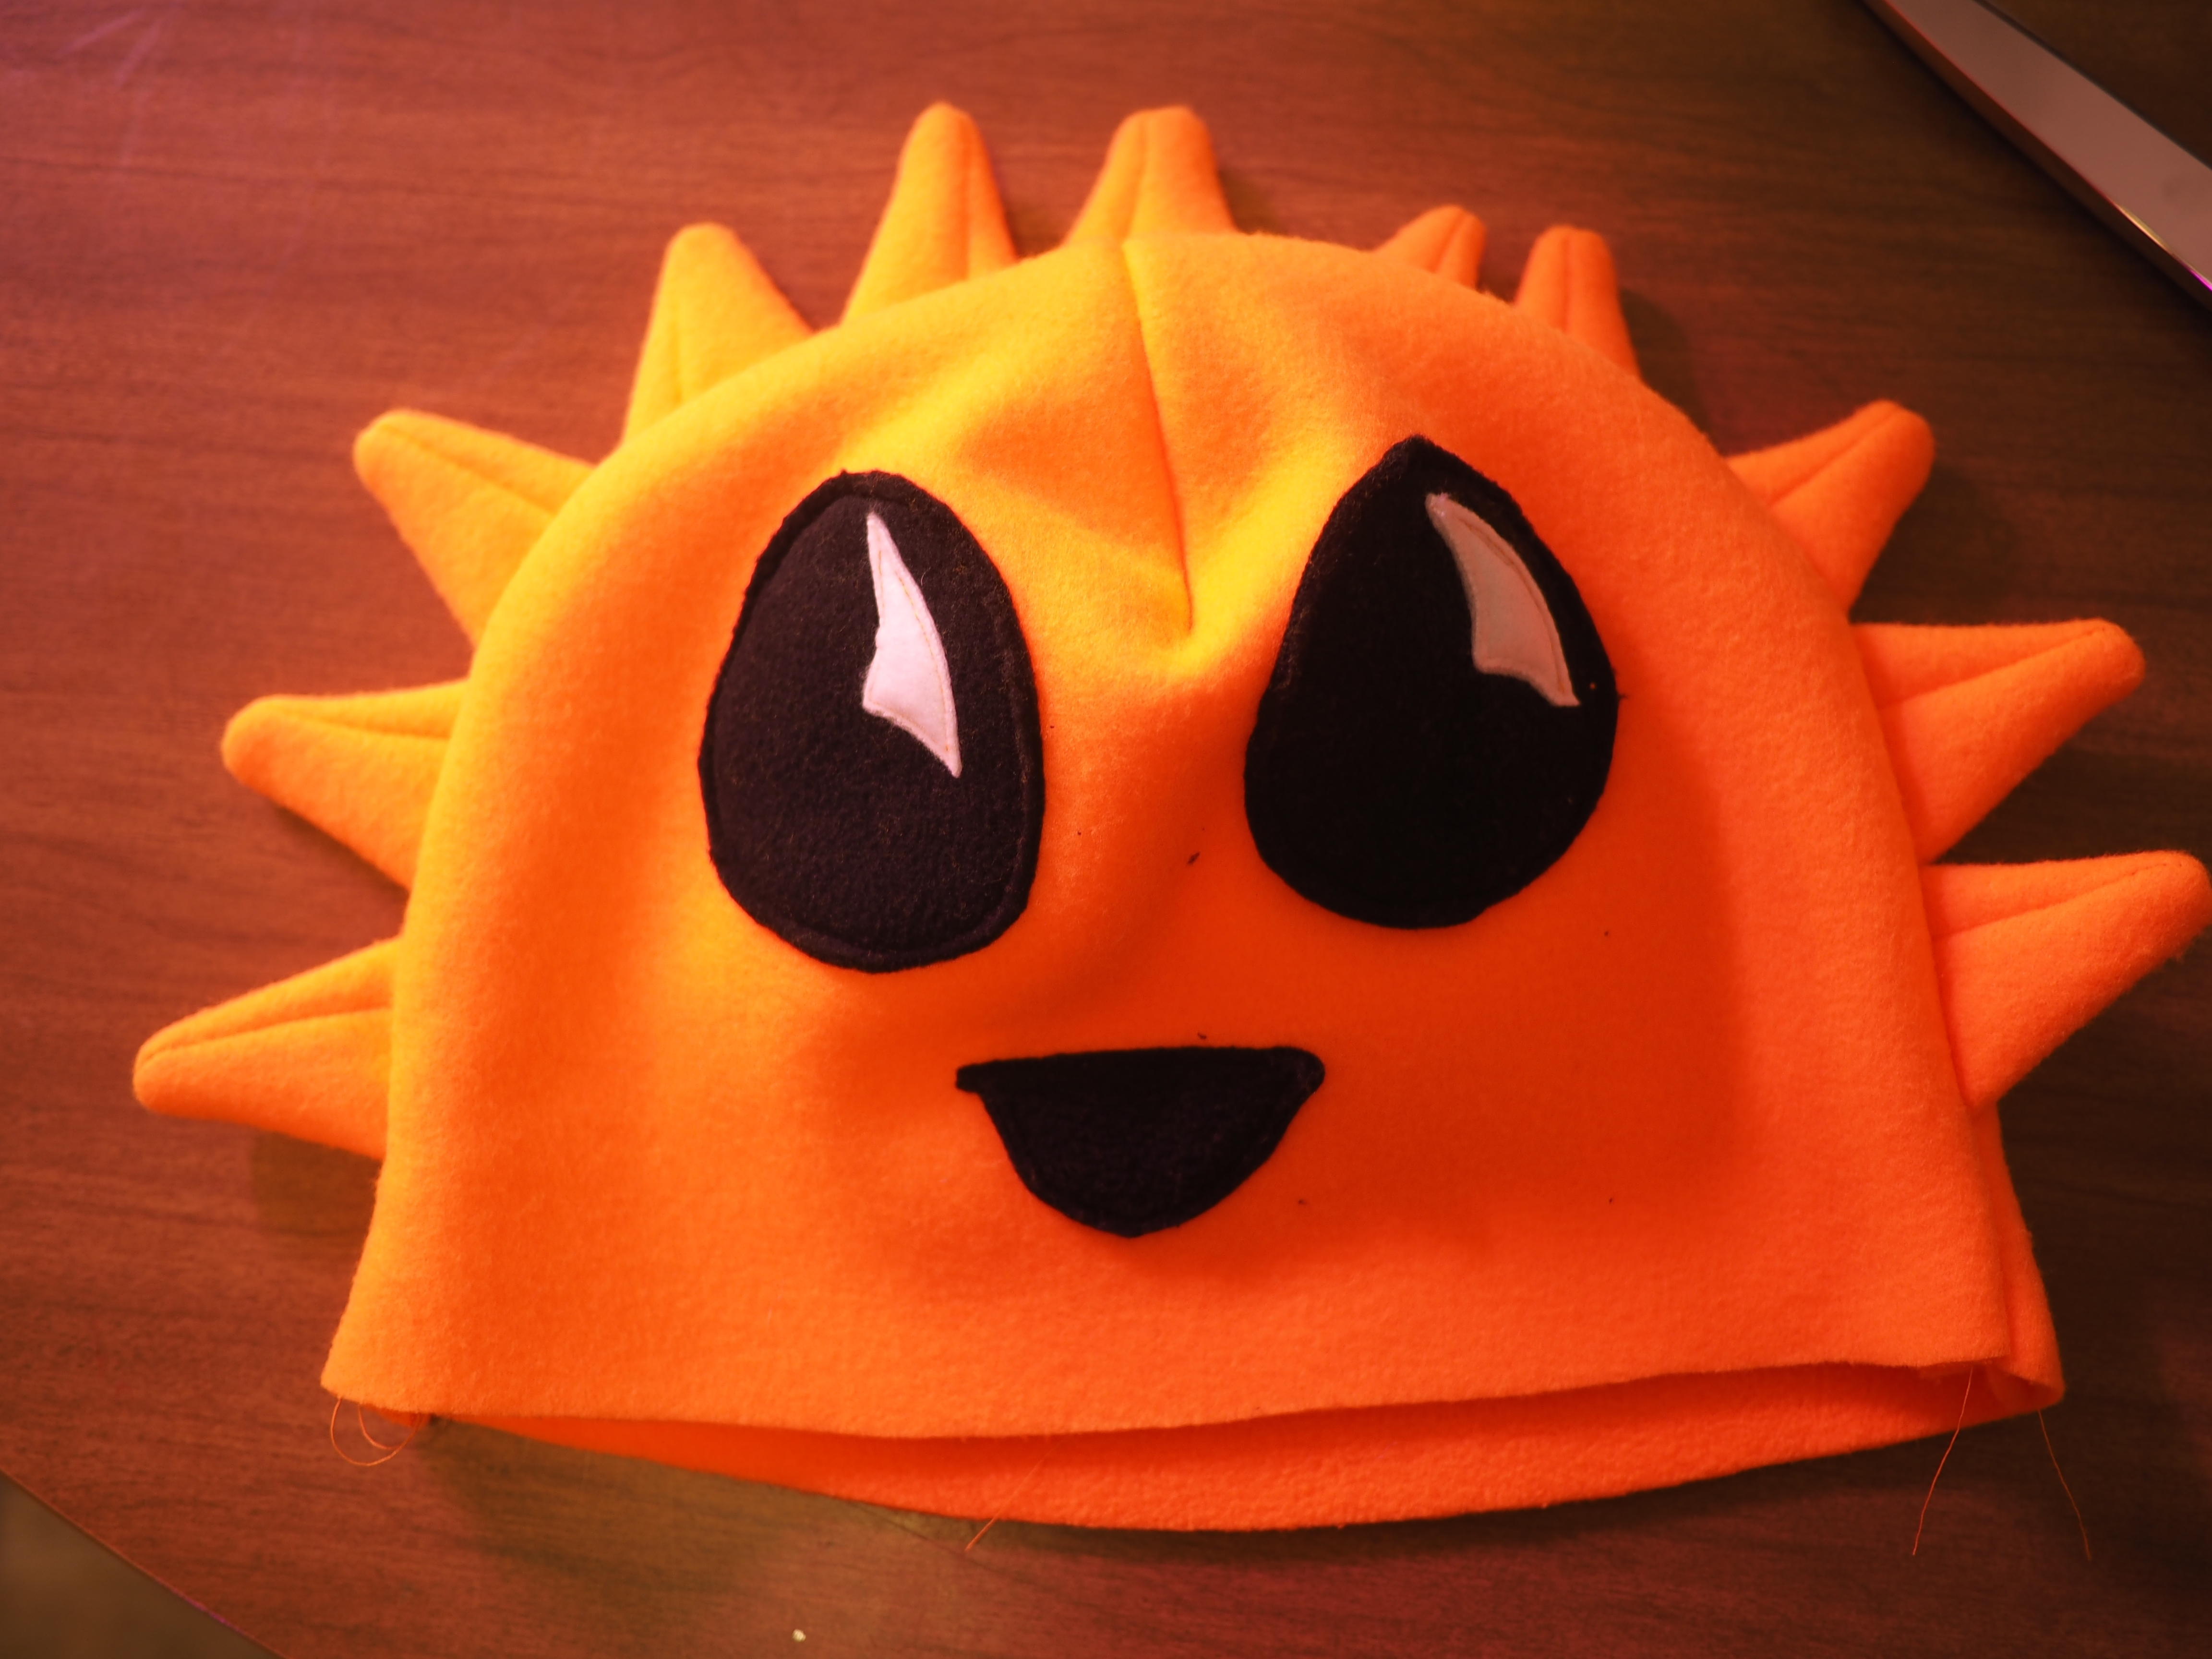
Now the fun part: Grab one of those outside pieces we cut before. Doesn't matter which. Sew the eyes andmouth onto it like so:
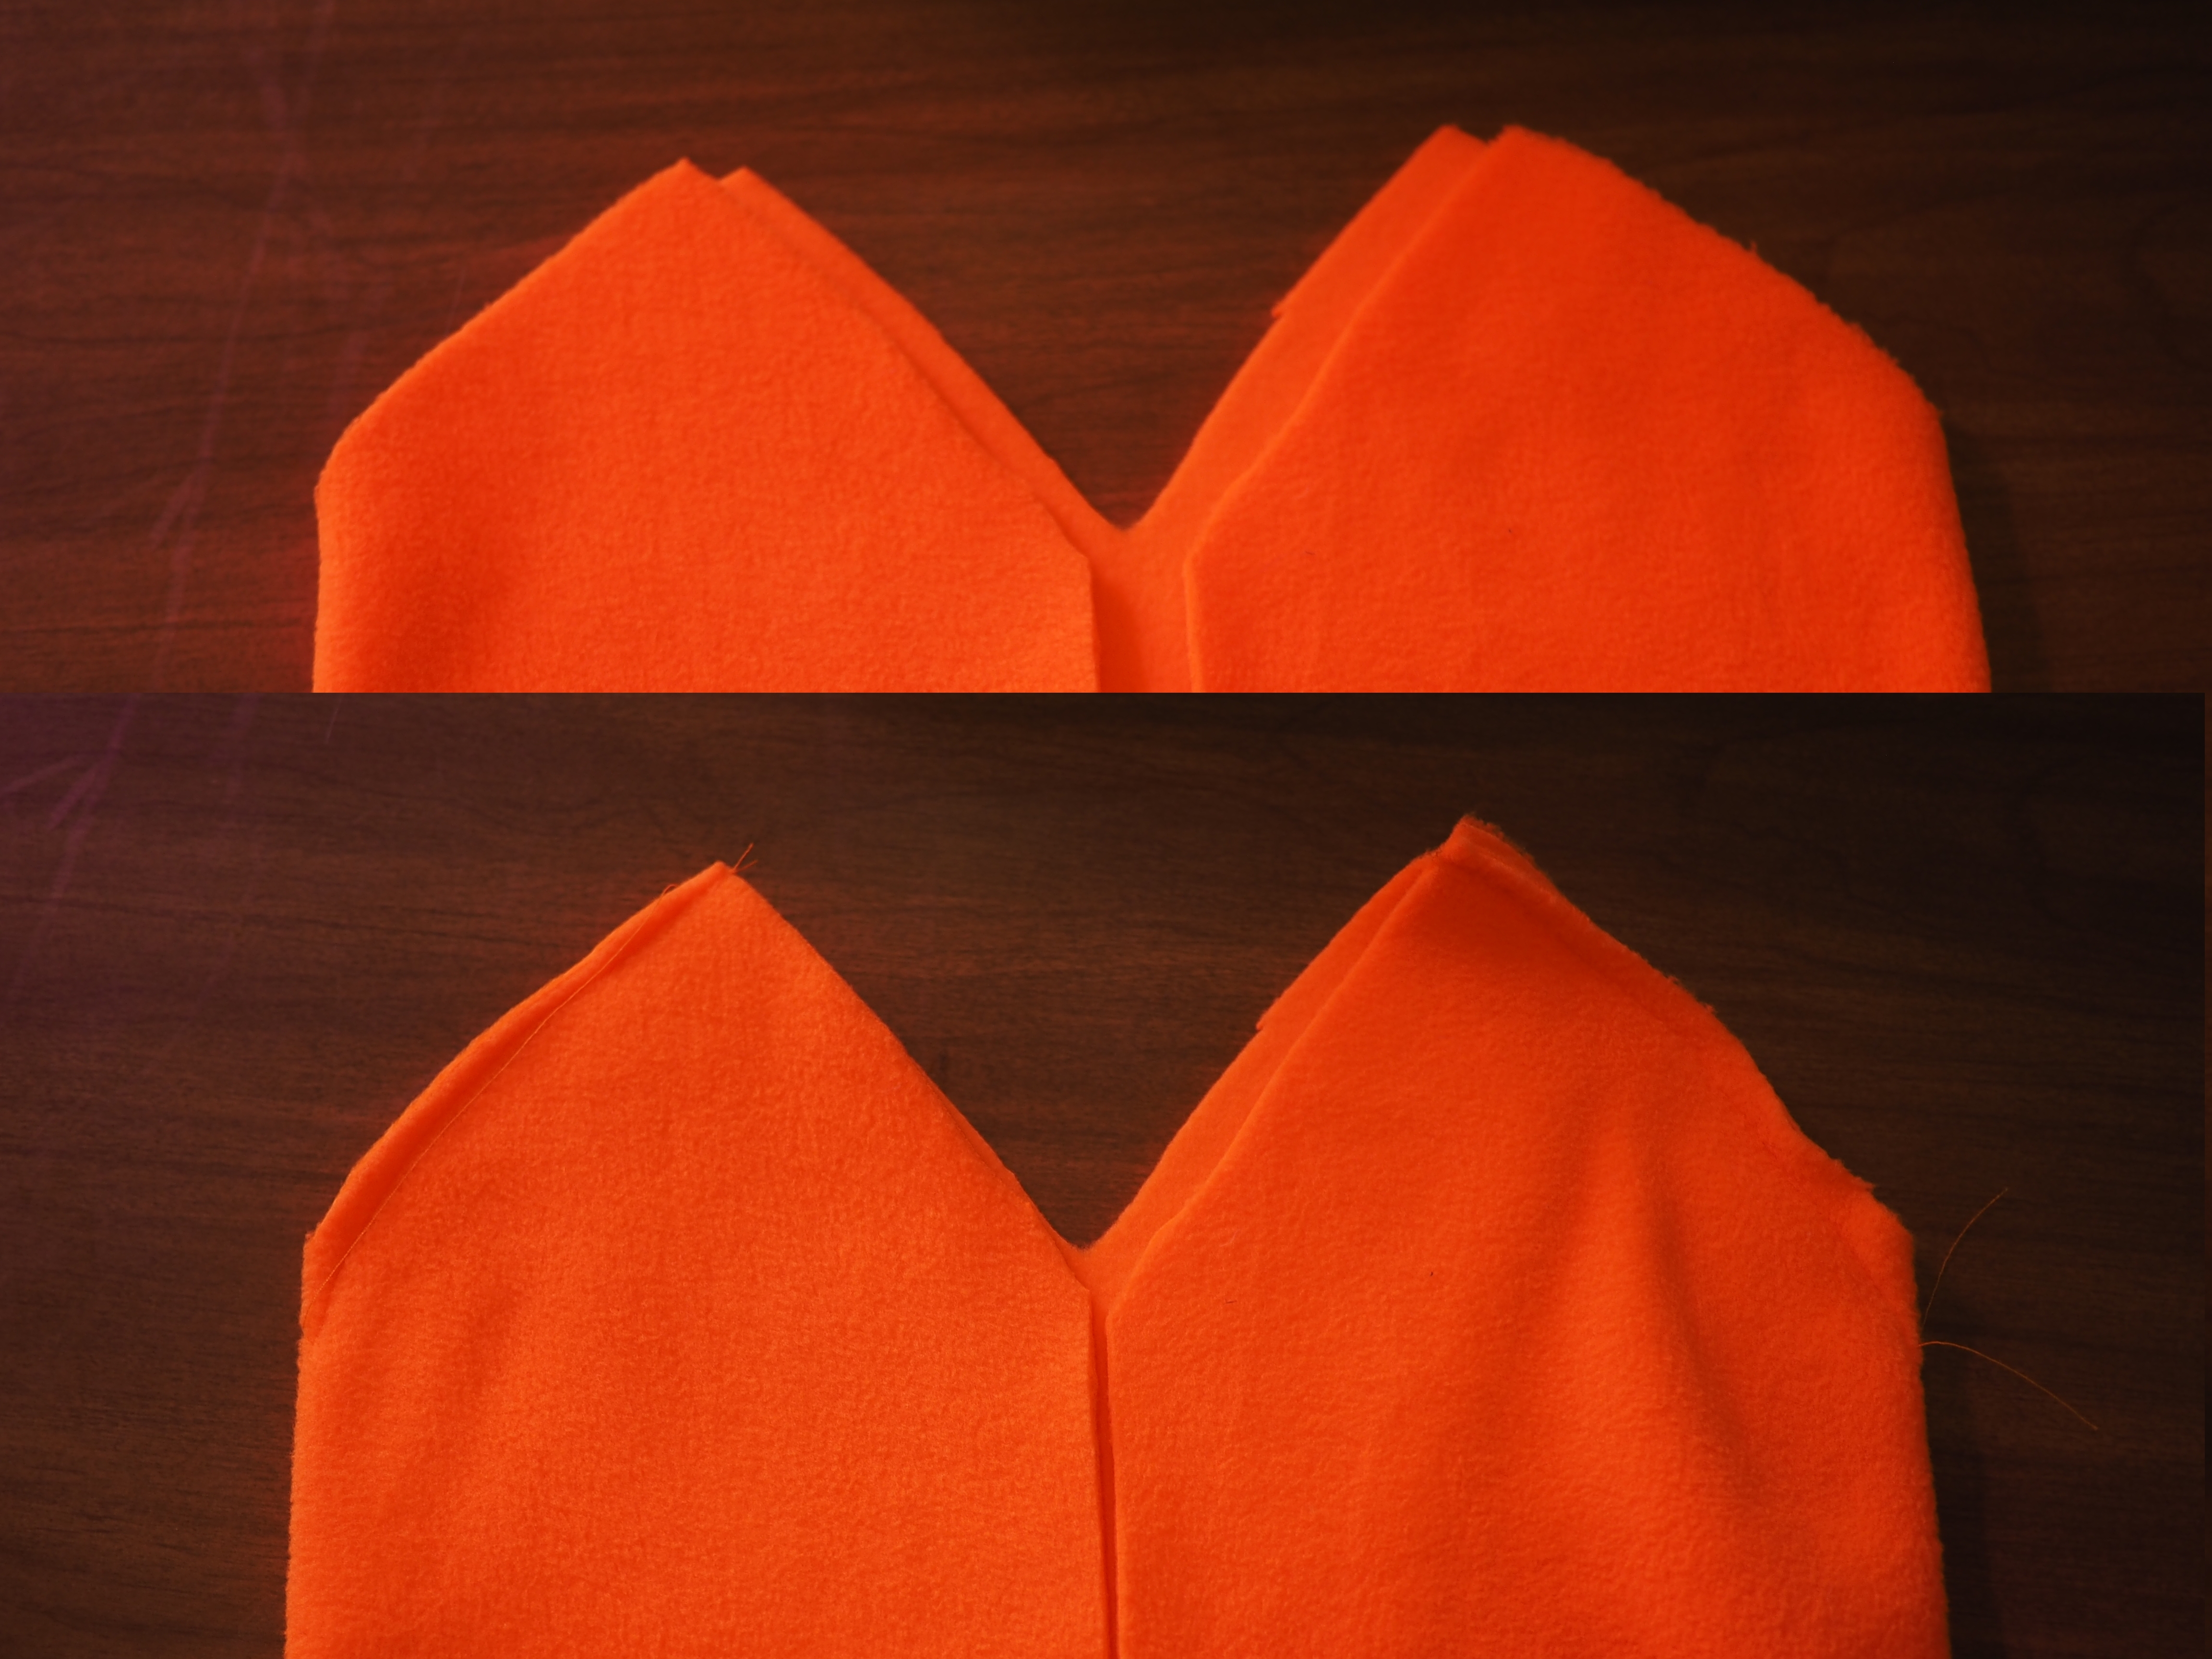
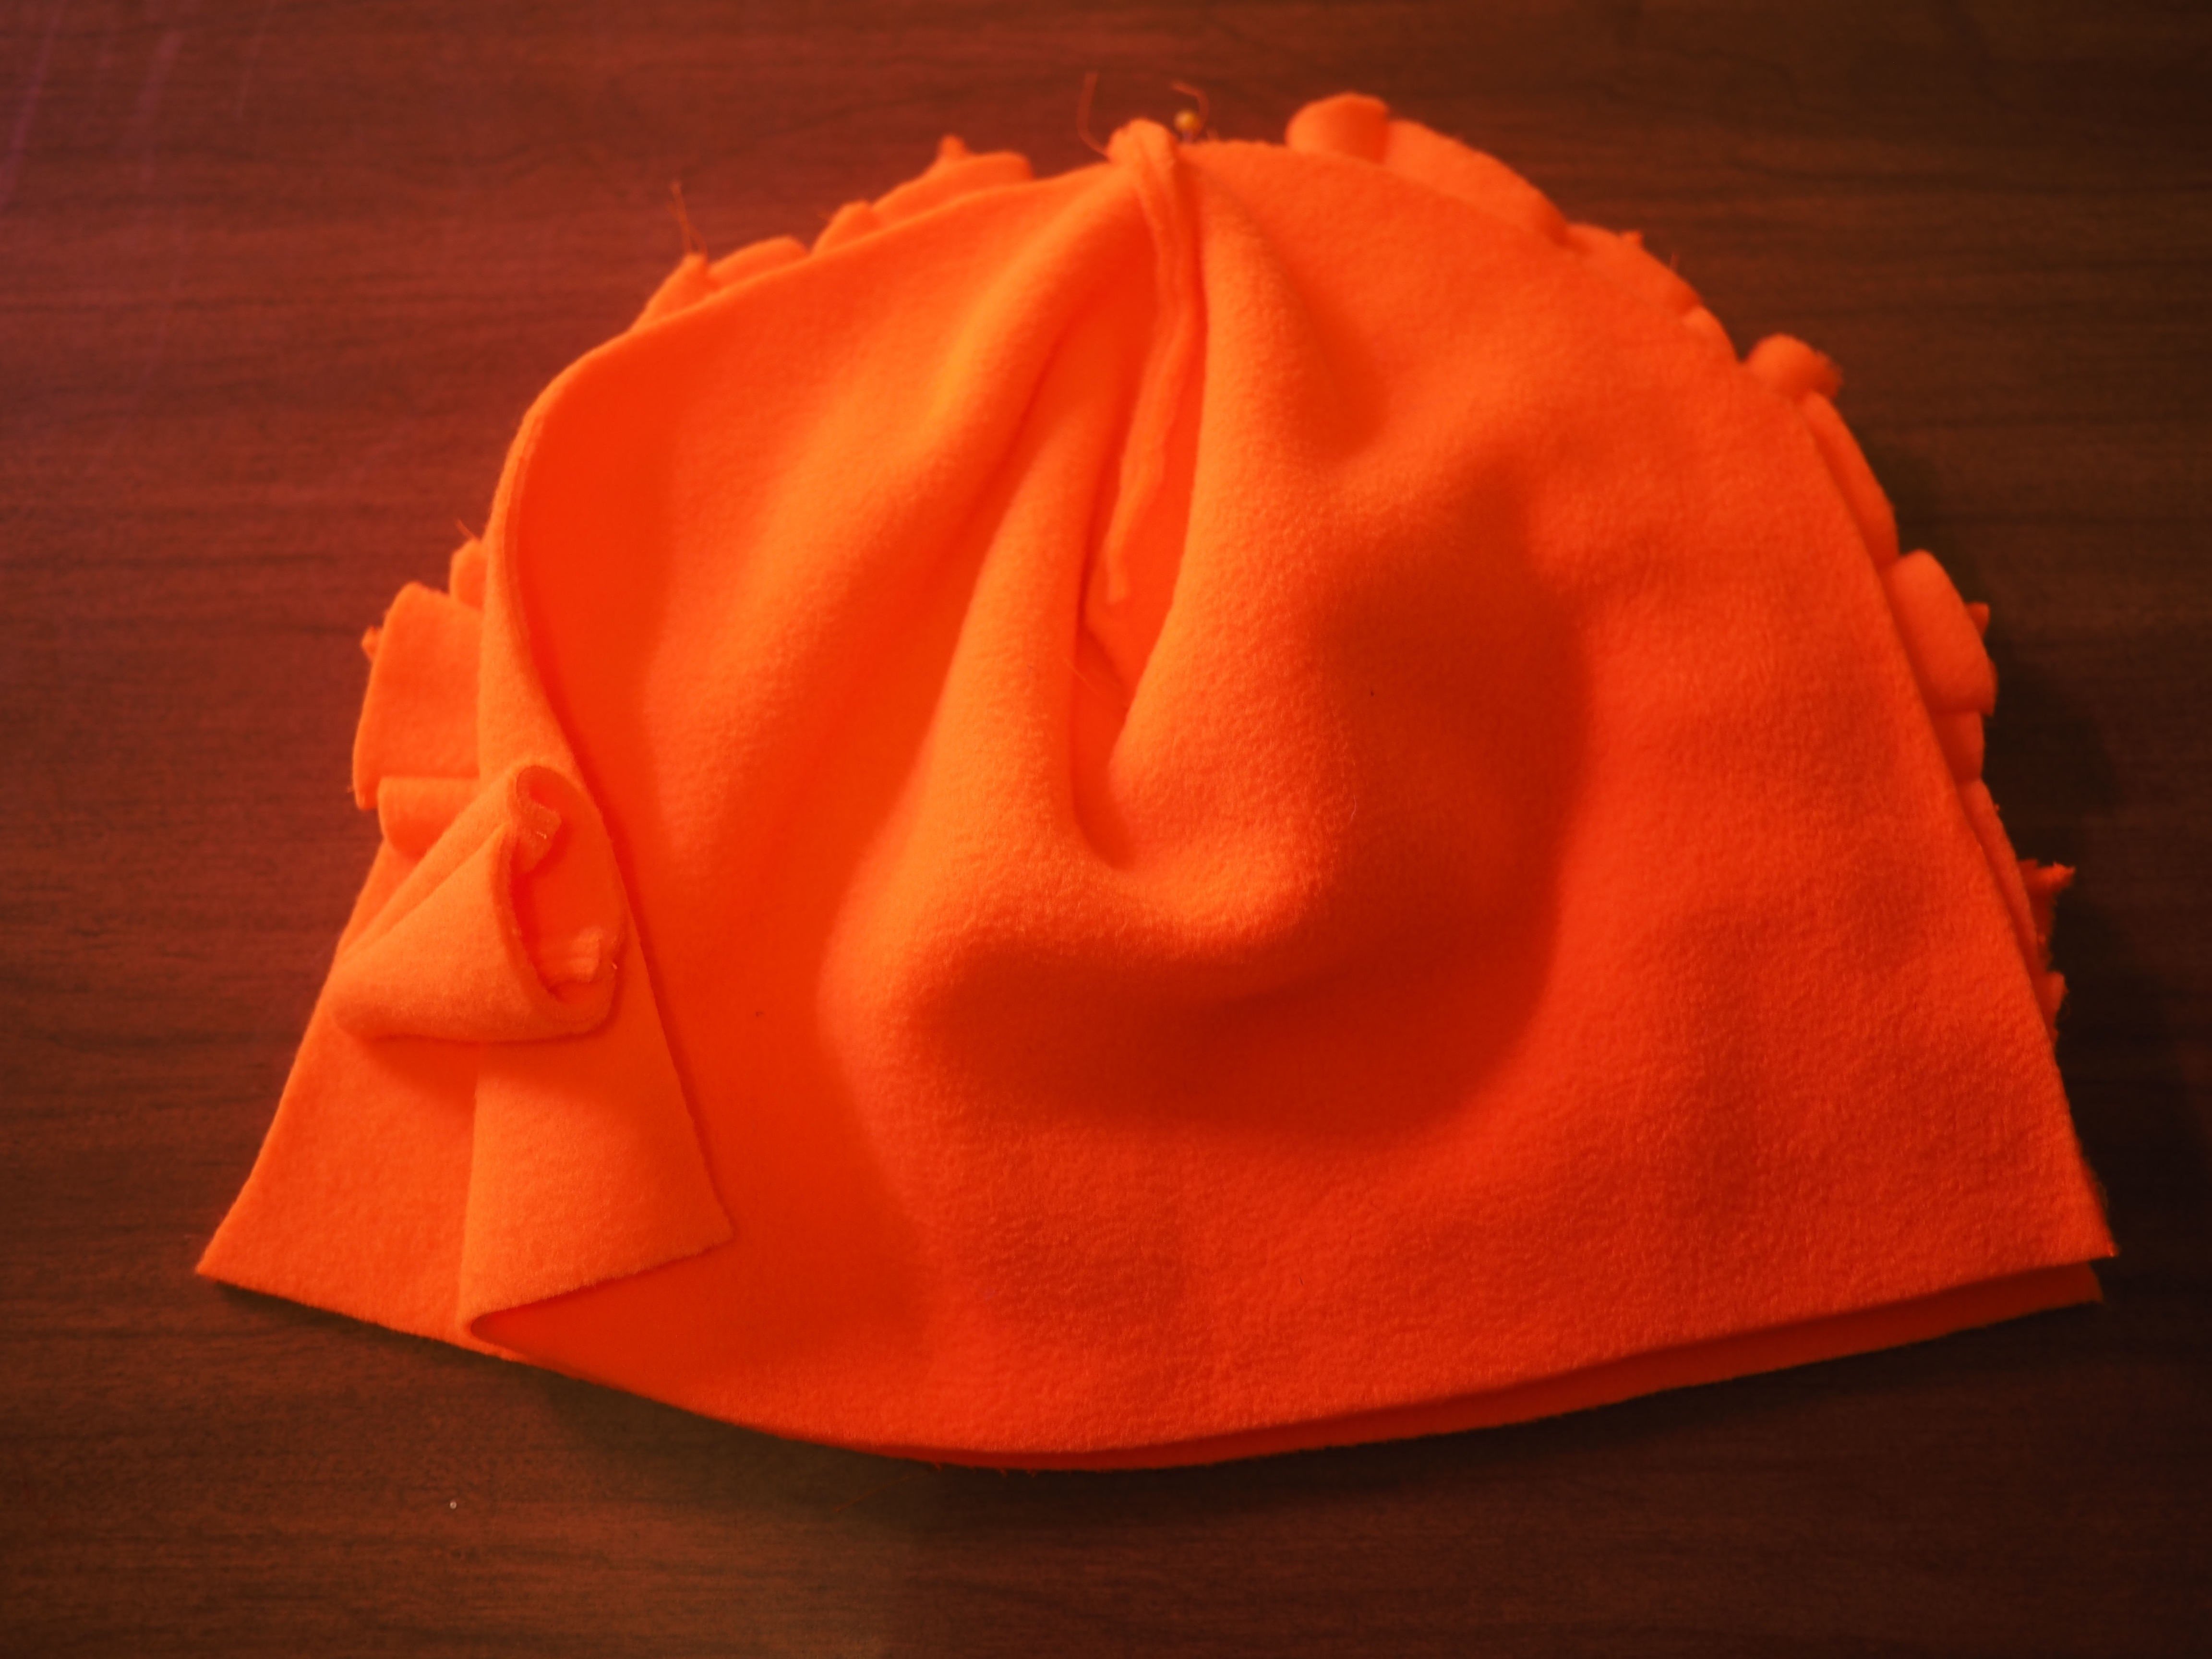
Now it's time to give the hat some shape. On both outside pieces -- the one with the face and also the one without -- sew that little V shaped gap shut. Like so:
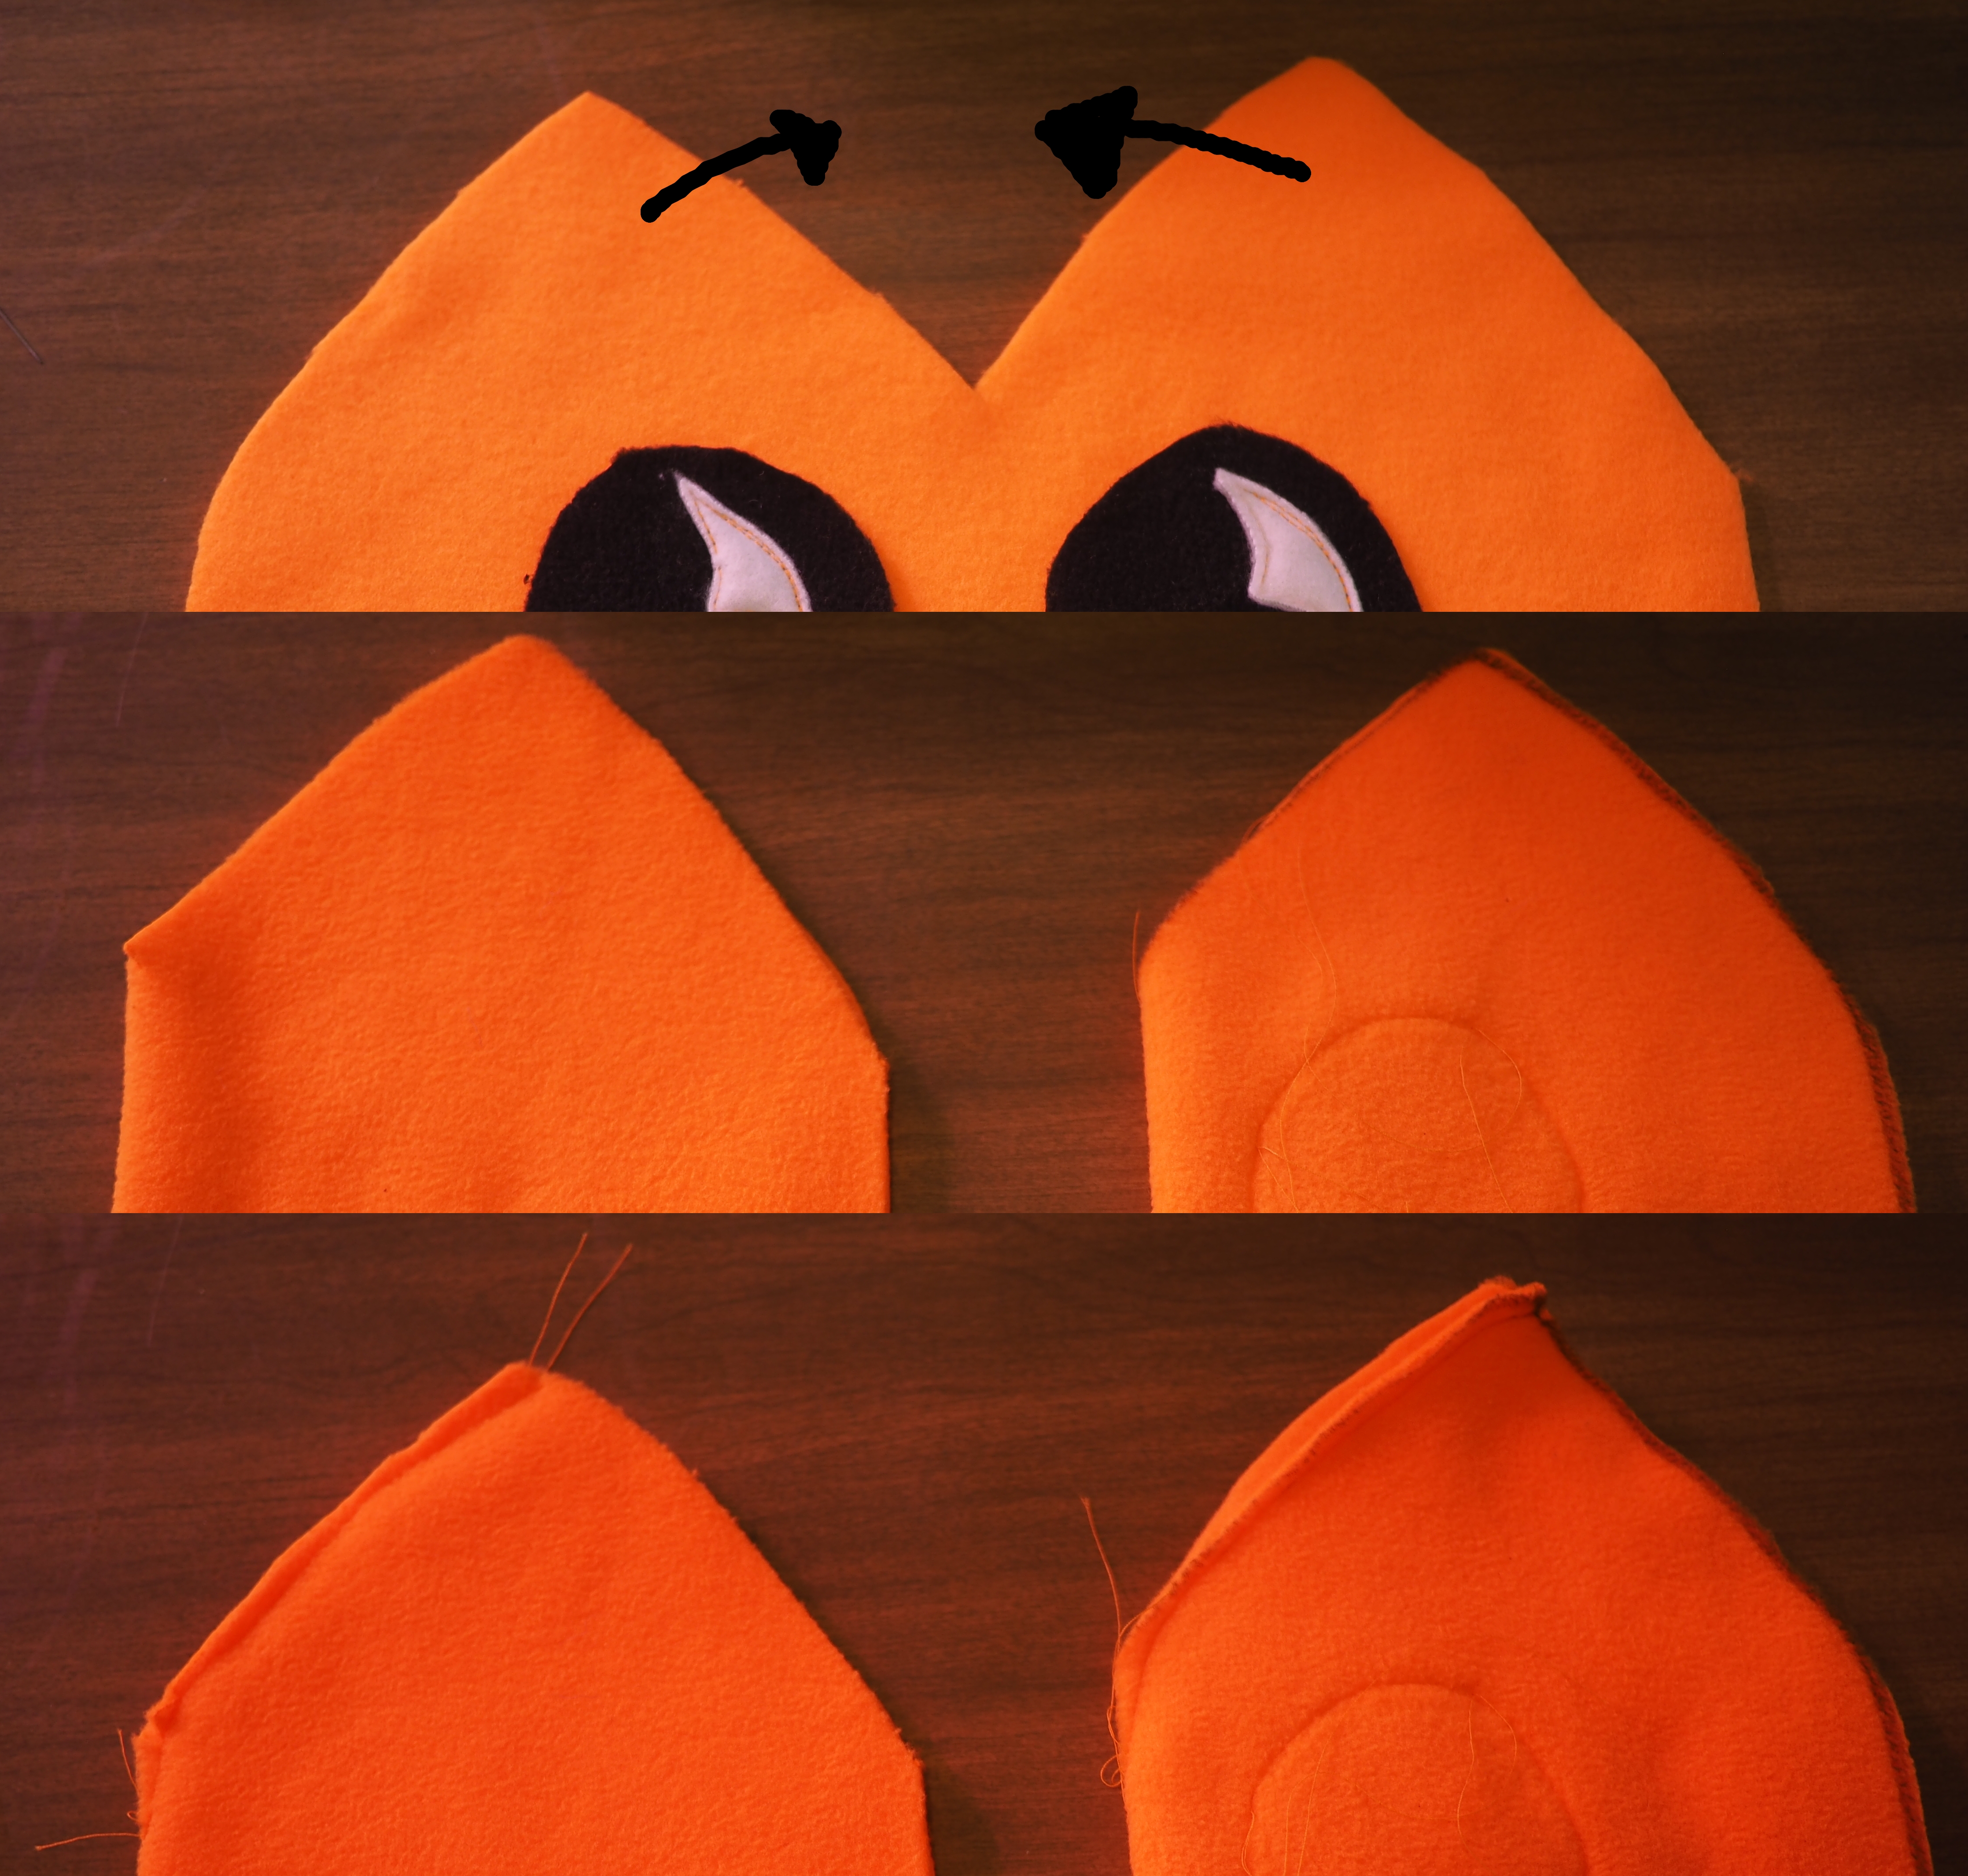
Now they look kind of 3D, like so:

Let's sew up the lining piece next. It's the bit we cut off of the fold earlier. Fold then sew the Vs shut, thusly:
Next, sew most of the remaining seam of the lining, but leave a gap at the top so we can turn the whole thing inside out later:

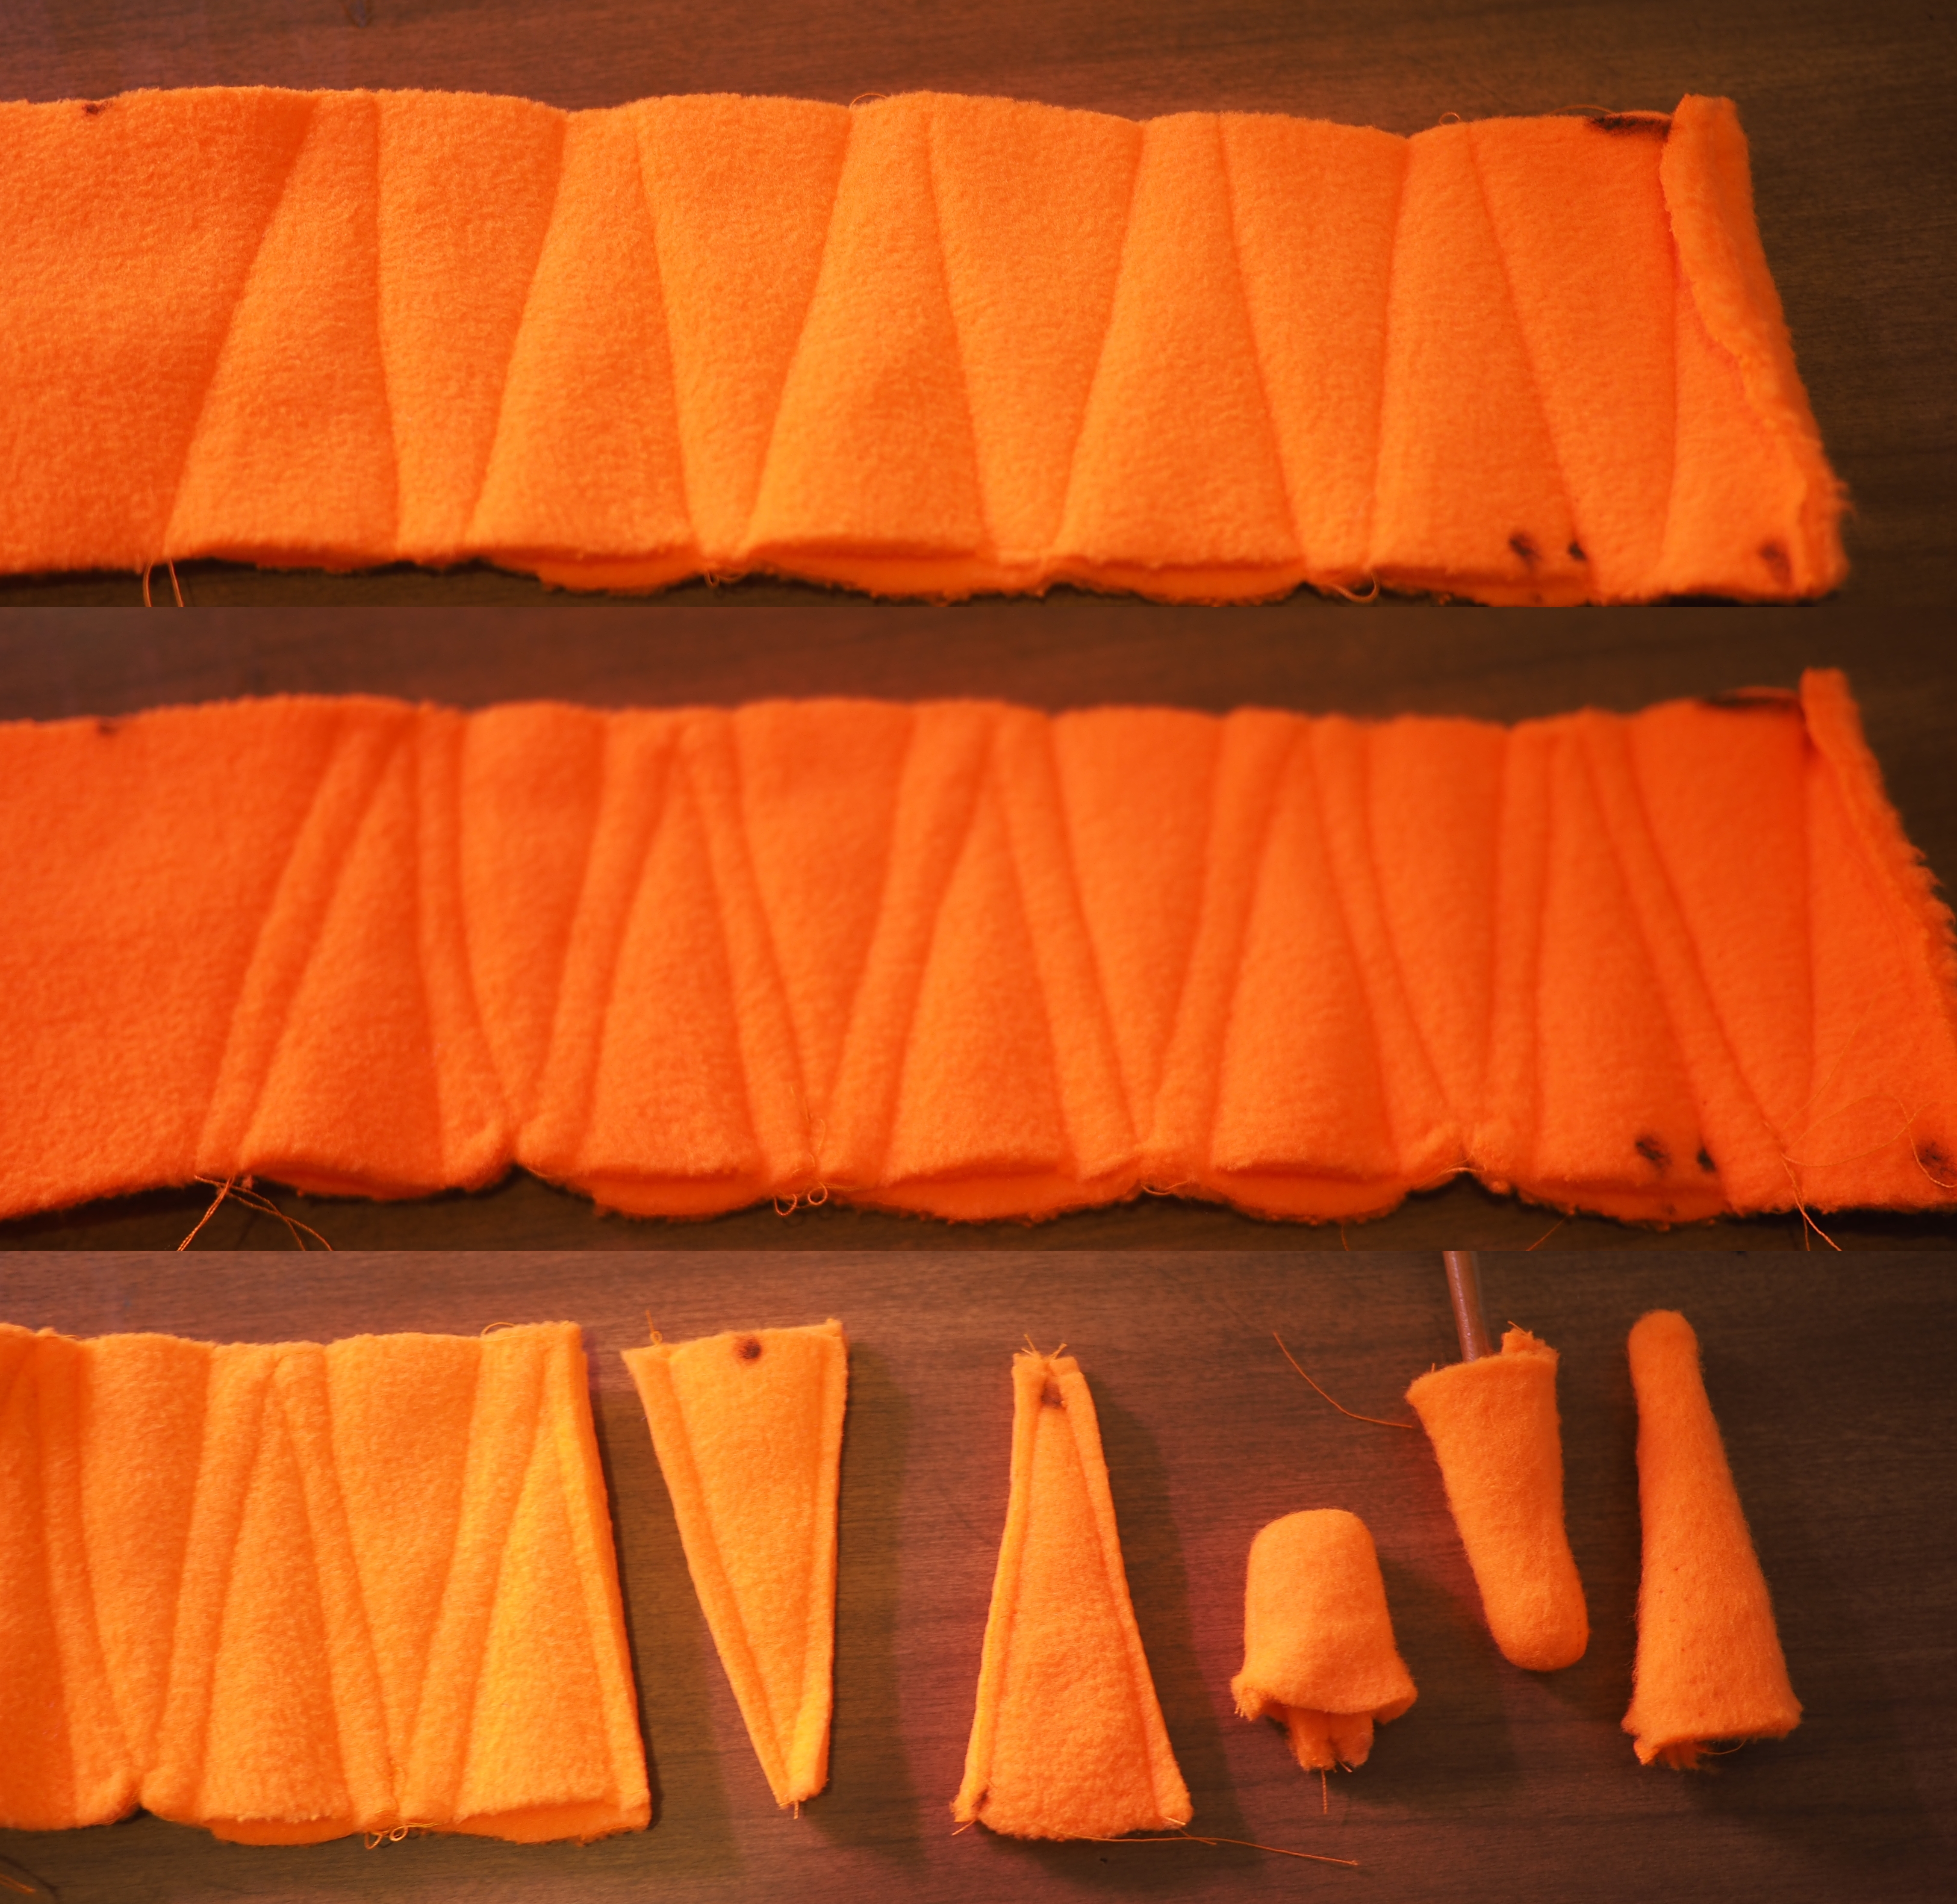
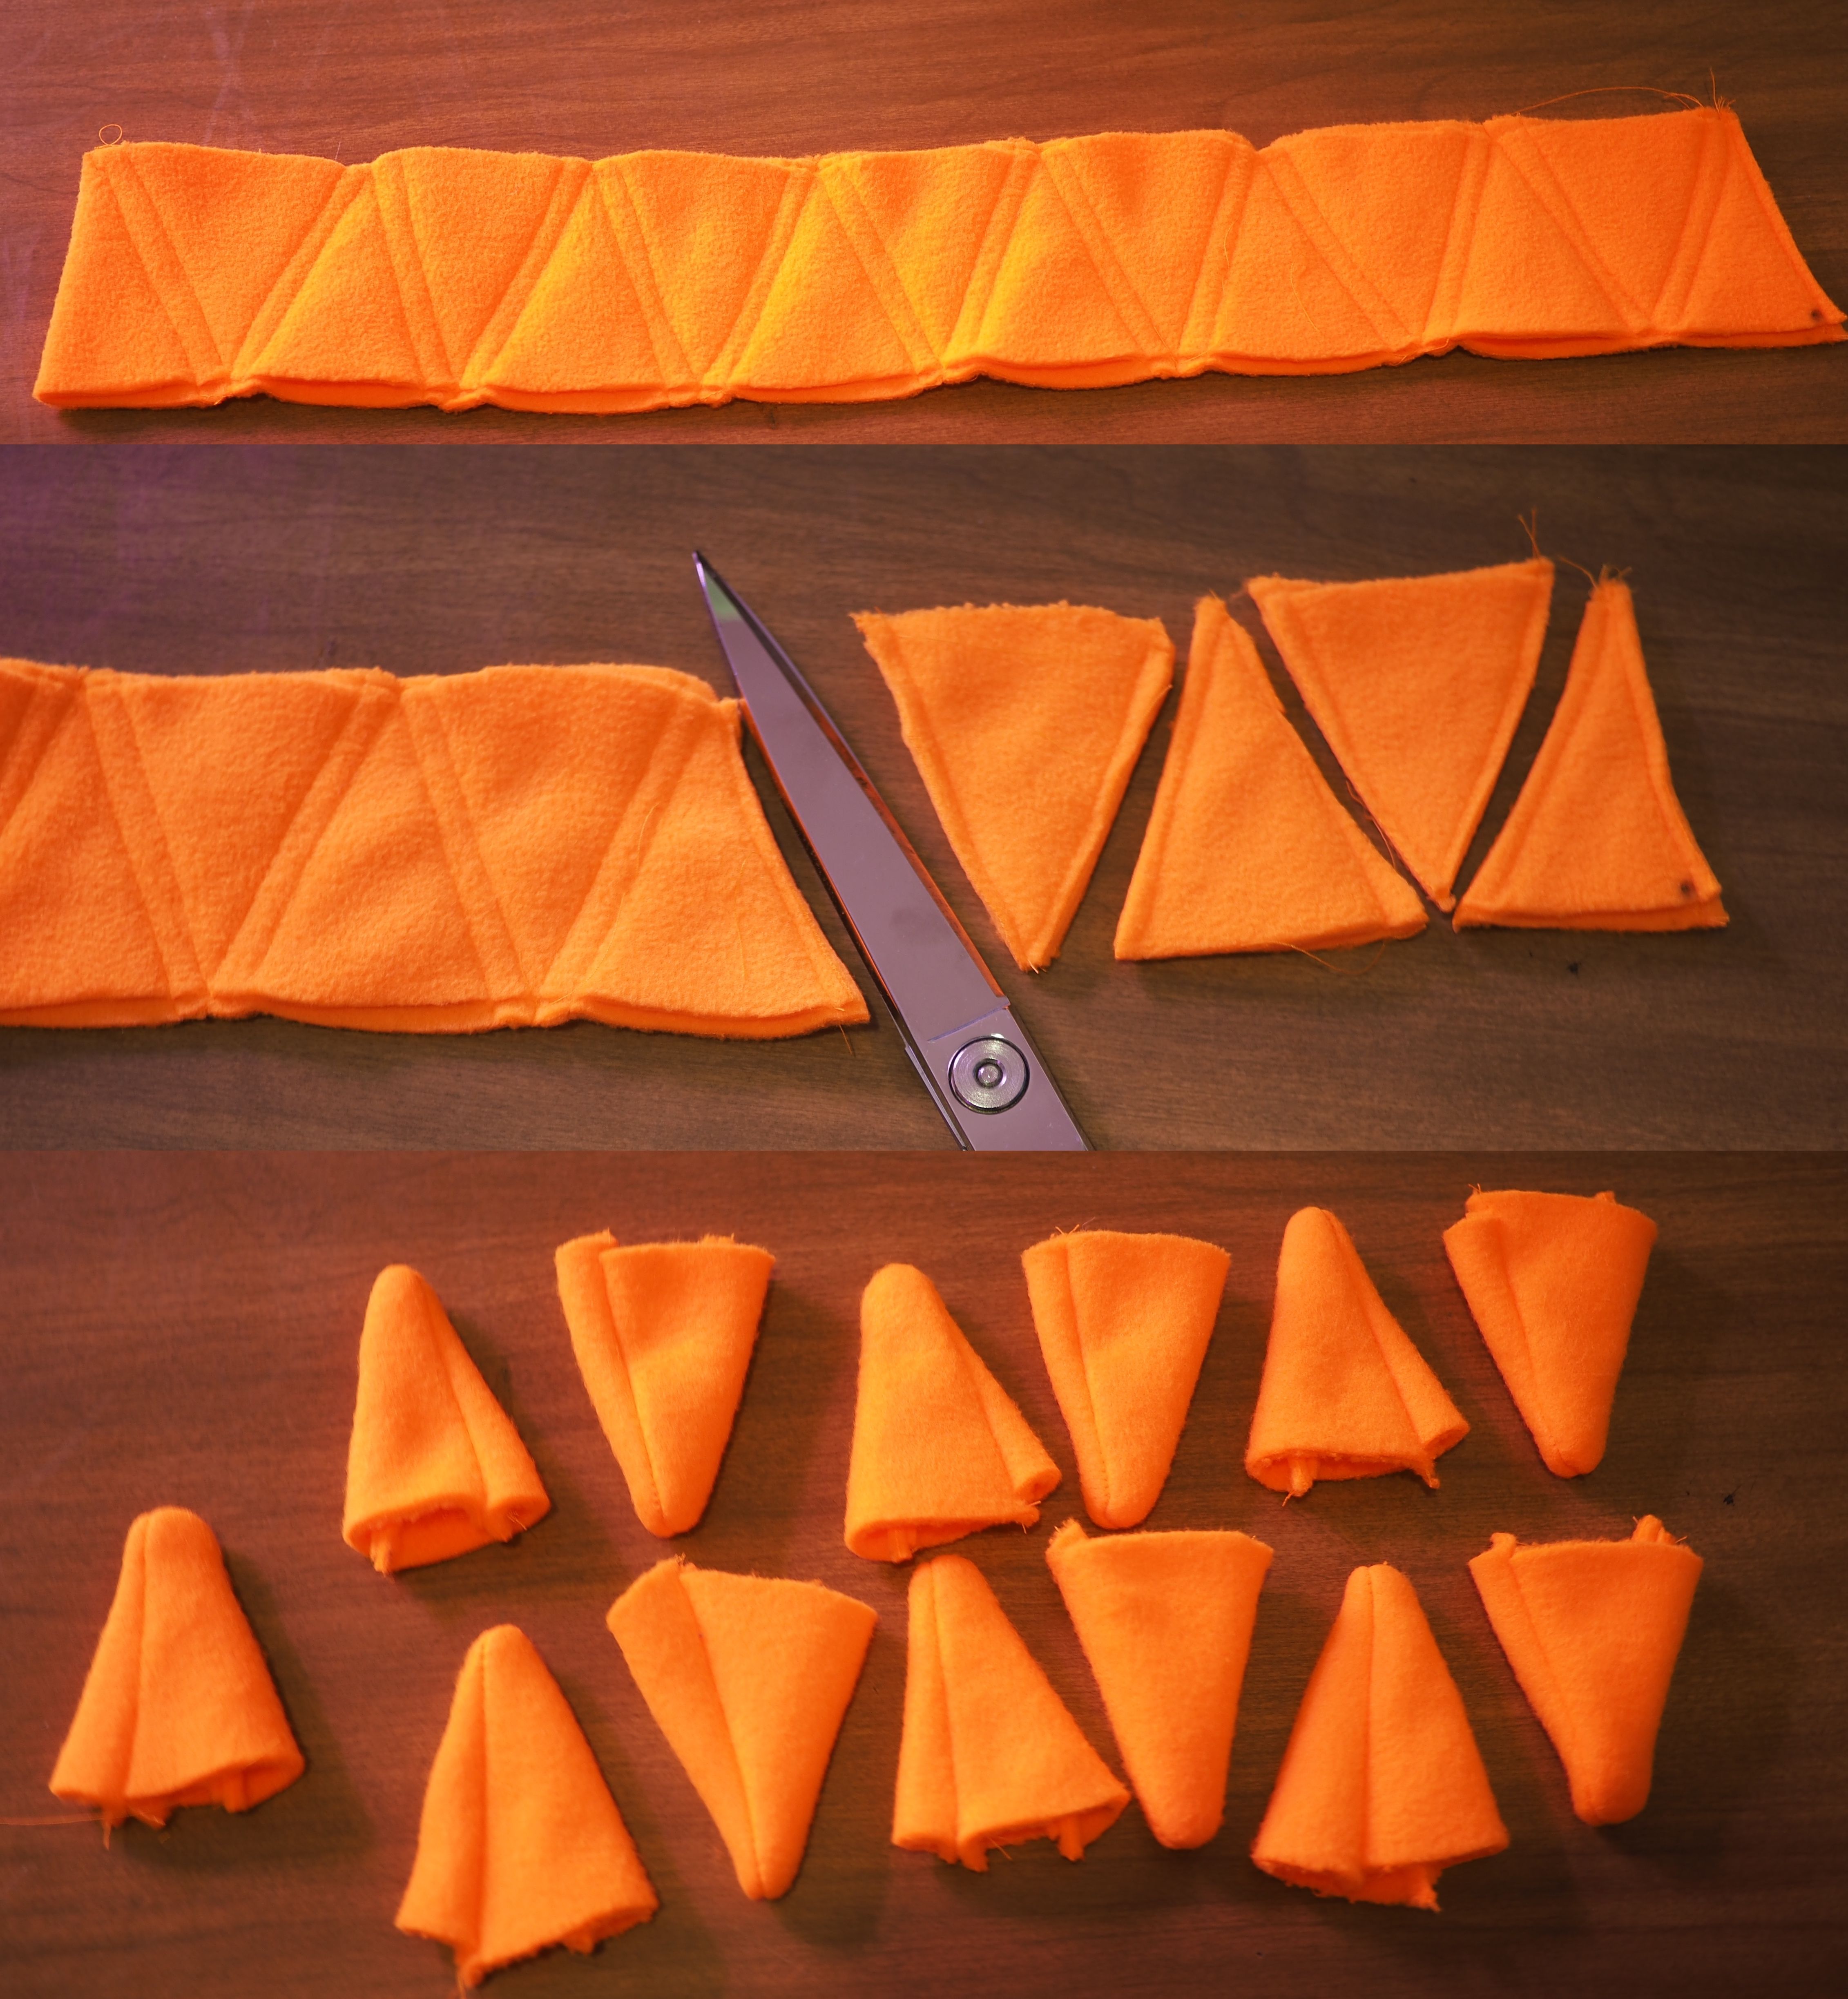
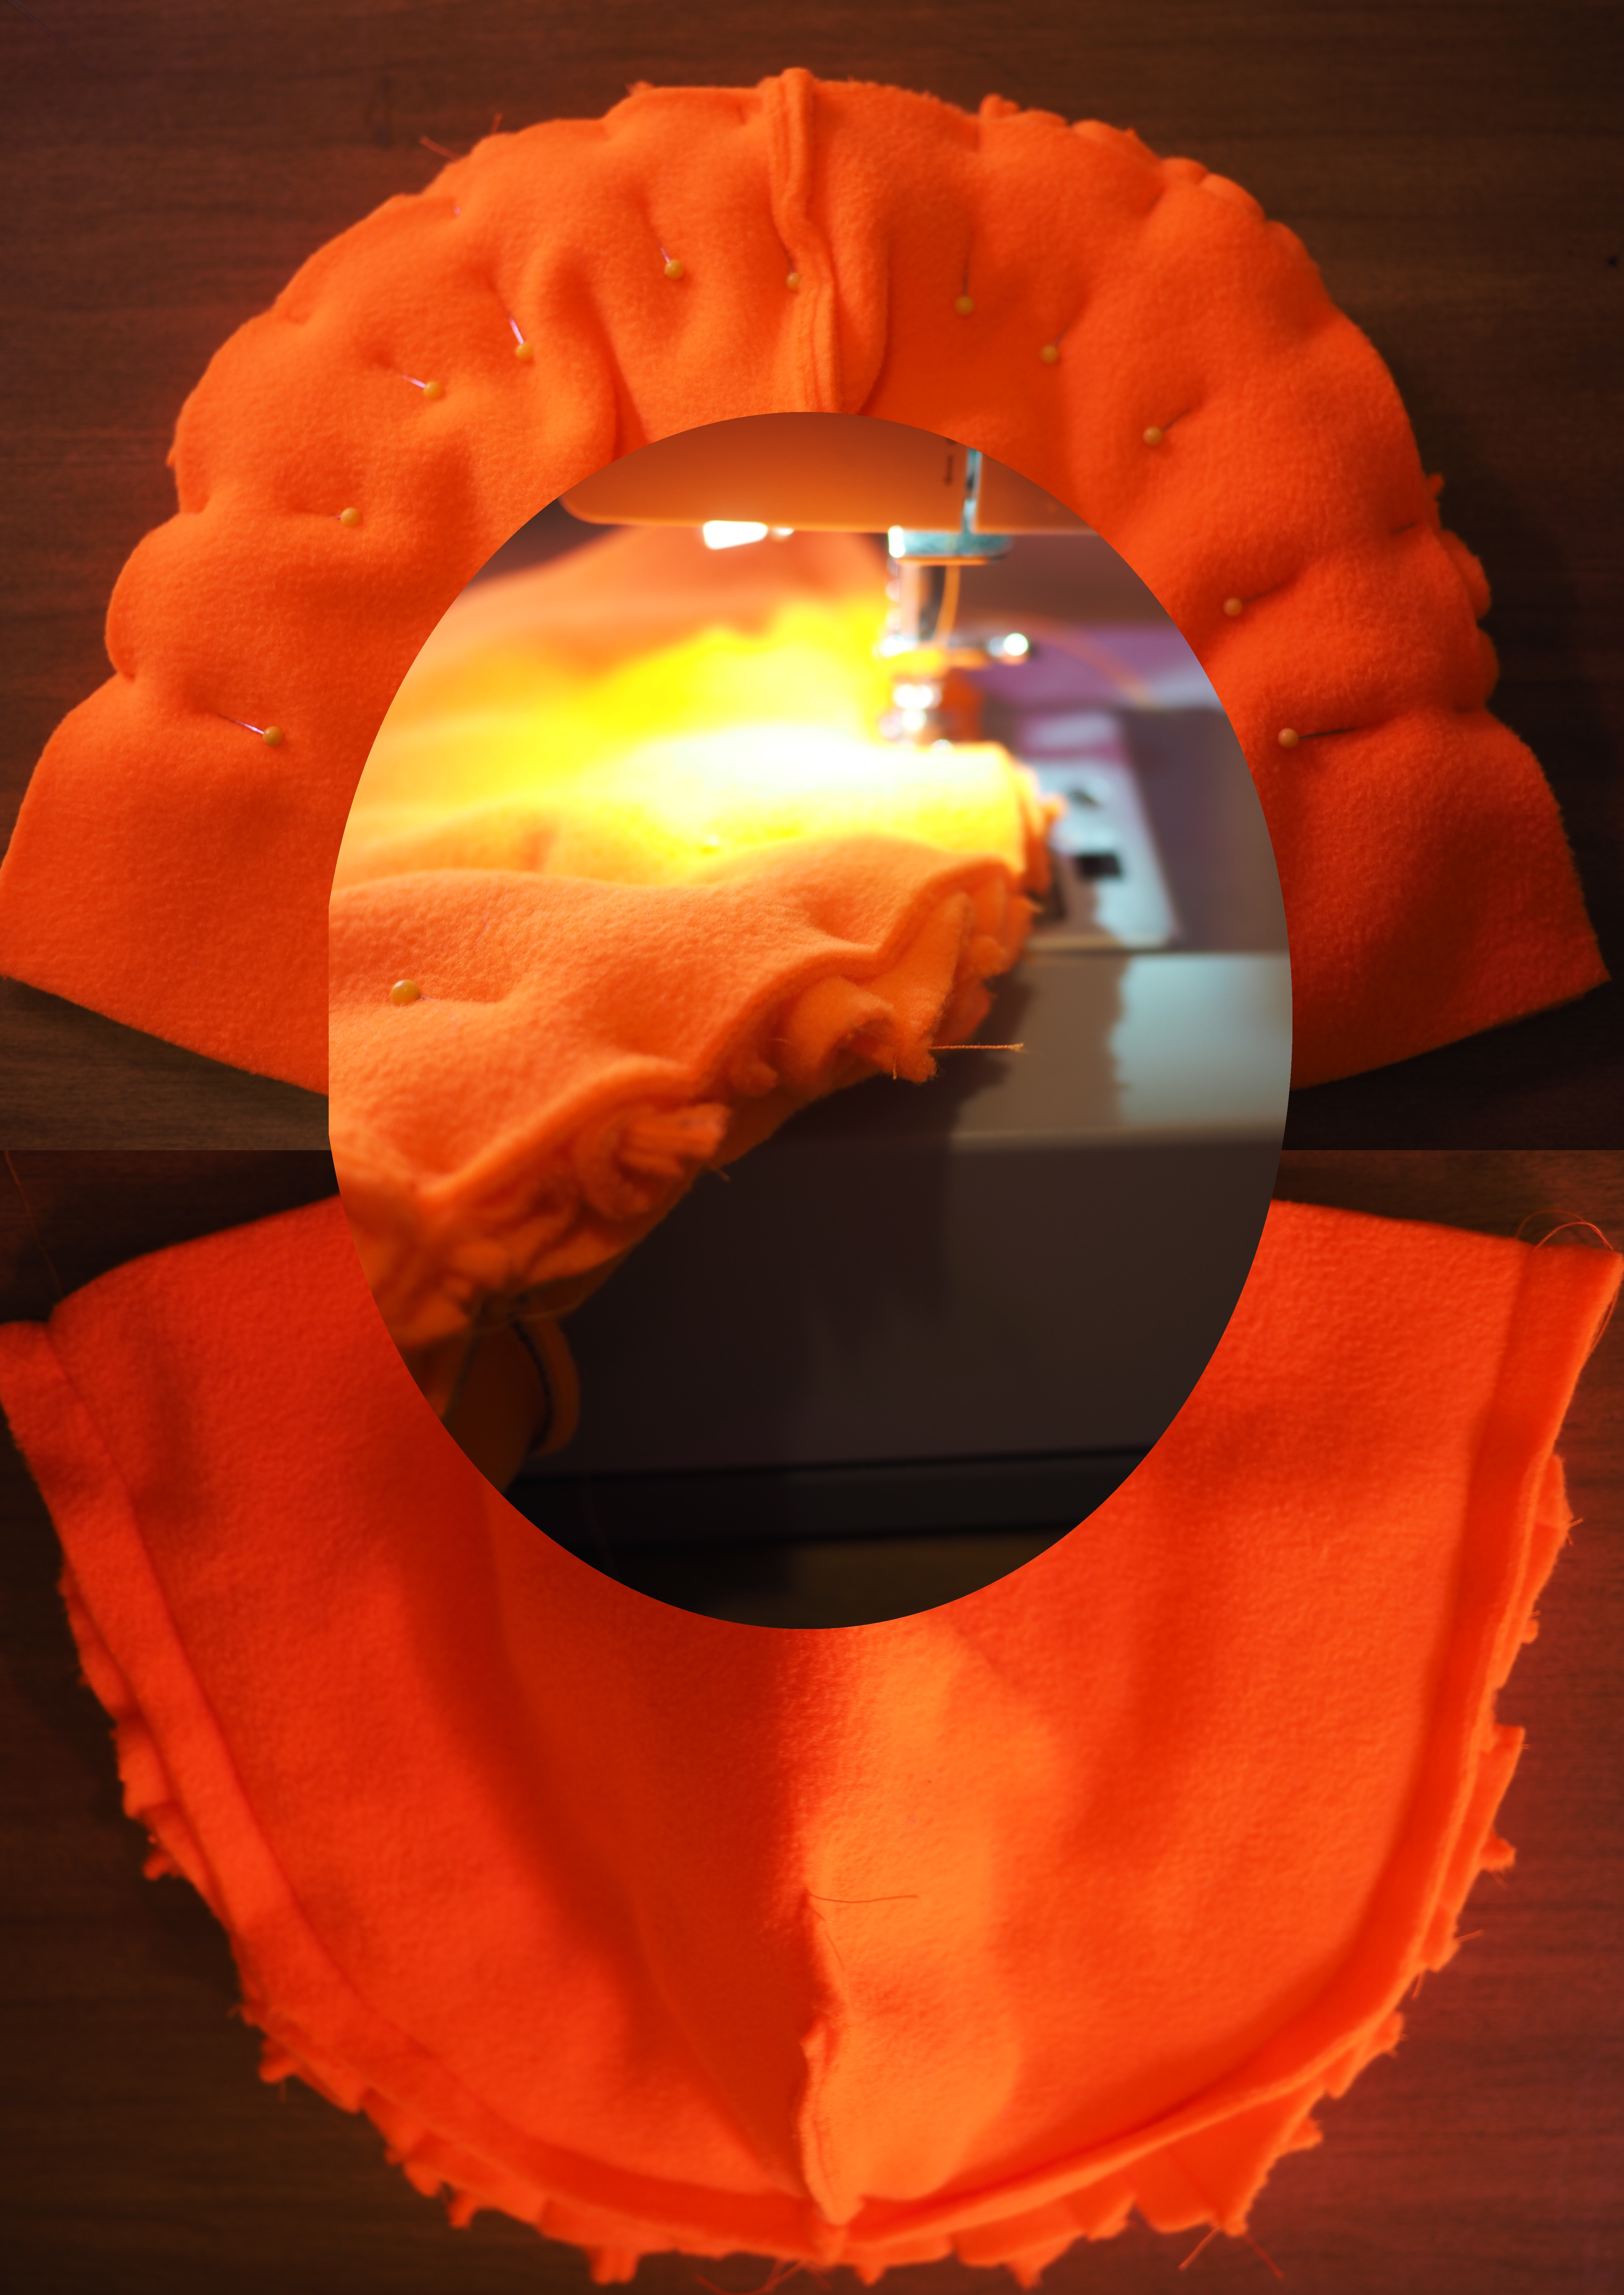
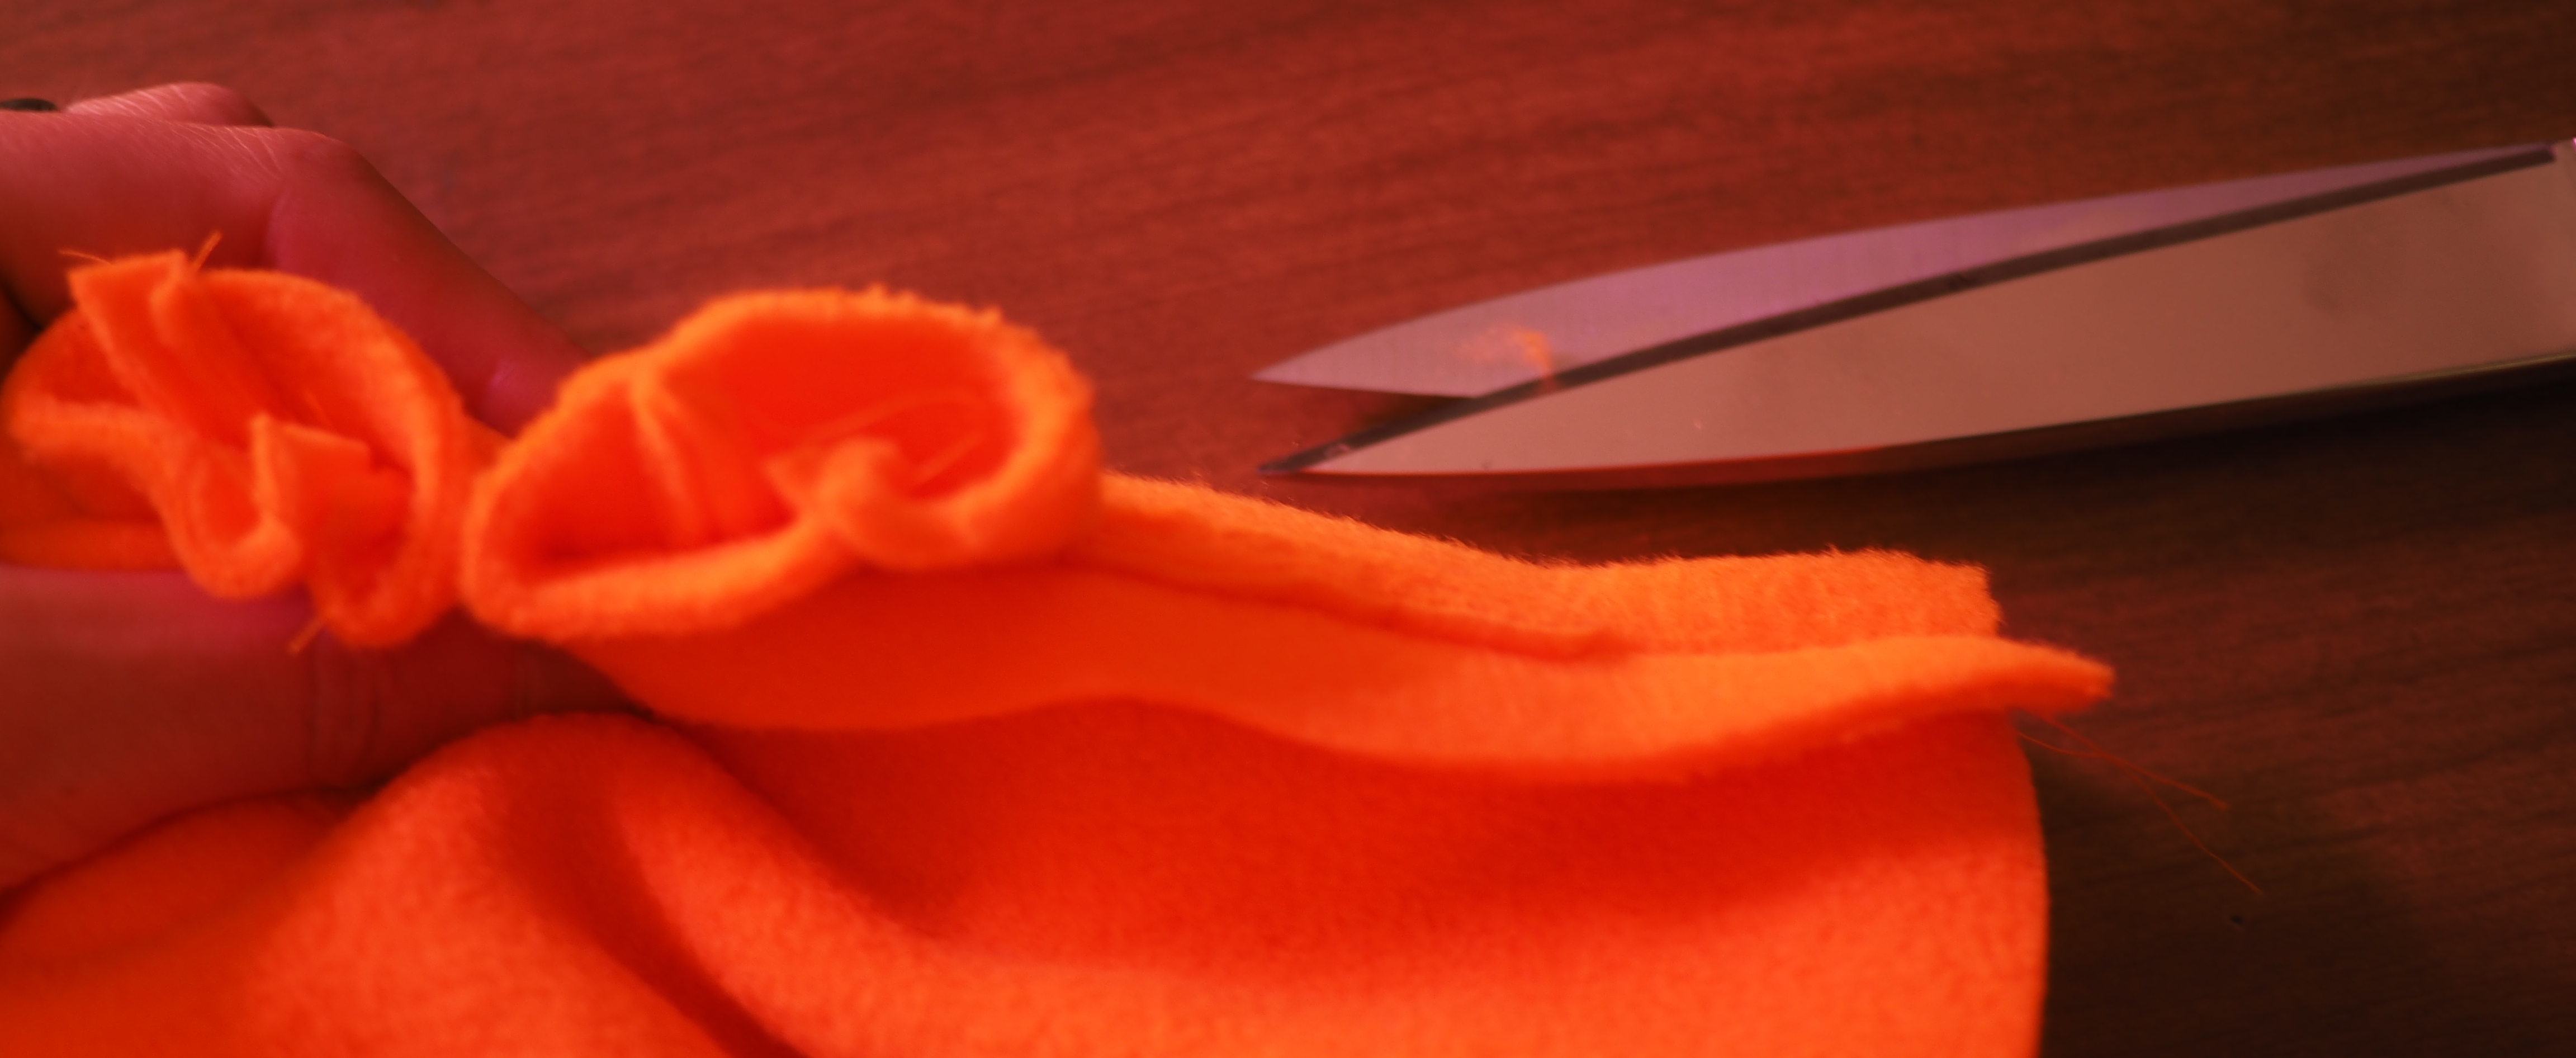
Now that the lining is sewn, let's sew 10 little legs. Grab that big rectangular strip we cut out at the very beginning, and sew its layers together into a bunch of little triangles with open bottoms. Then cut them apart and turn them inside out to get legs. Here's how I did those steps:
Those little legs should have taken up maybe 1/3 of big rectangular strip. With the rest of it, let's make some spines to go across Ferris's back. They're little triangles, wider than the legs, sewn up the same way.
Now put those spines onto one of the outside hat pieces. Leave some room at the bottom, because that's where we'll attach the claws that we'll make later. The spines will stick toward the face when you pin them out, so when the whole thing turns right-side-out after sewing they'll stick out.
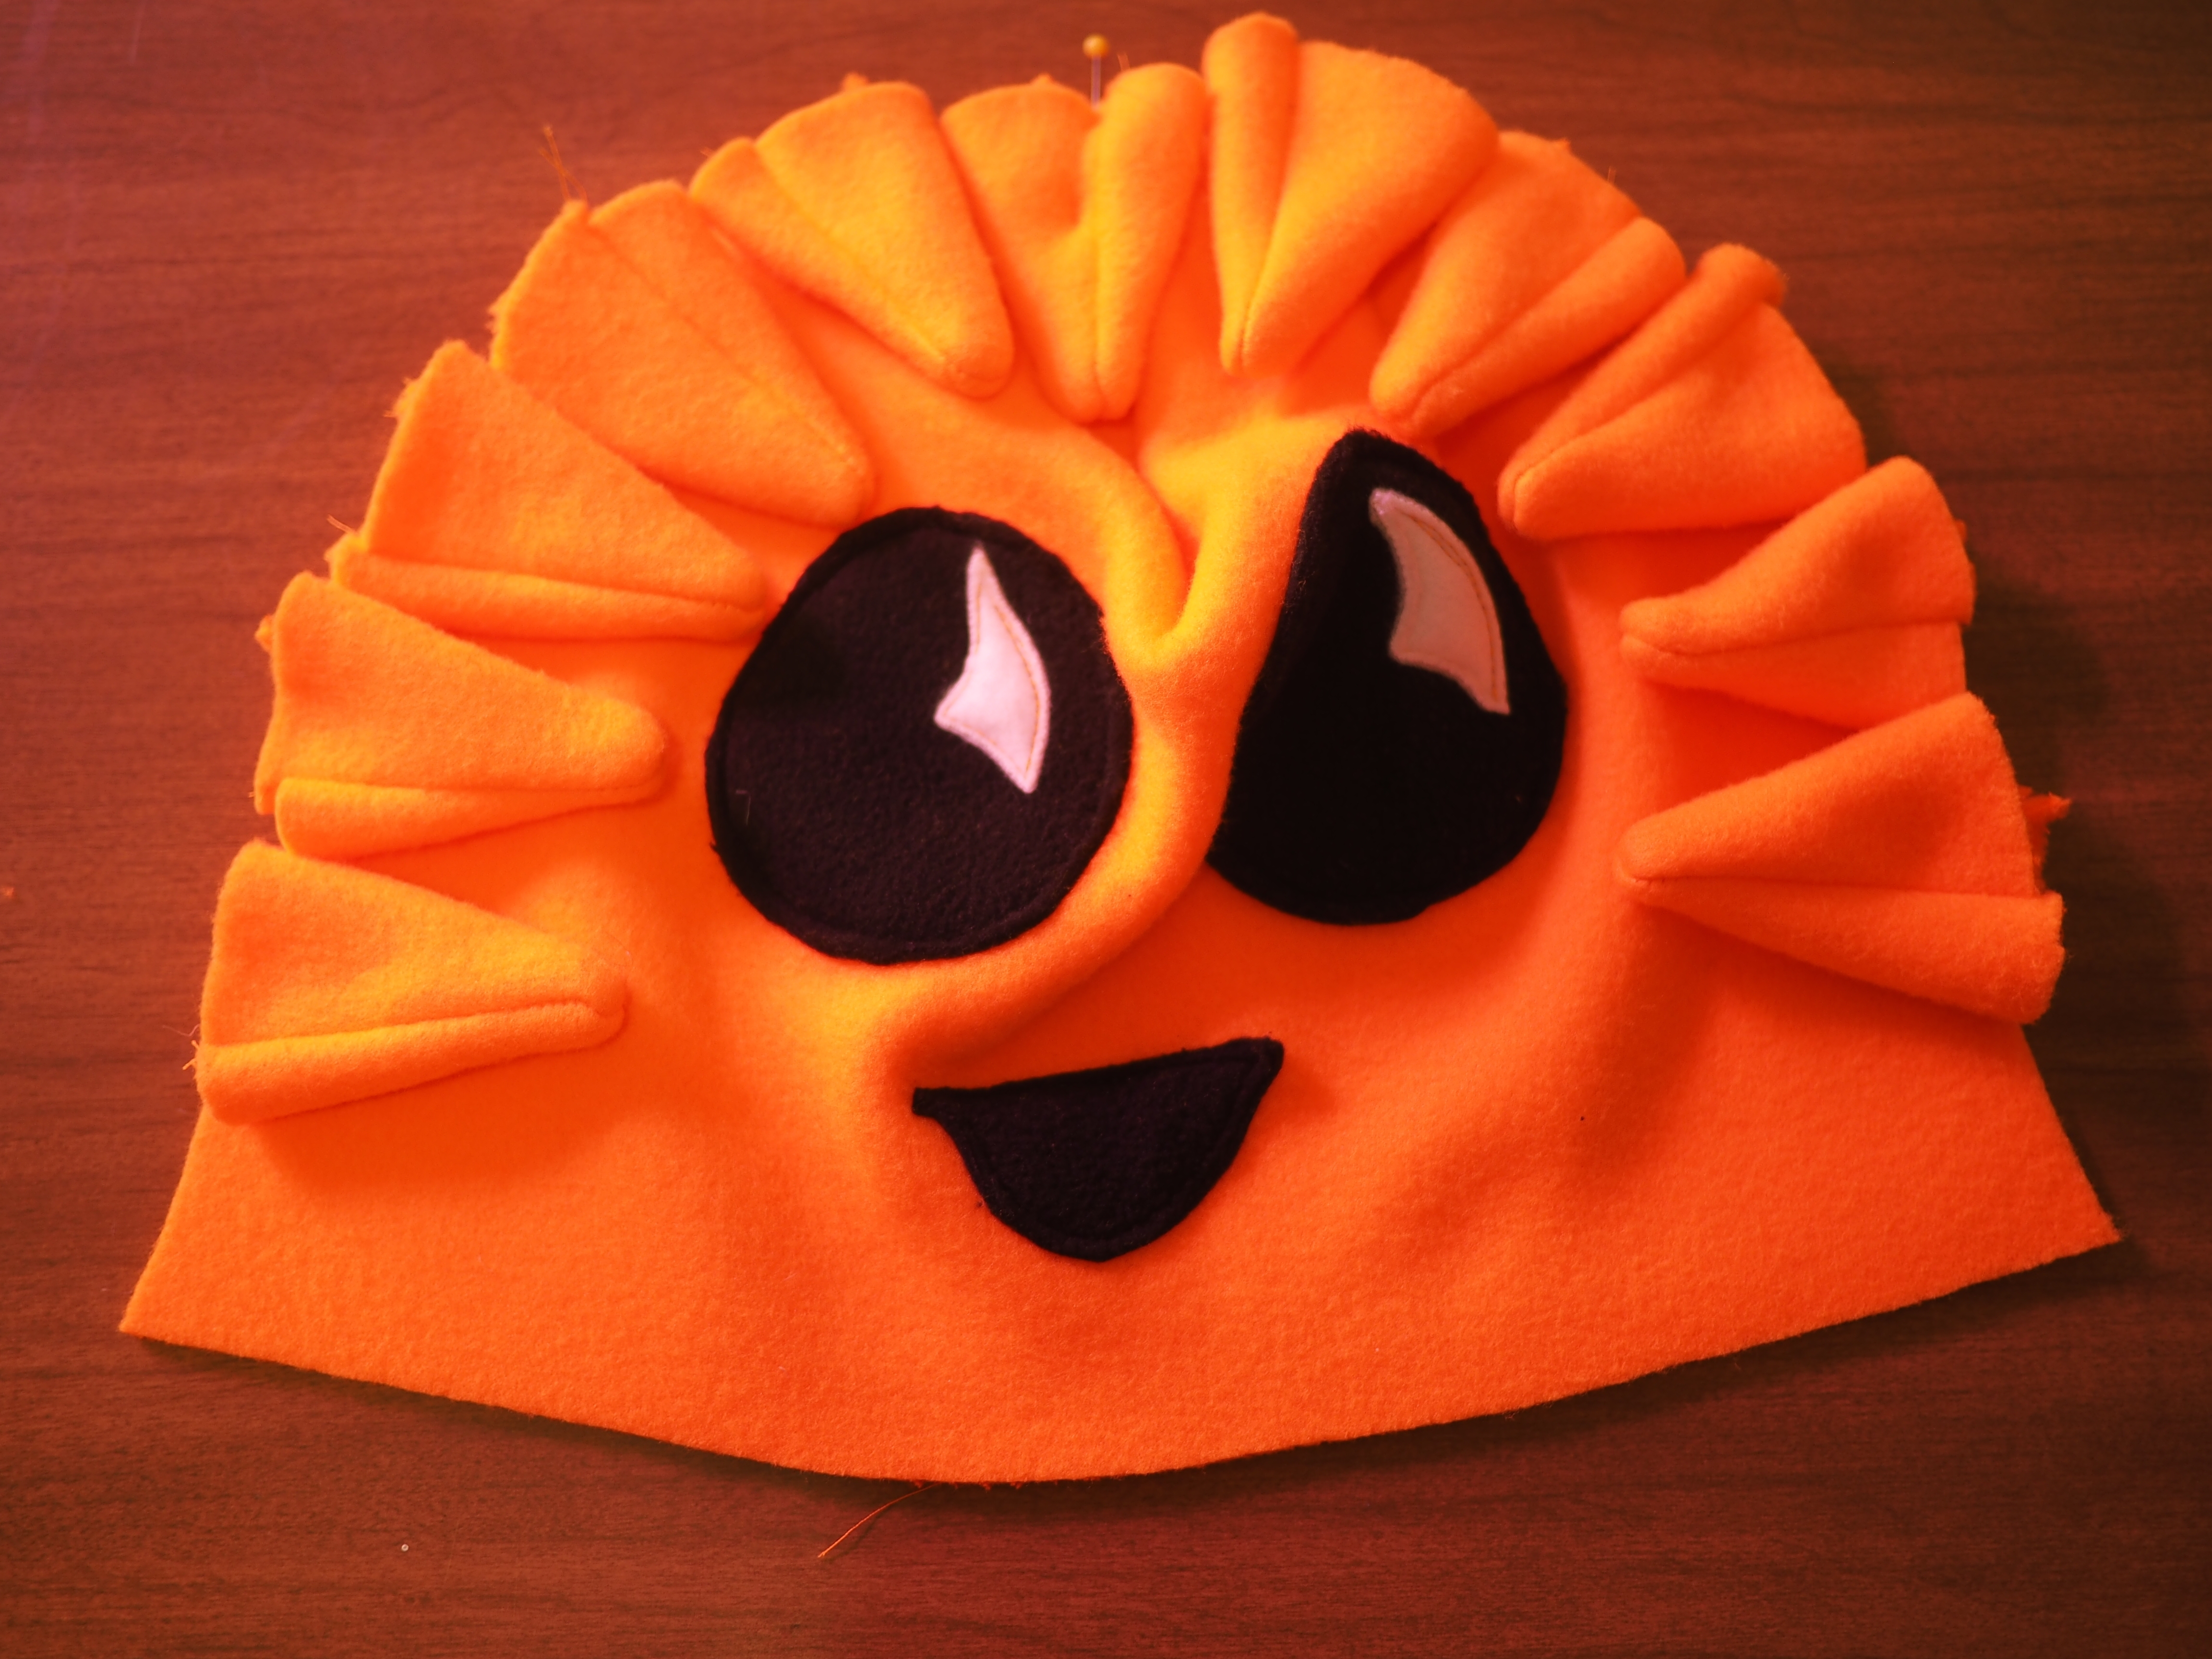
Put the back of the outside onto this spine sandwich you're building. Make sure the seam that sticks out is on the outside, because the outsides of this sandwich will end up inside the hat.
Pin and sew around the edge:
Note how the bottoms of the spines make the seam very bulky. Trim them closer to the seam, if you're using a fabric which doesn't fray, such as polar fleece.
The outer layer of the hat is complete!
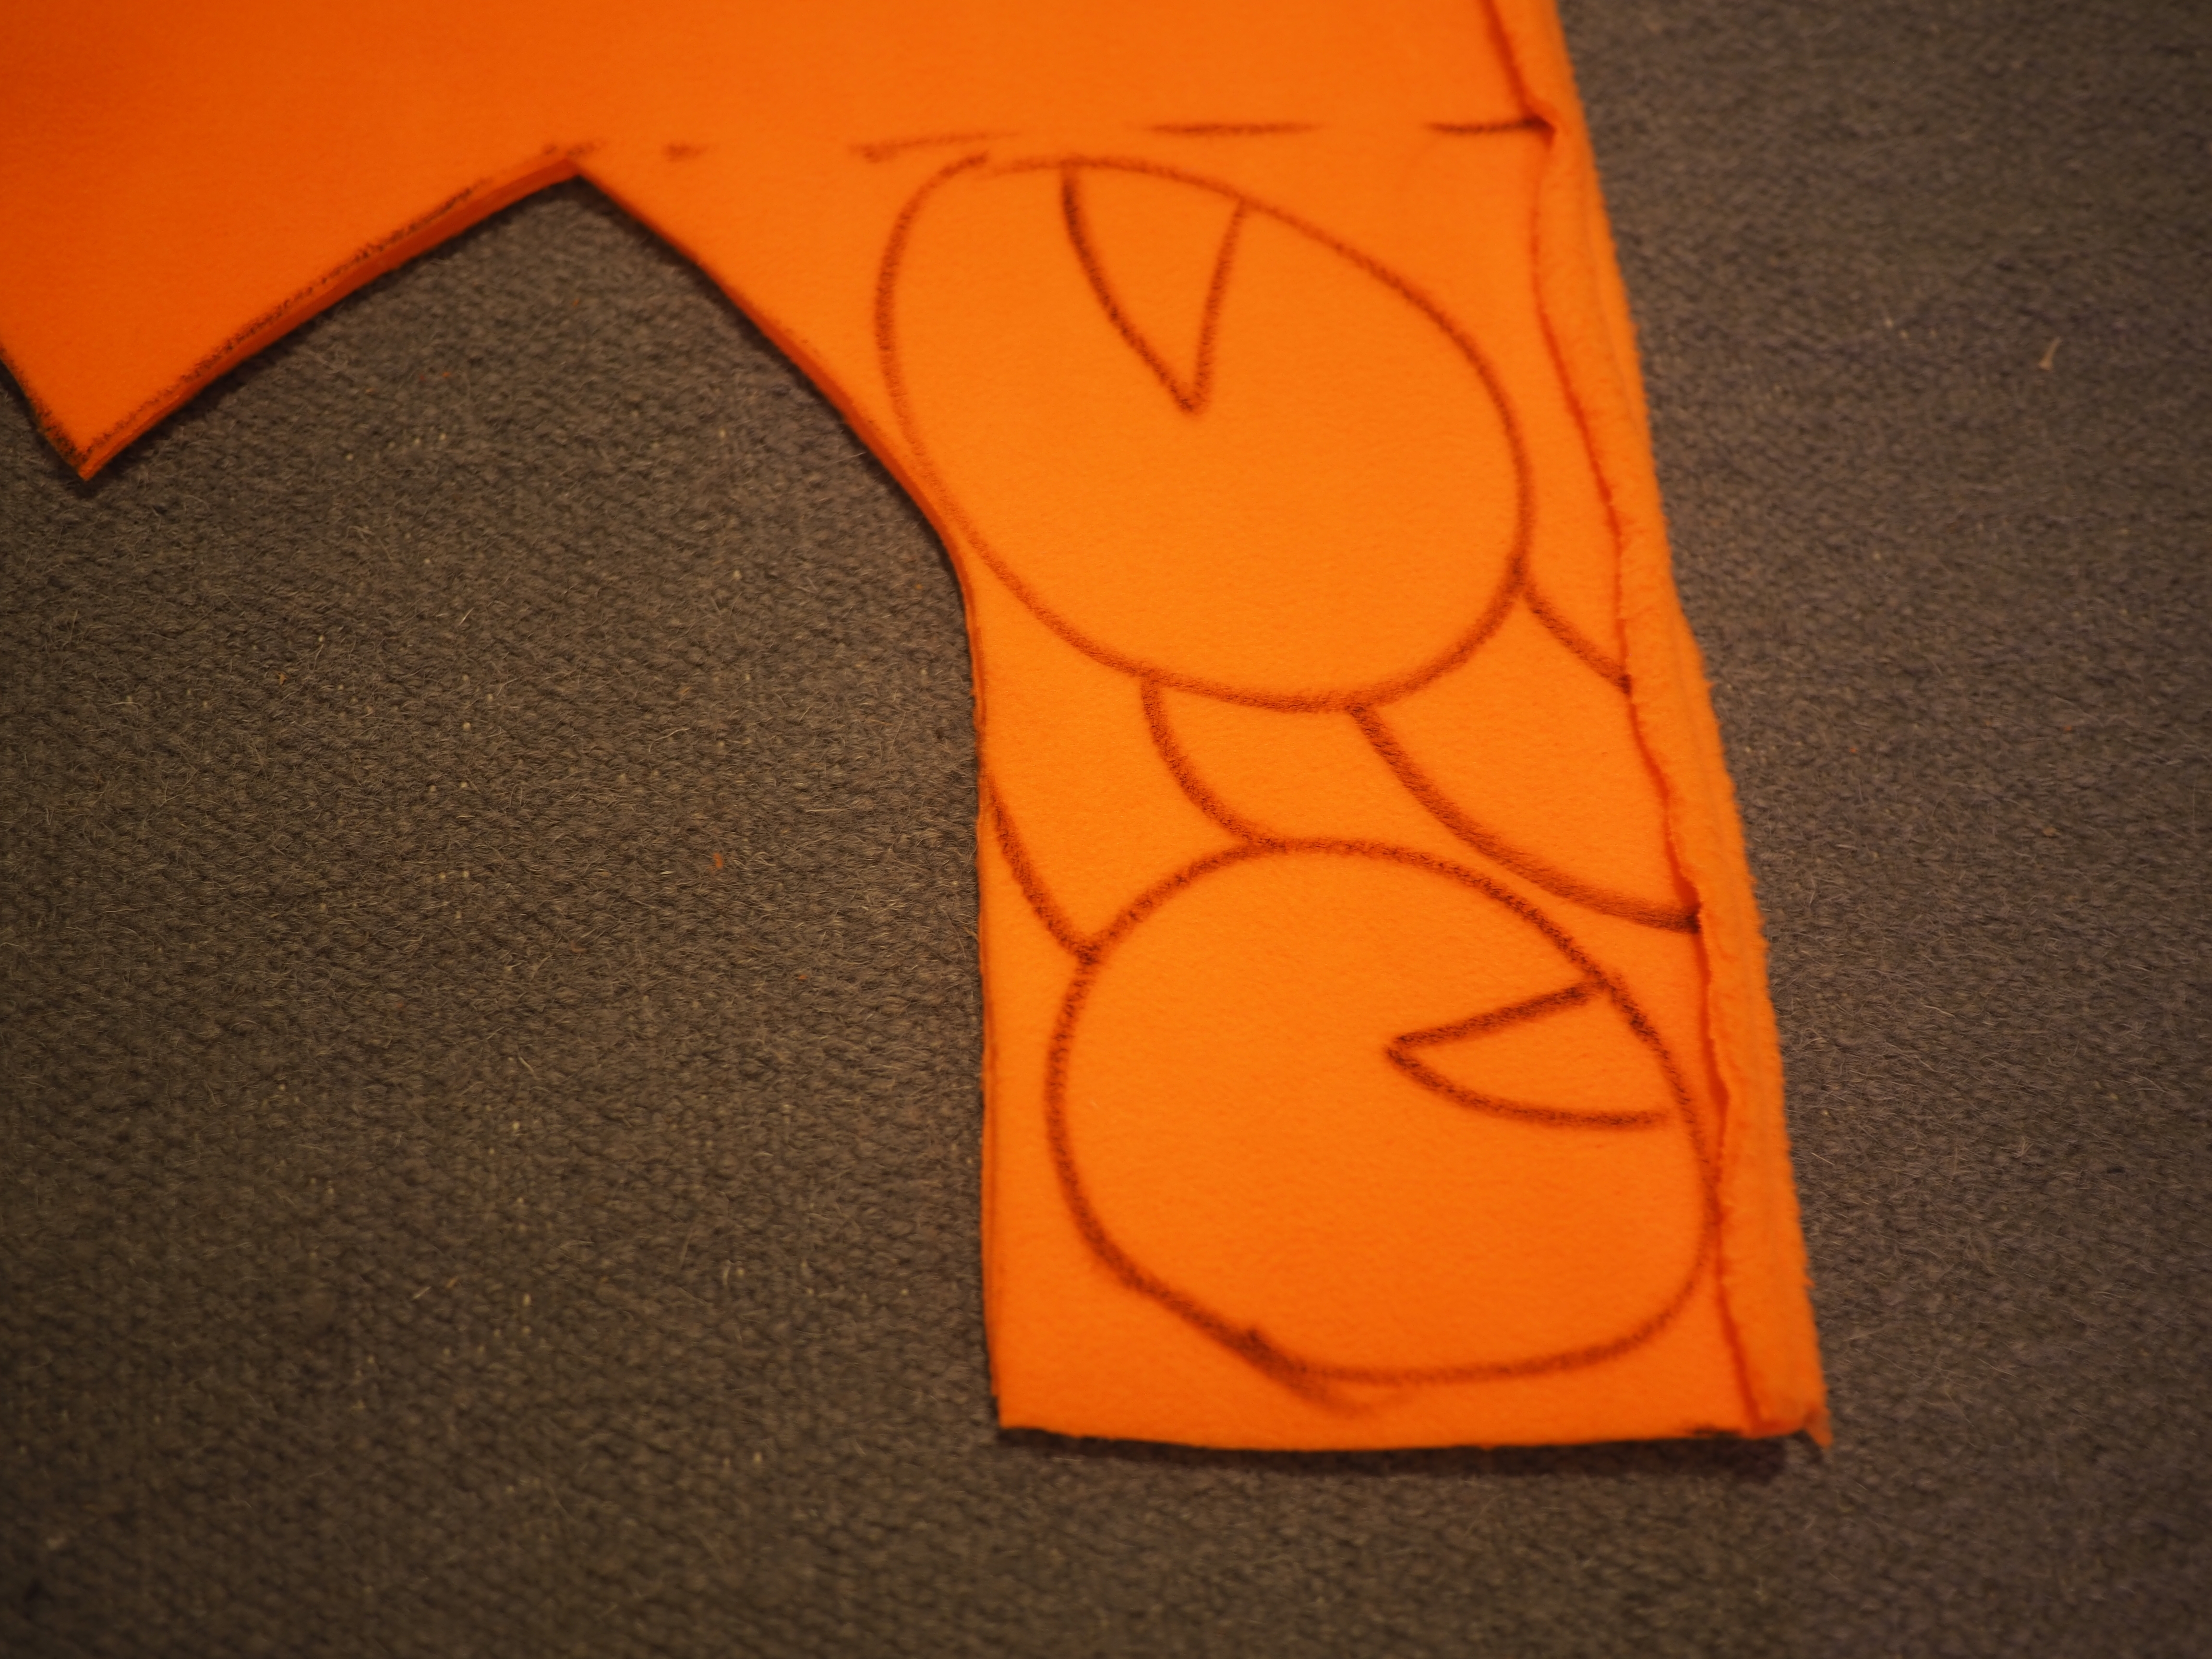
At this point, we remember that Ferris has some claws that we haven't accounted for yet. That's ok because there was some extra fabric left over when we cut out the lining and outer for the hat. On that extra fabric, draw two claws. A claw is just an oval with a pie slice misisng, plus a little stem for the arm. Make sure the arms are wide enough to turn the claw inside out through later. It's ok to draw them straight onto the fabric with a pen, since the pen marks will end up inside the claw later.
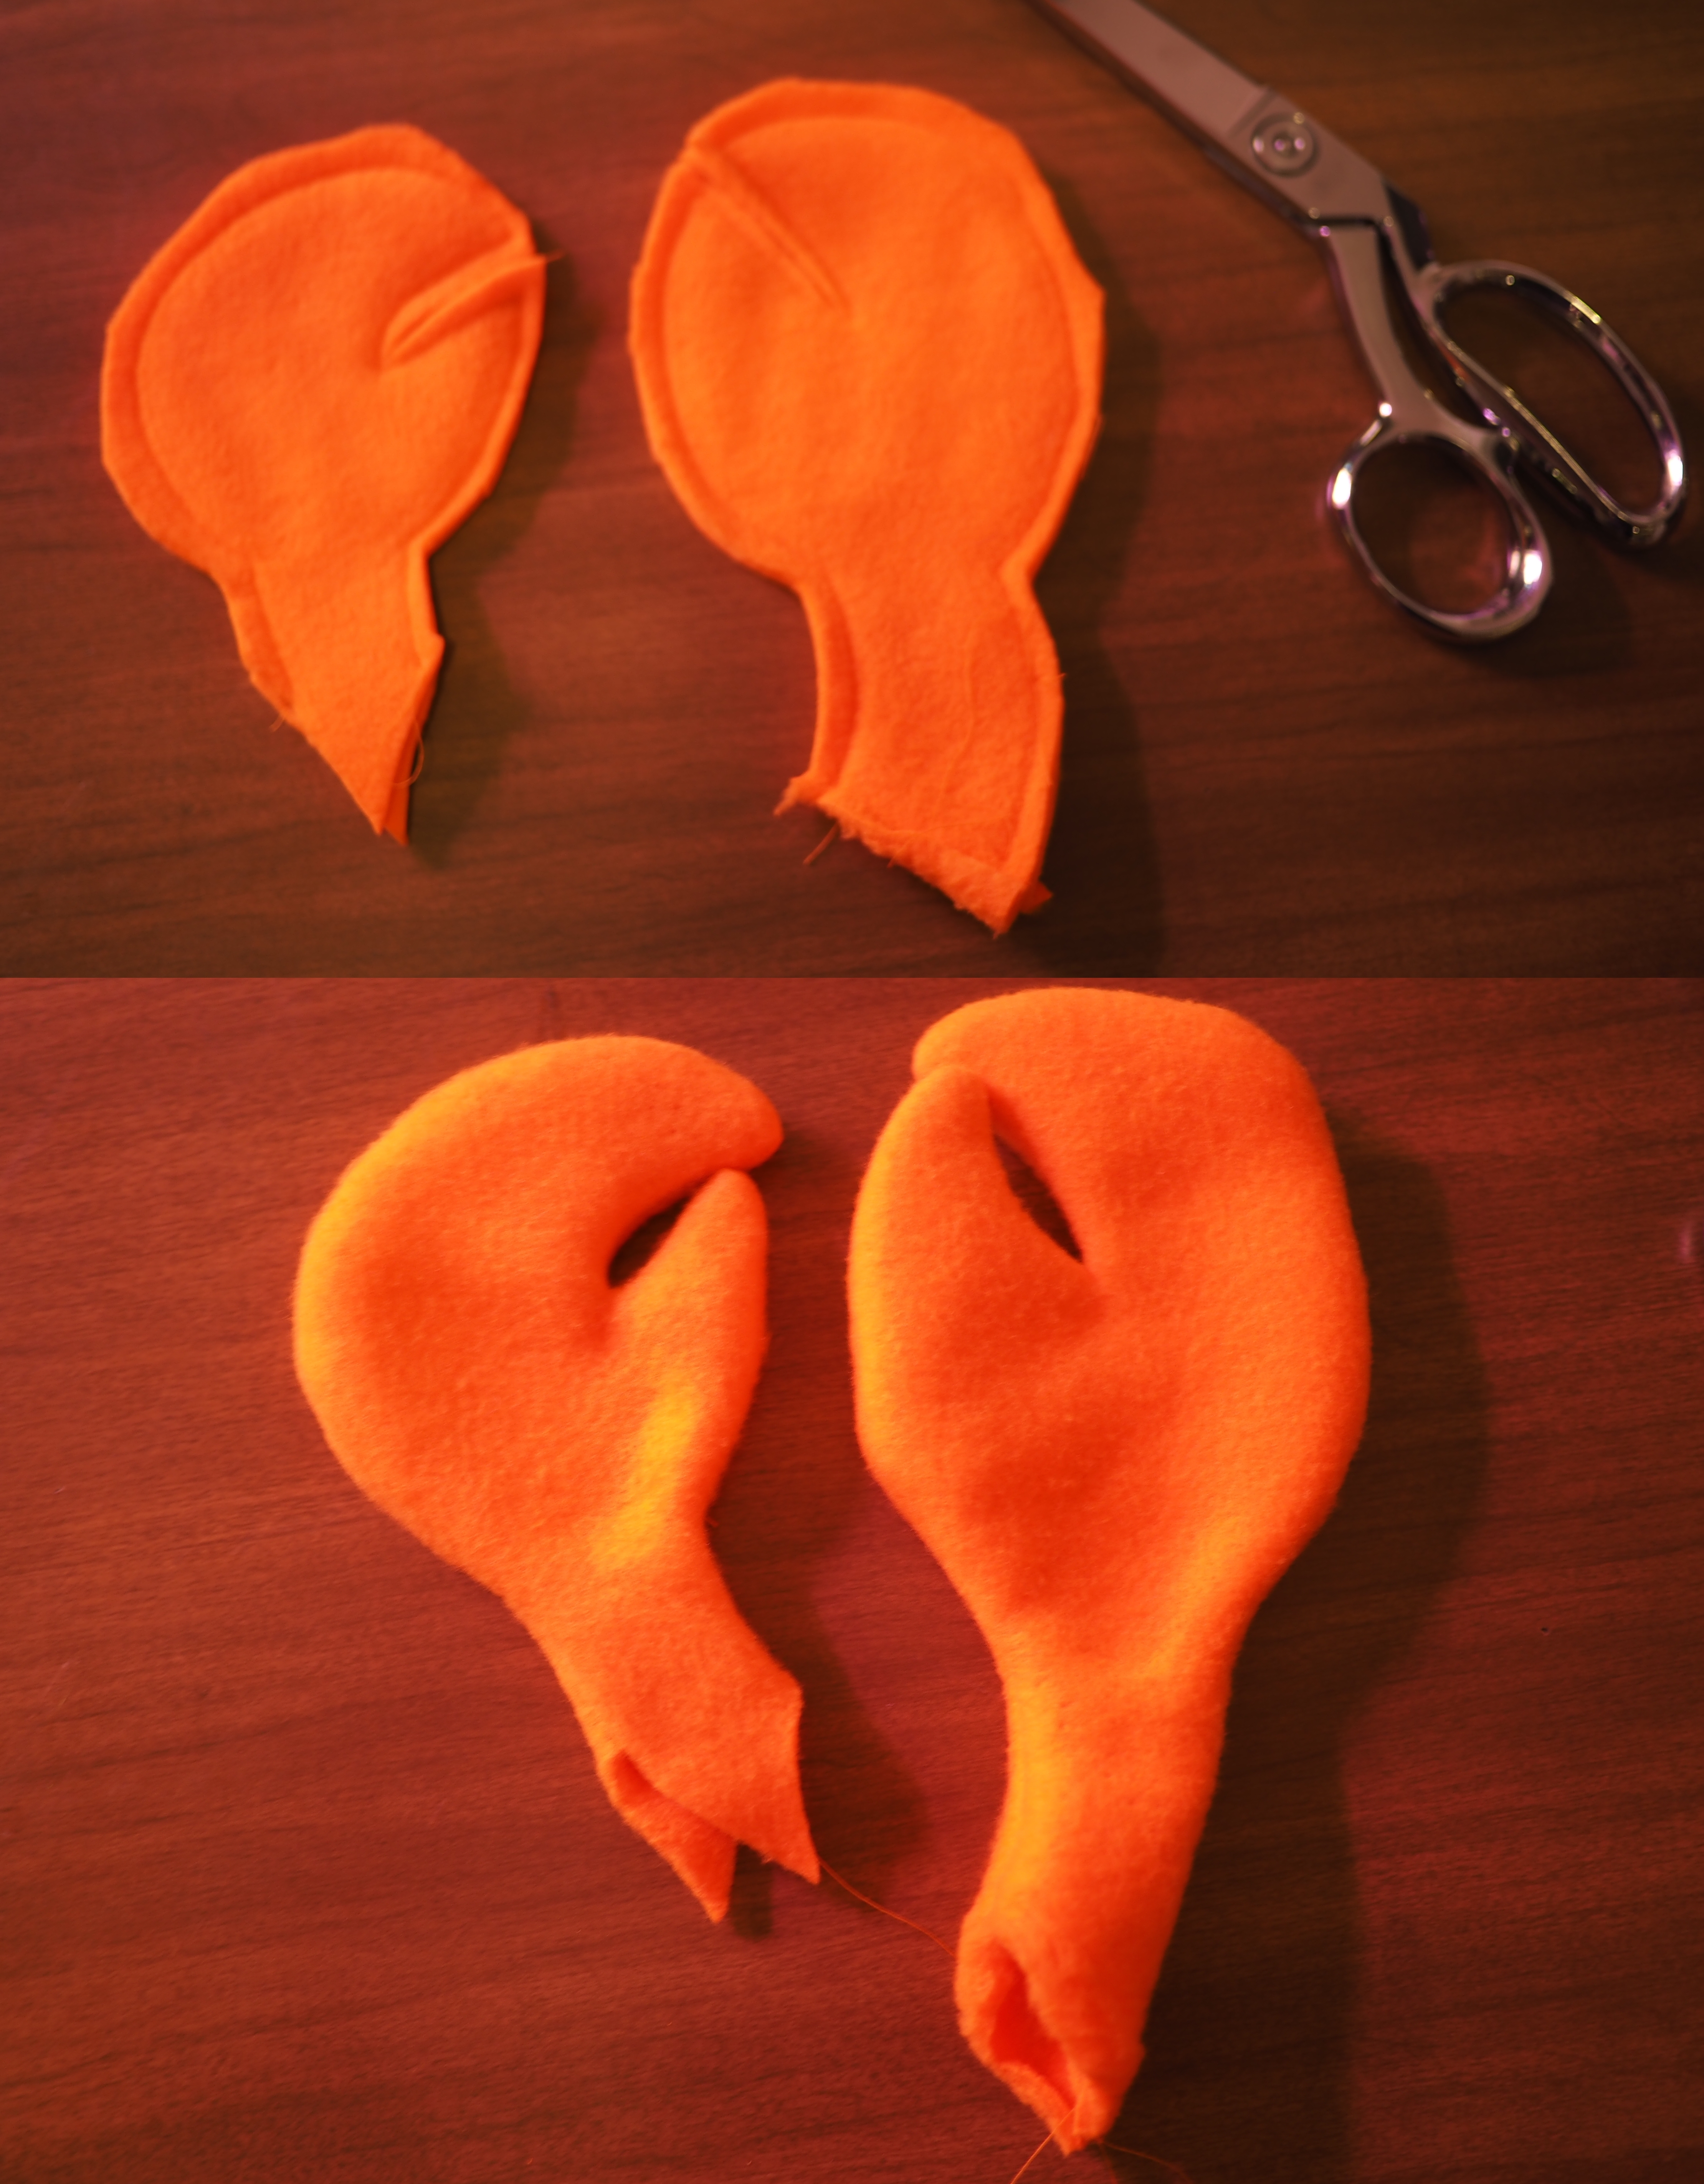
Then sew around the claws. It doesn't have to match the pen lines exactly; nobody will ever know (except the whole internet in this case). Here are the front and back of the cloth sandwich that I sewed claws with:

Cut them out, being careful not to snip through the stitching when cutting the bit that sticks inward, and turn them right-side out:
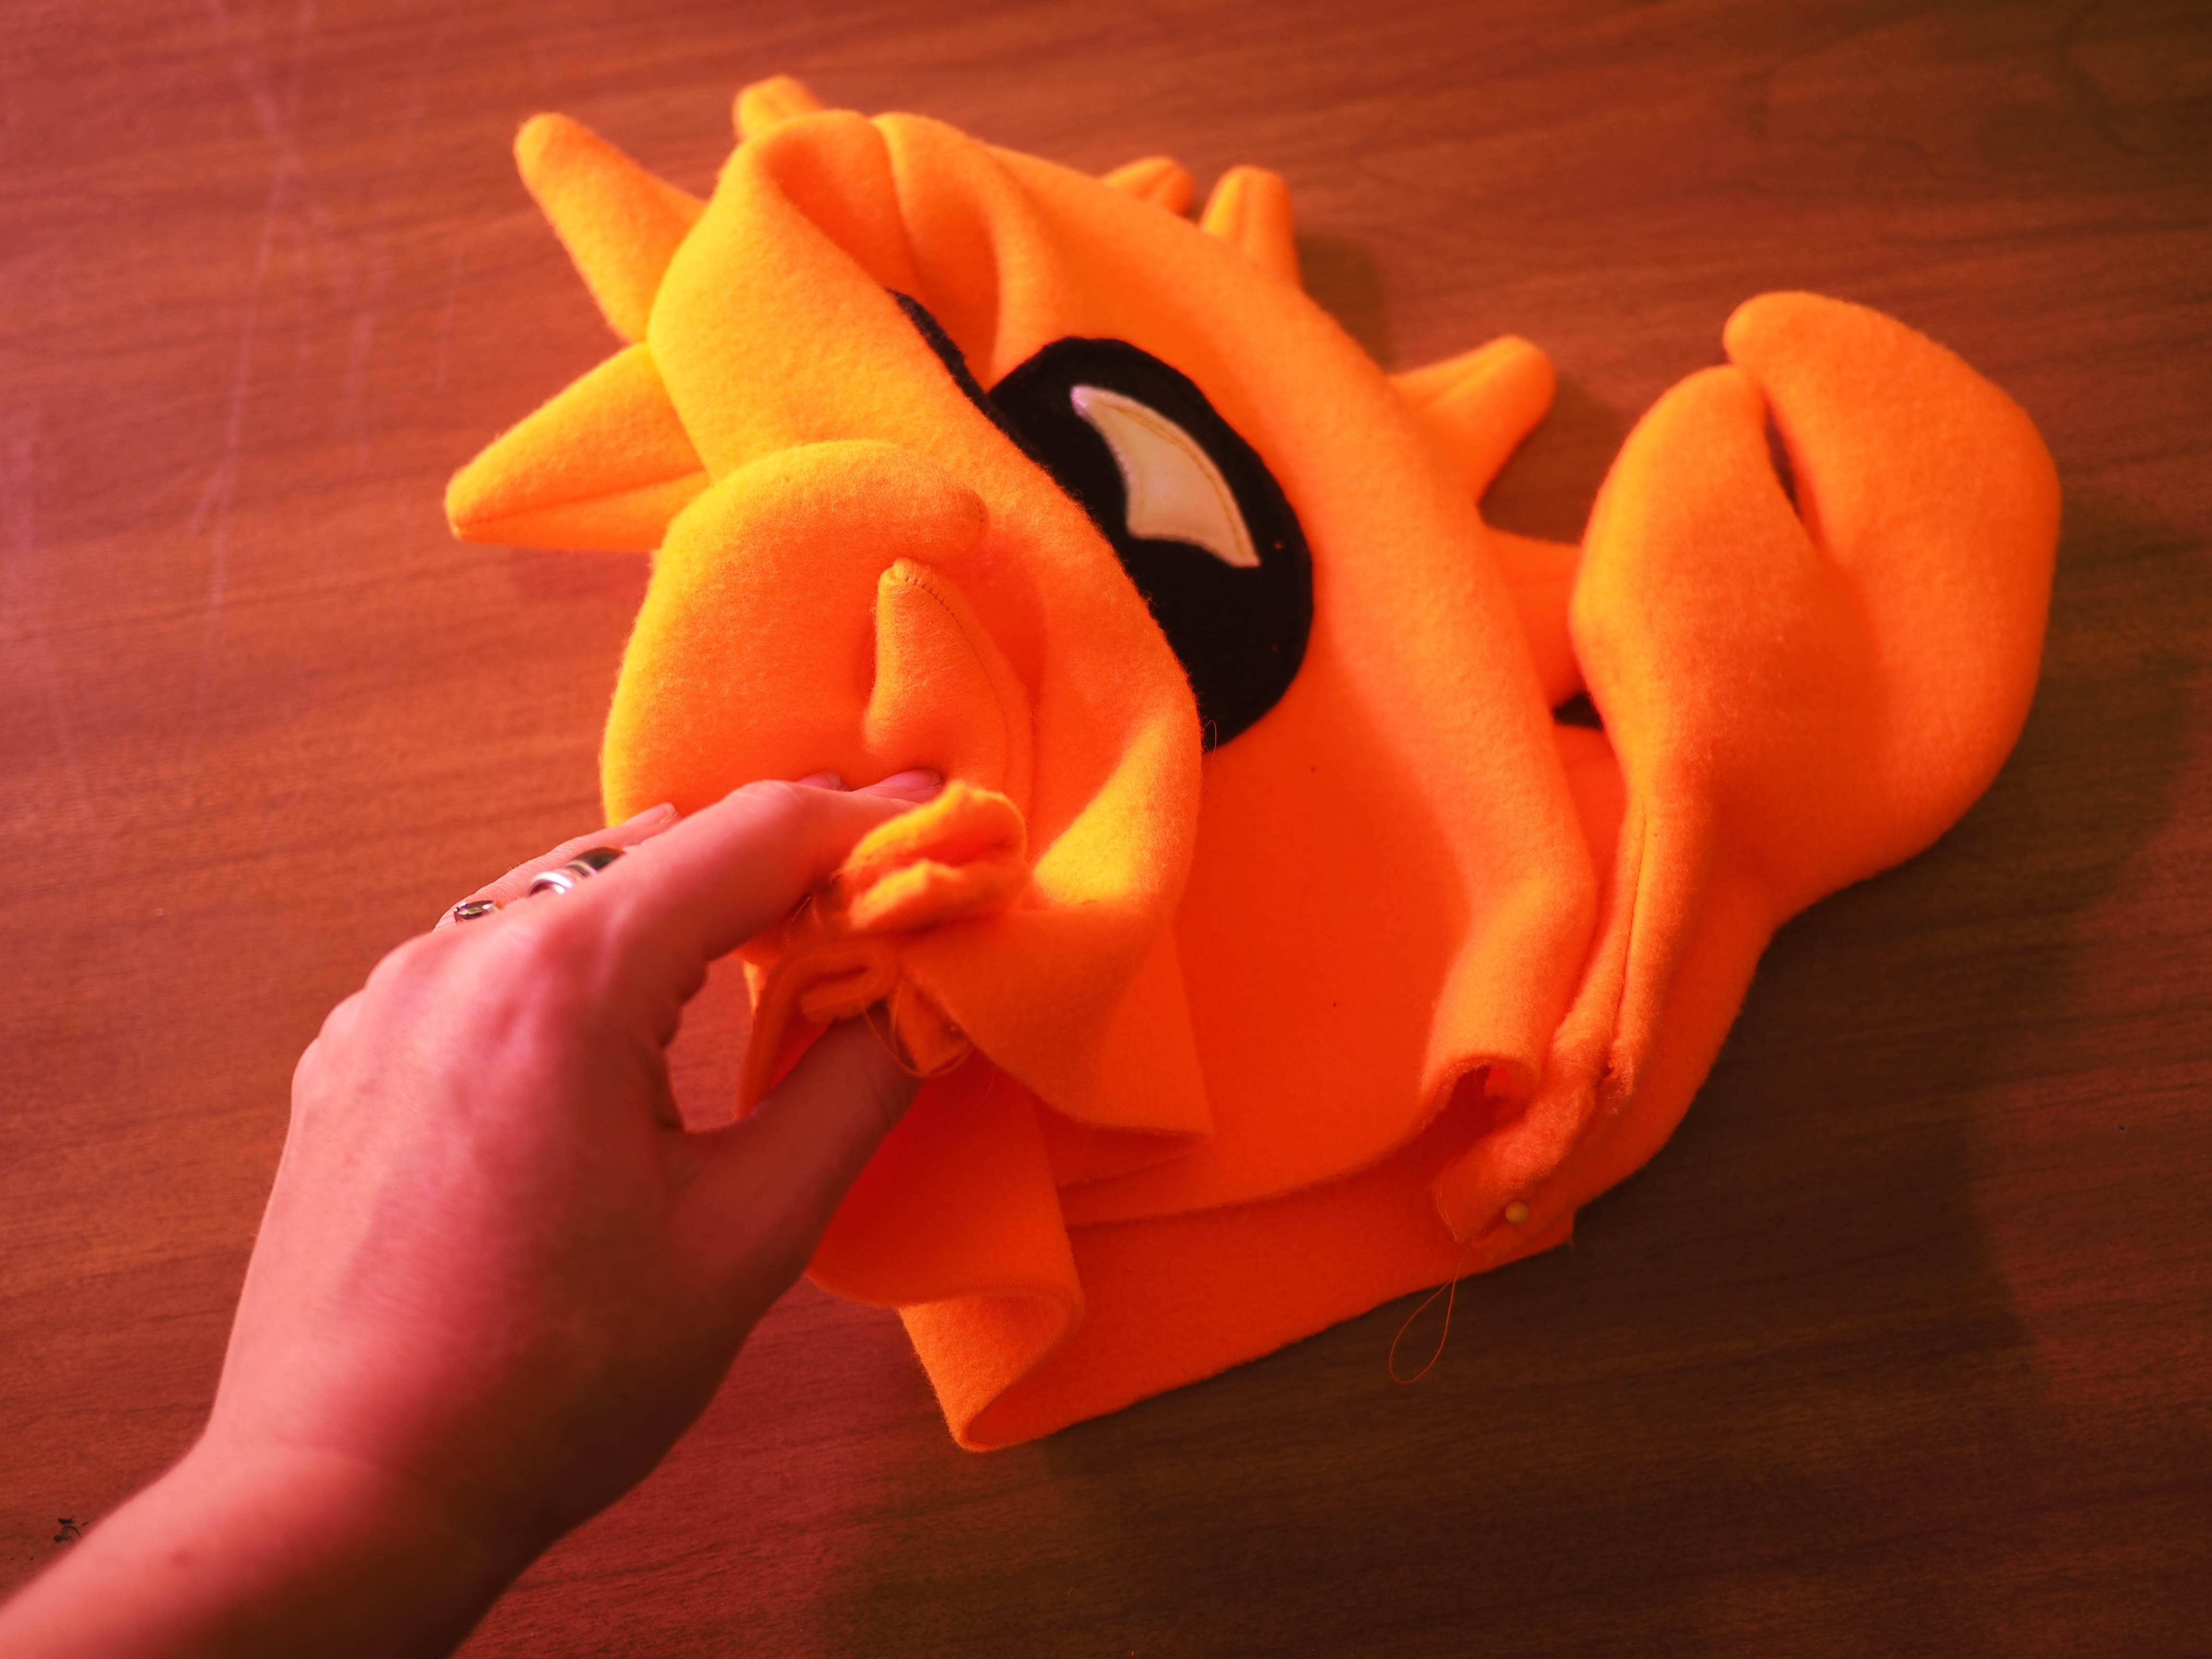
Now it's time to attach the liner and the hat outer together. First we need to pin the arms and legs in, making another sandwich kind of like we did with the spines along the back. I like to pin the arms sticking straight up and covering the outer's side seams, like so:
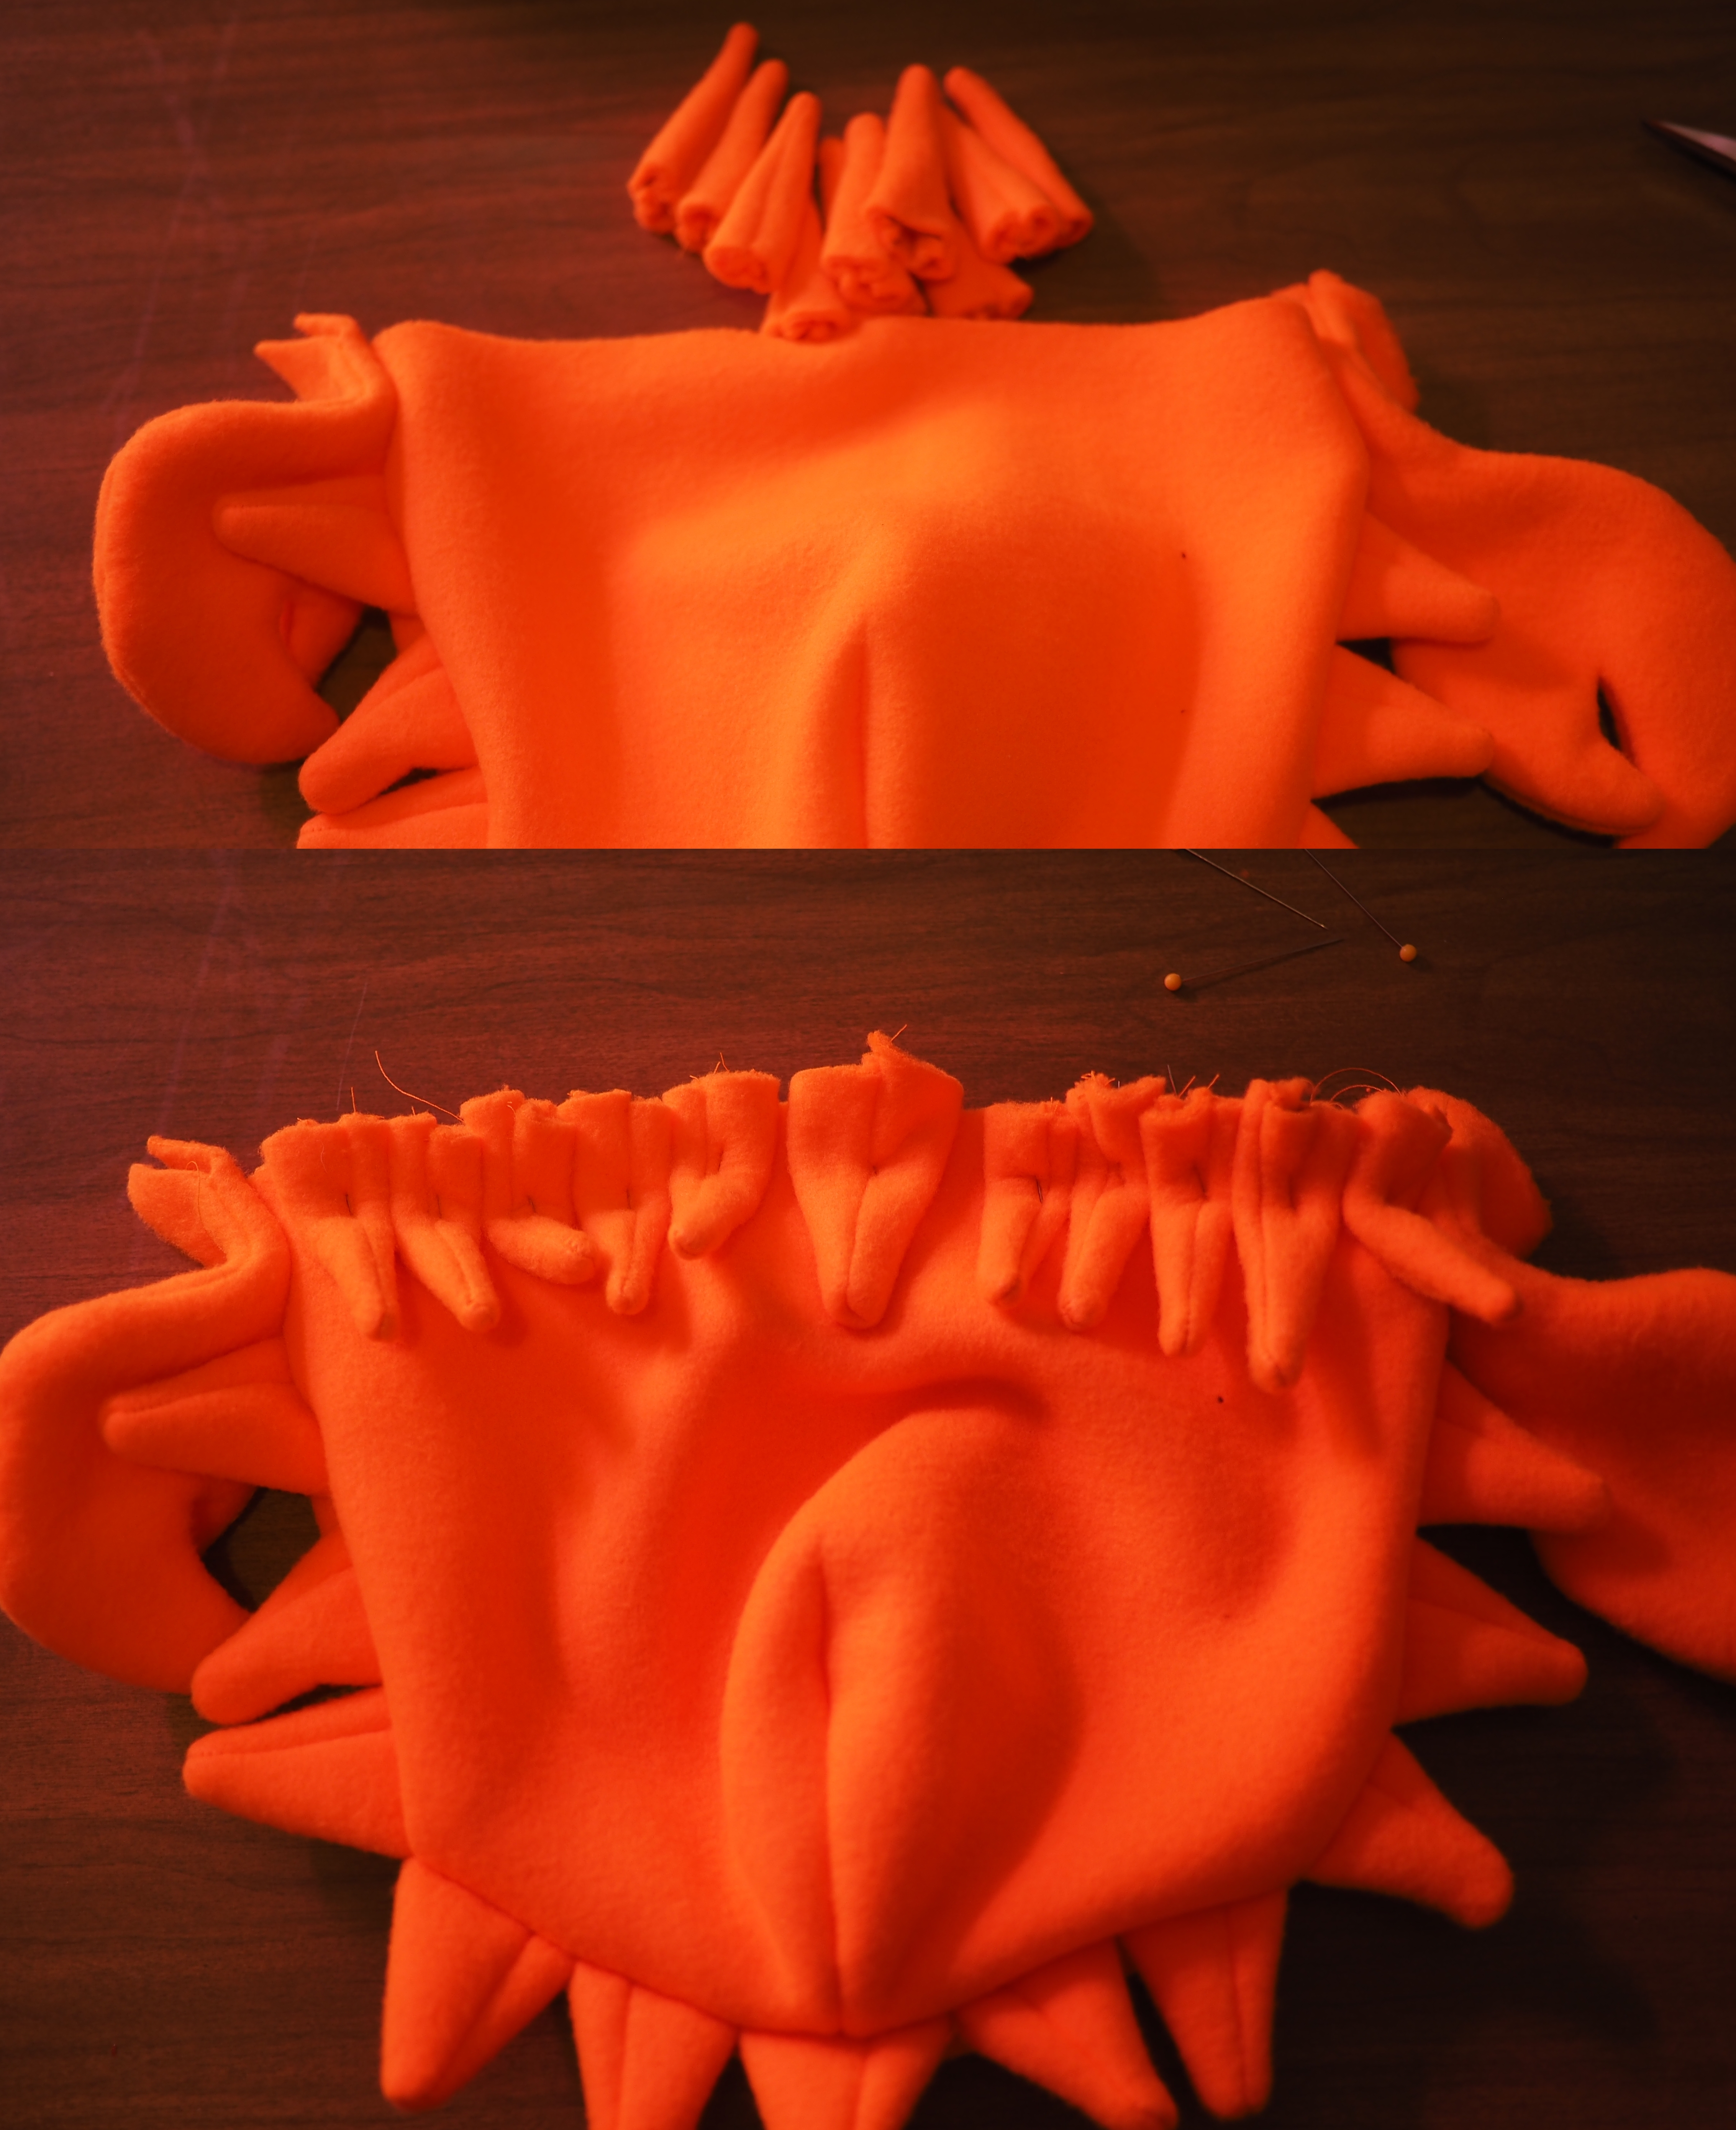
Remember those 10 little legs we sewed earlier? Well, we need those now. And I used an extra spine from when we sewed the spines along Ferris's back, in the center back, as a tail. Pin them on, 5 on each side, like little legs.
And finally, remember that liner we sewed, with a hole in the middle? Go find that one real quick:

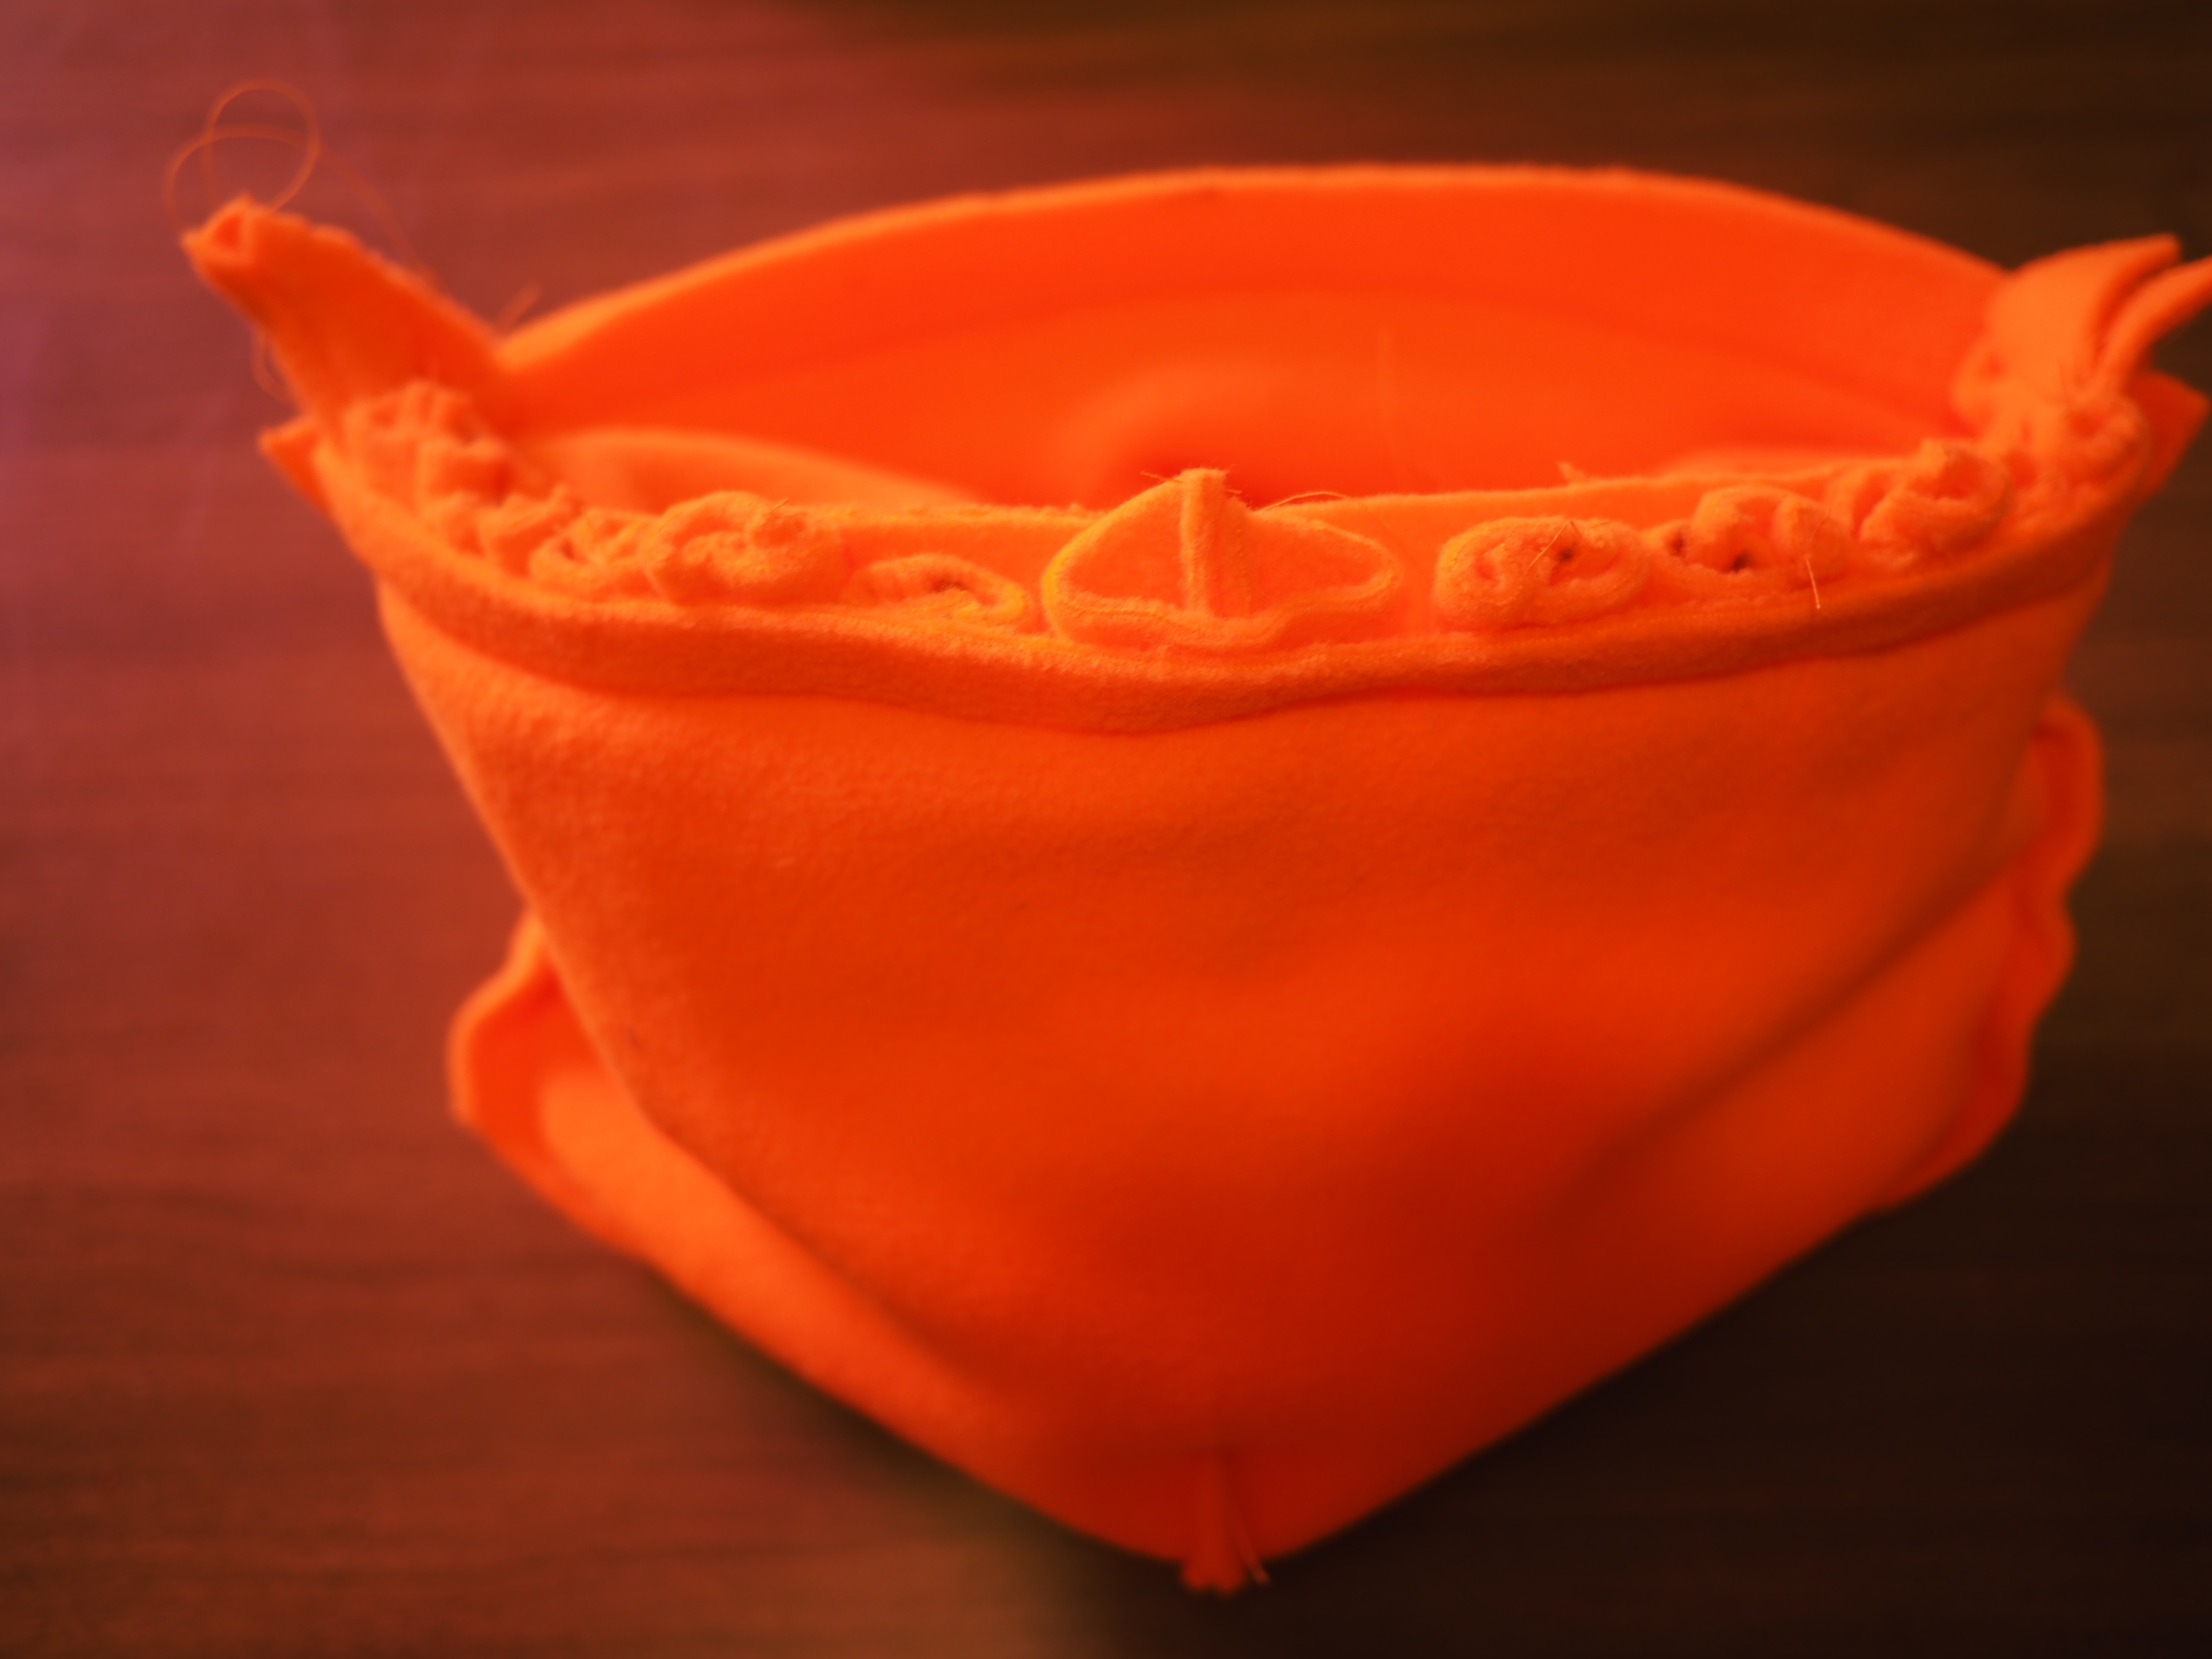
Now we're going to put the whole hat outer inside of the lining, creating Ferris The Bowl. All the pretty sides of things are INSIDE the sandwich, so all the seam allowances are visible.

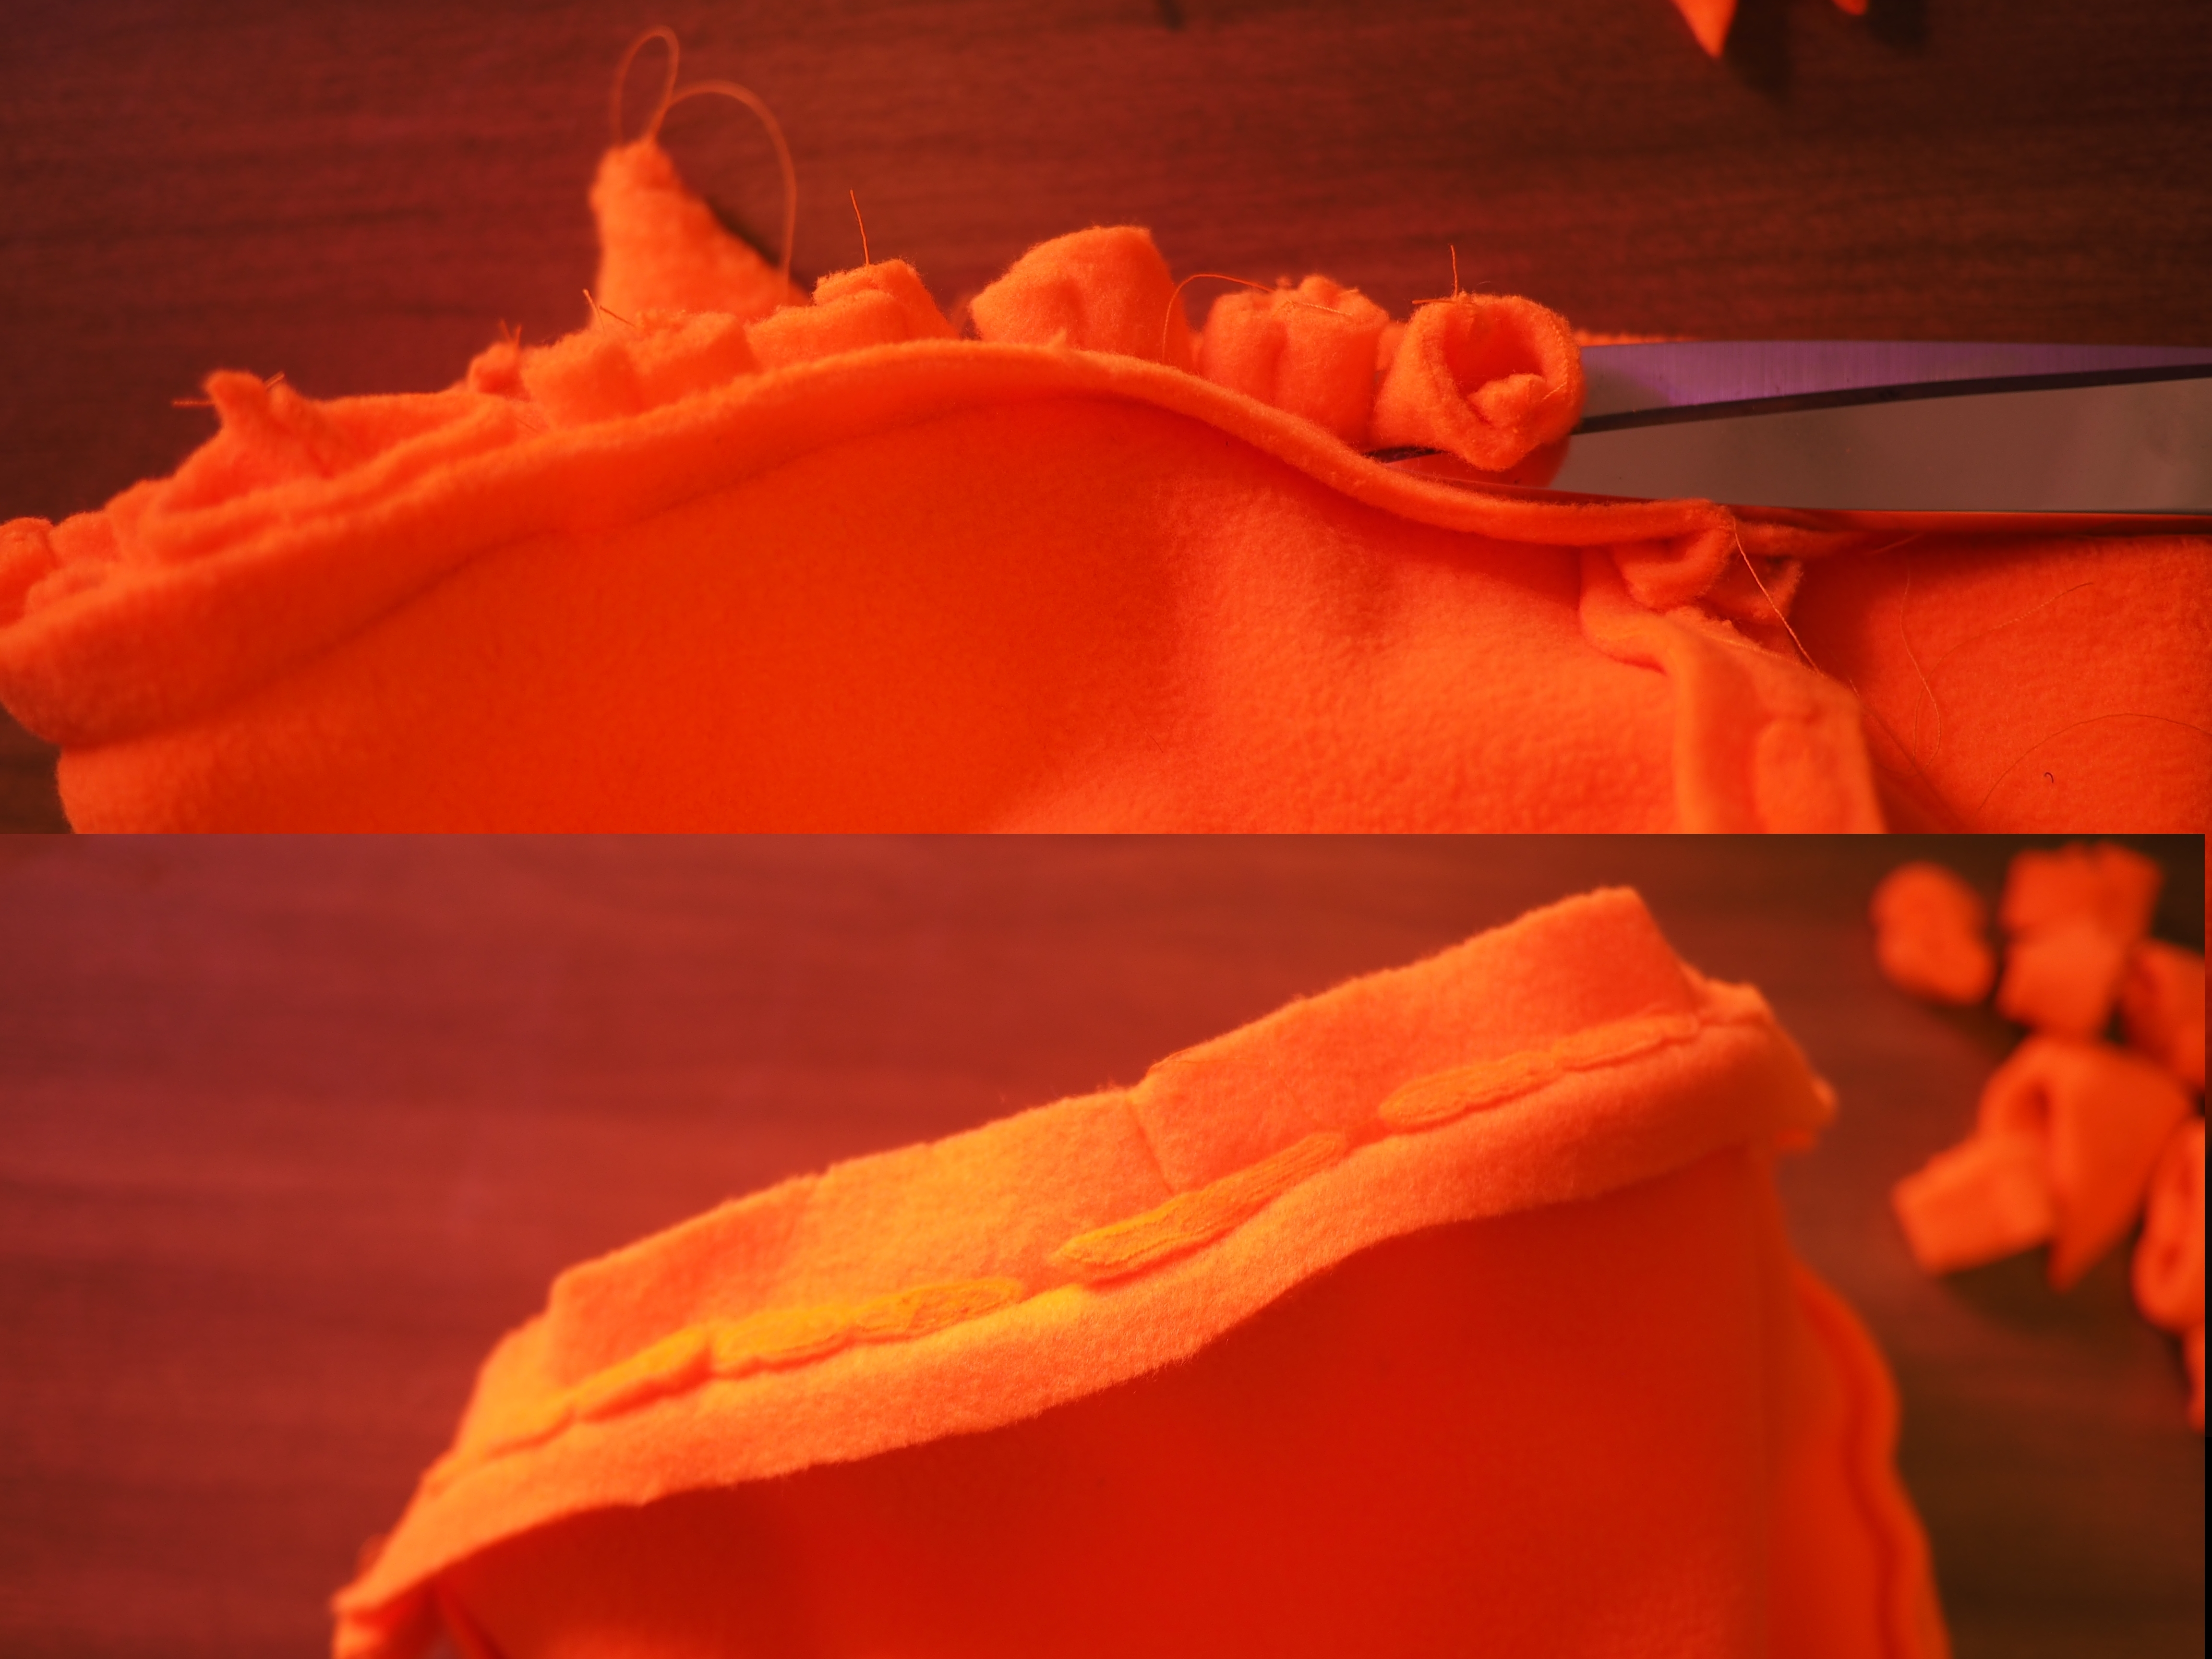
Rearrange your pins to allow sewing, then sew around the entire rim of Ferris The Bowl.
Snip off the extra bits of the legs and stuff, just like we snipped off the extra bits of the spines before, like this:
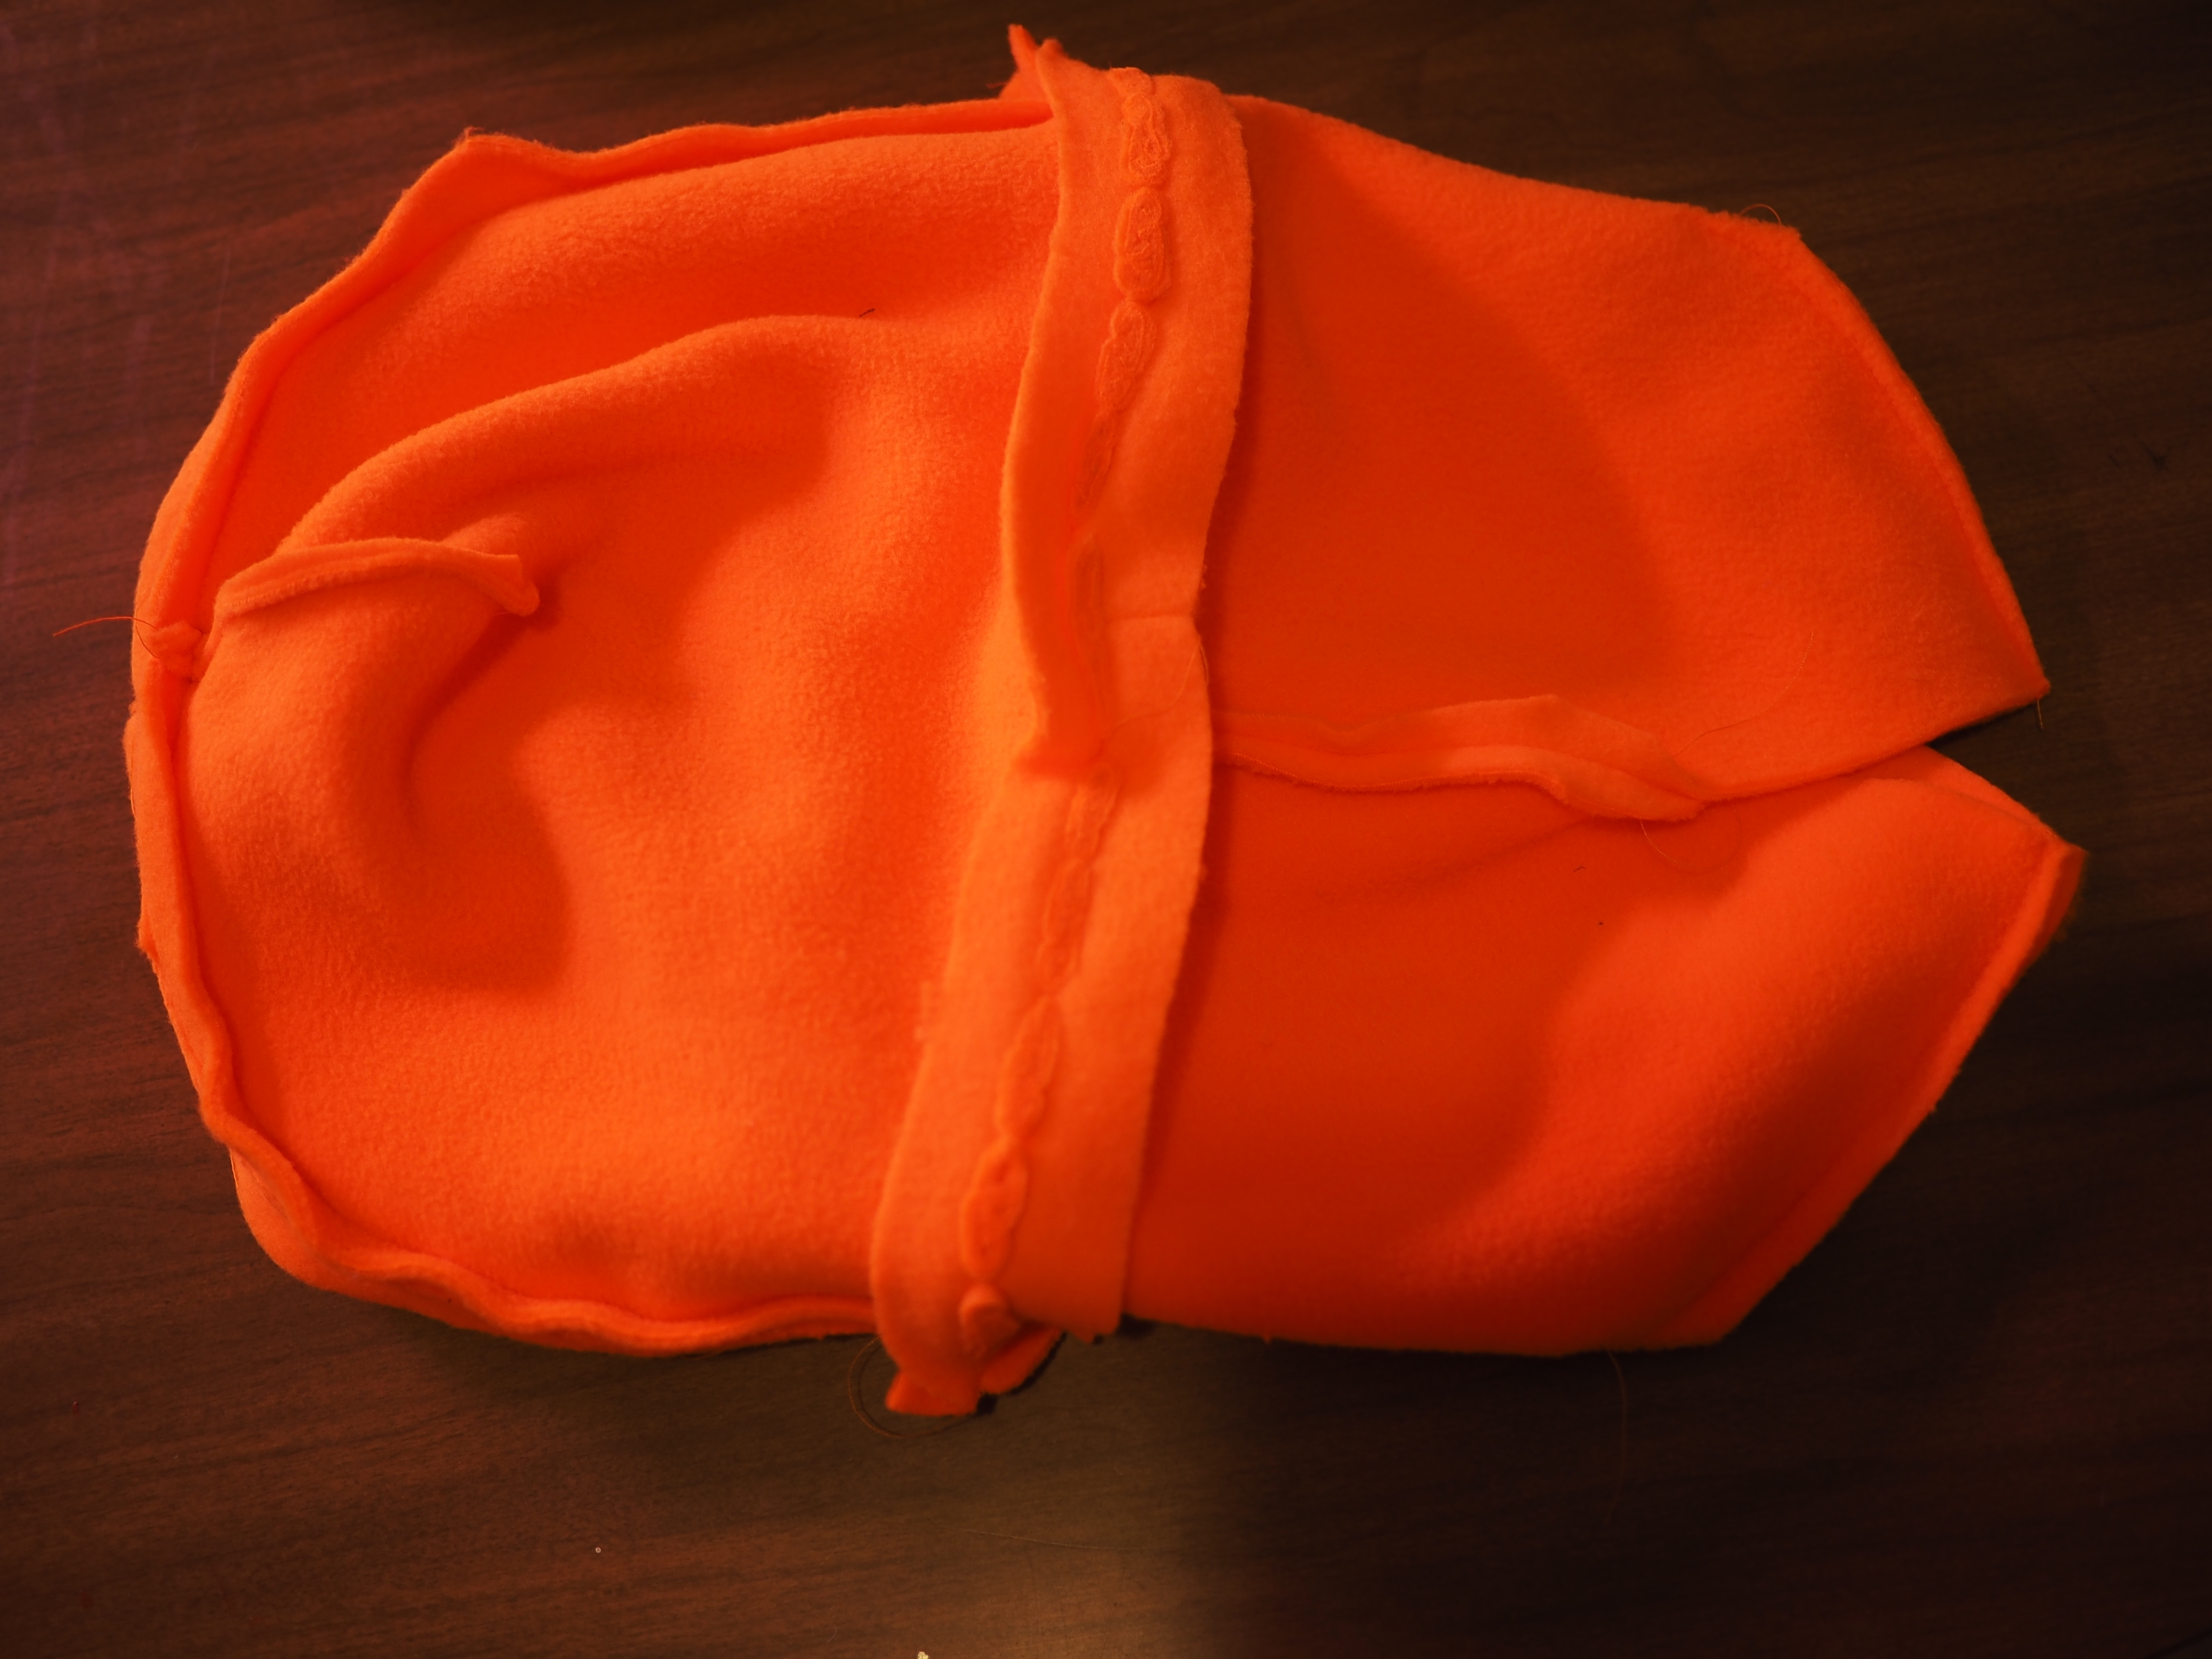
Now Ferris The Bowl is more like Ferris The Football:
Reach in through the hole in the end of Ferris The Football, grab the other end, and pull. First it'll look like this...

And then he'll look like this:
Sew shut that hole in the bottom of the lining...
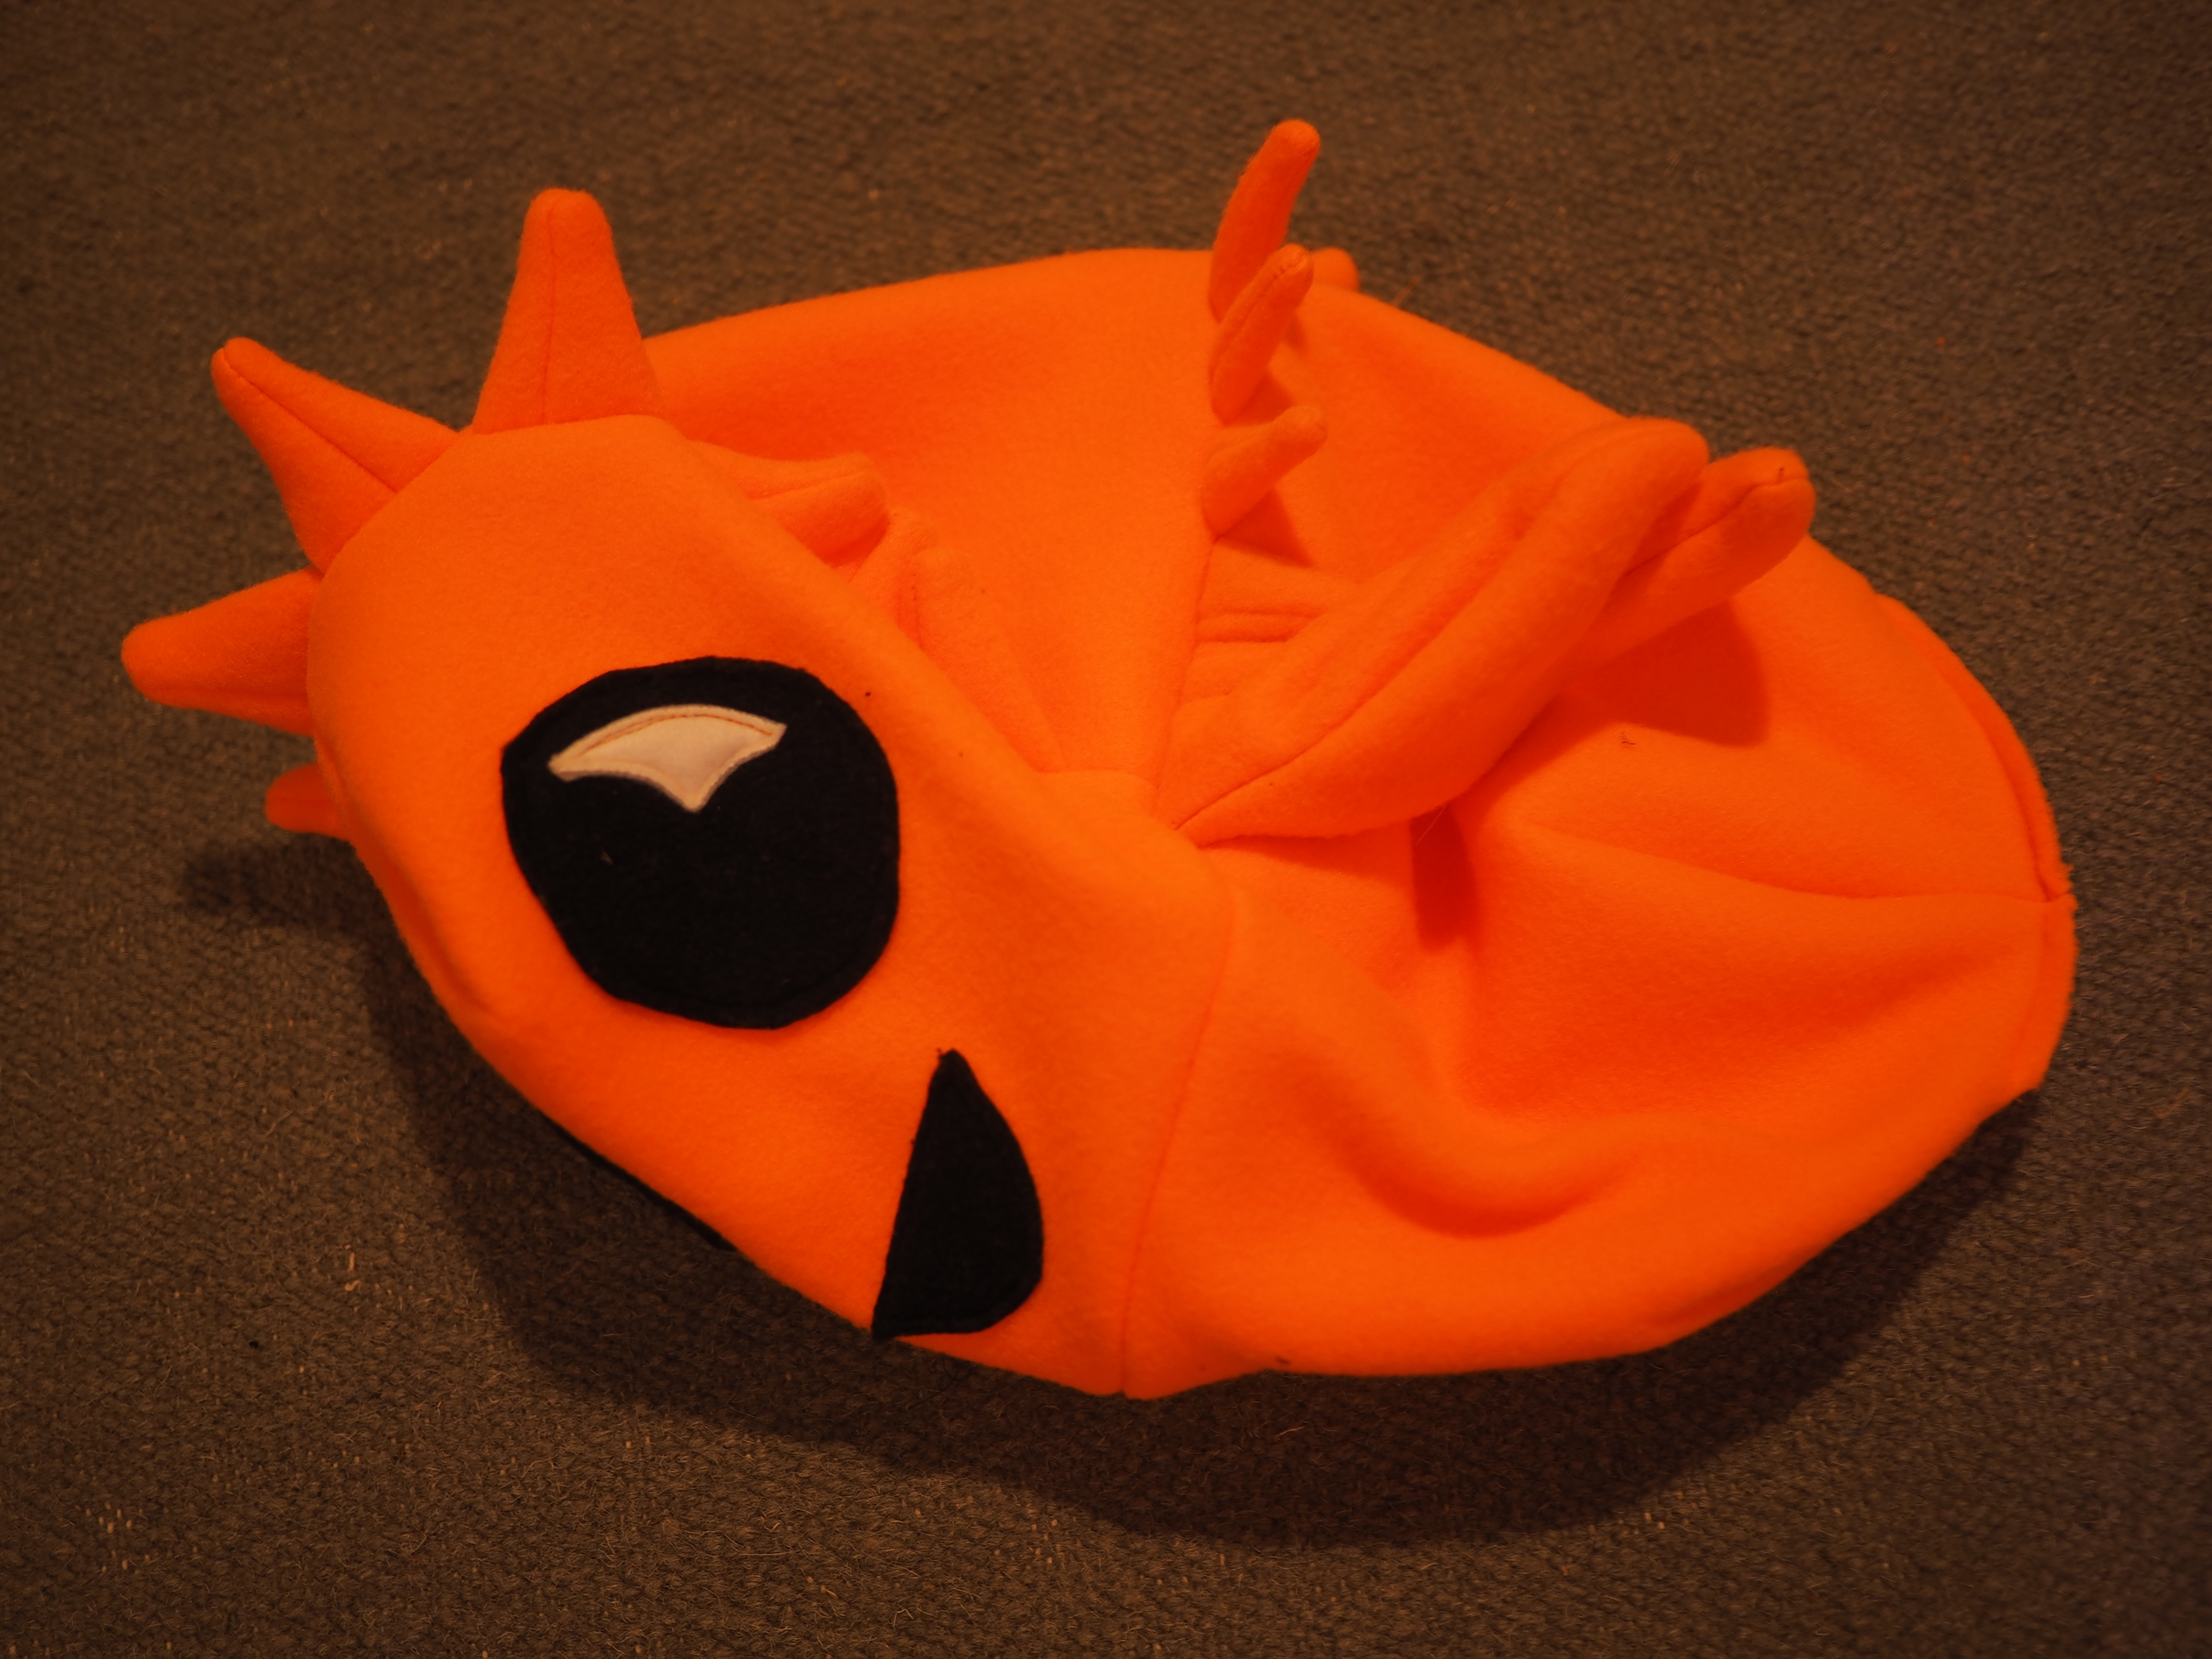
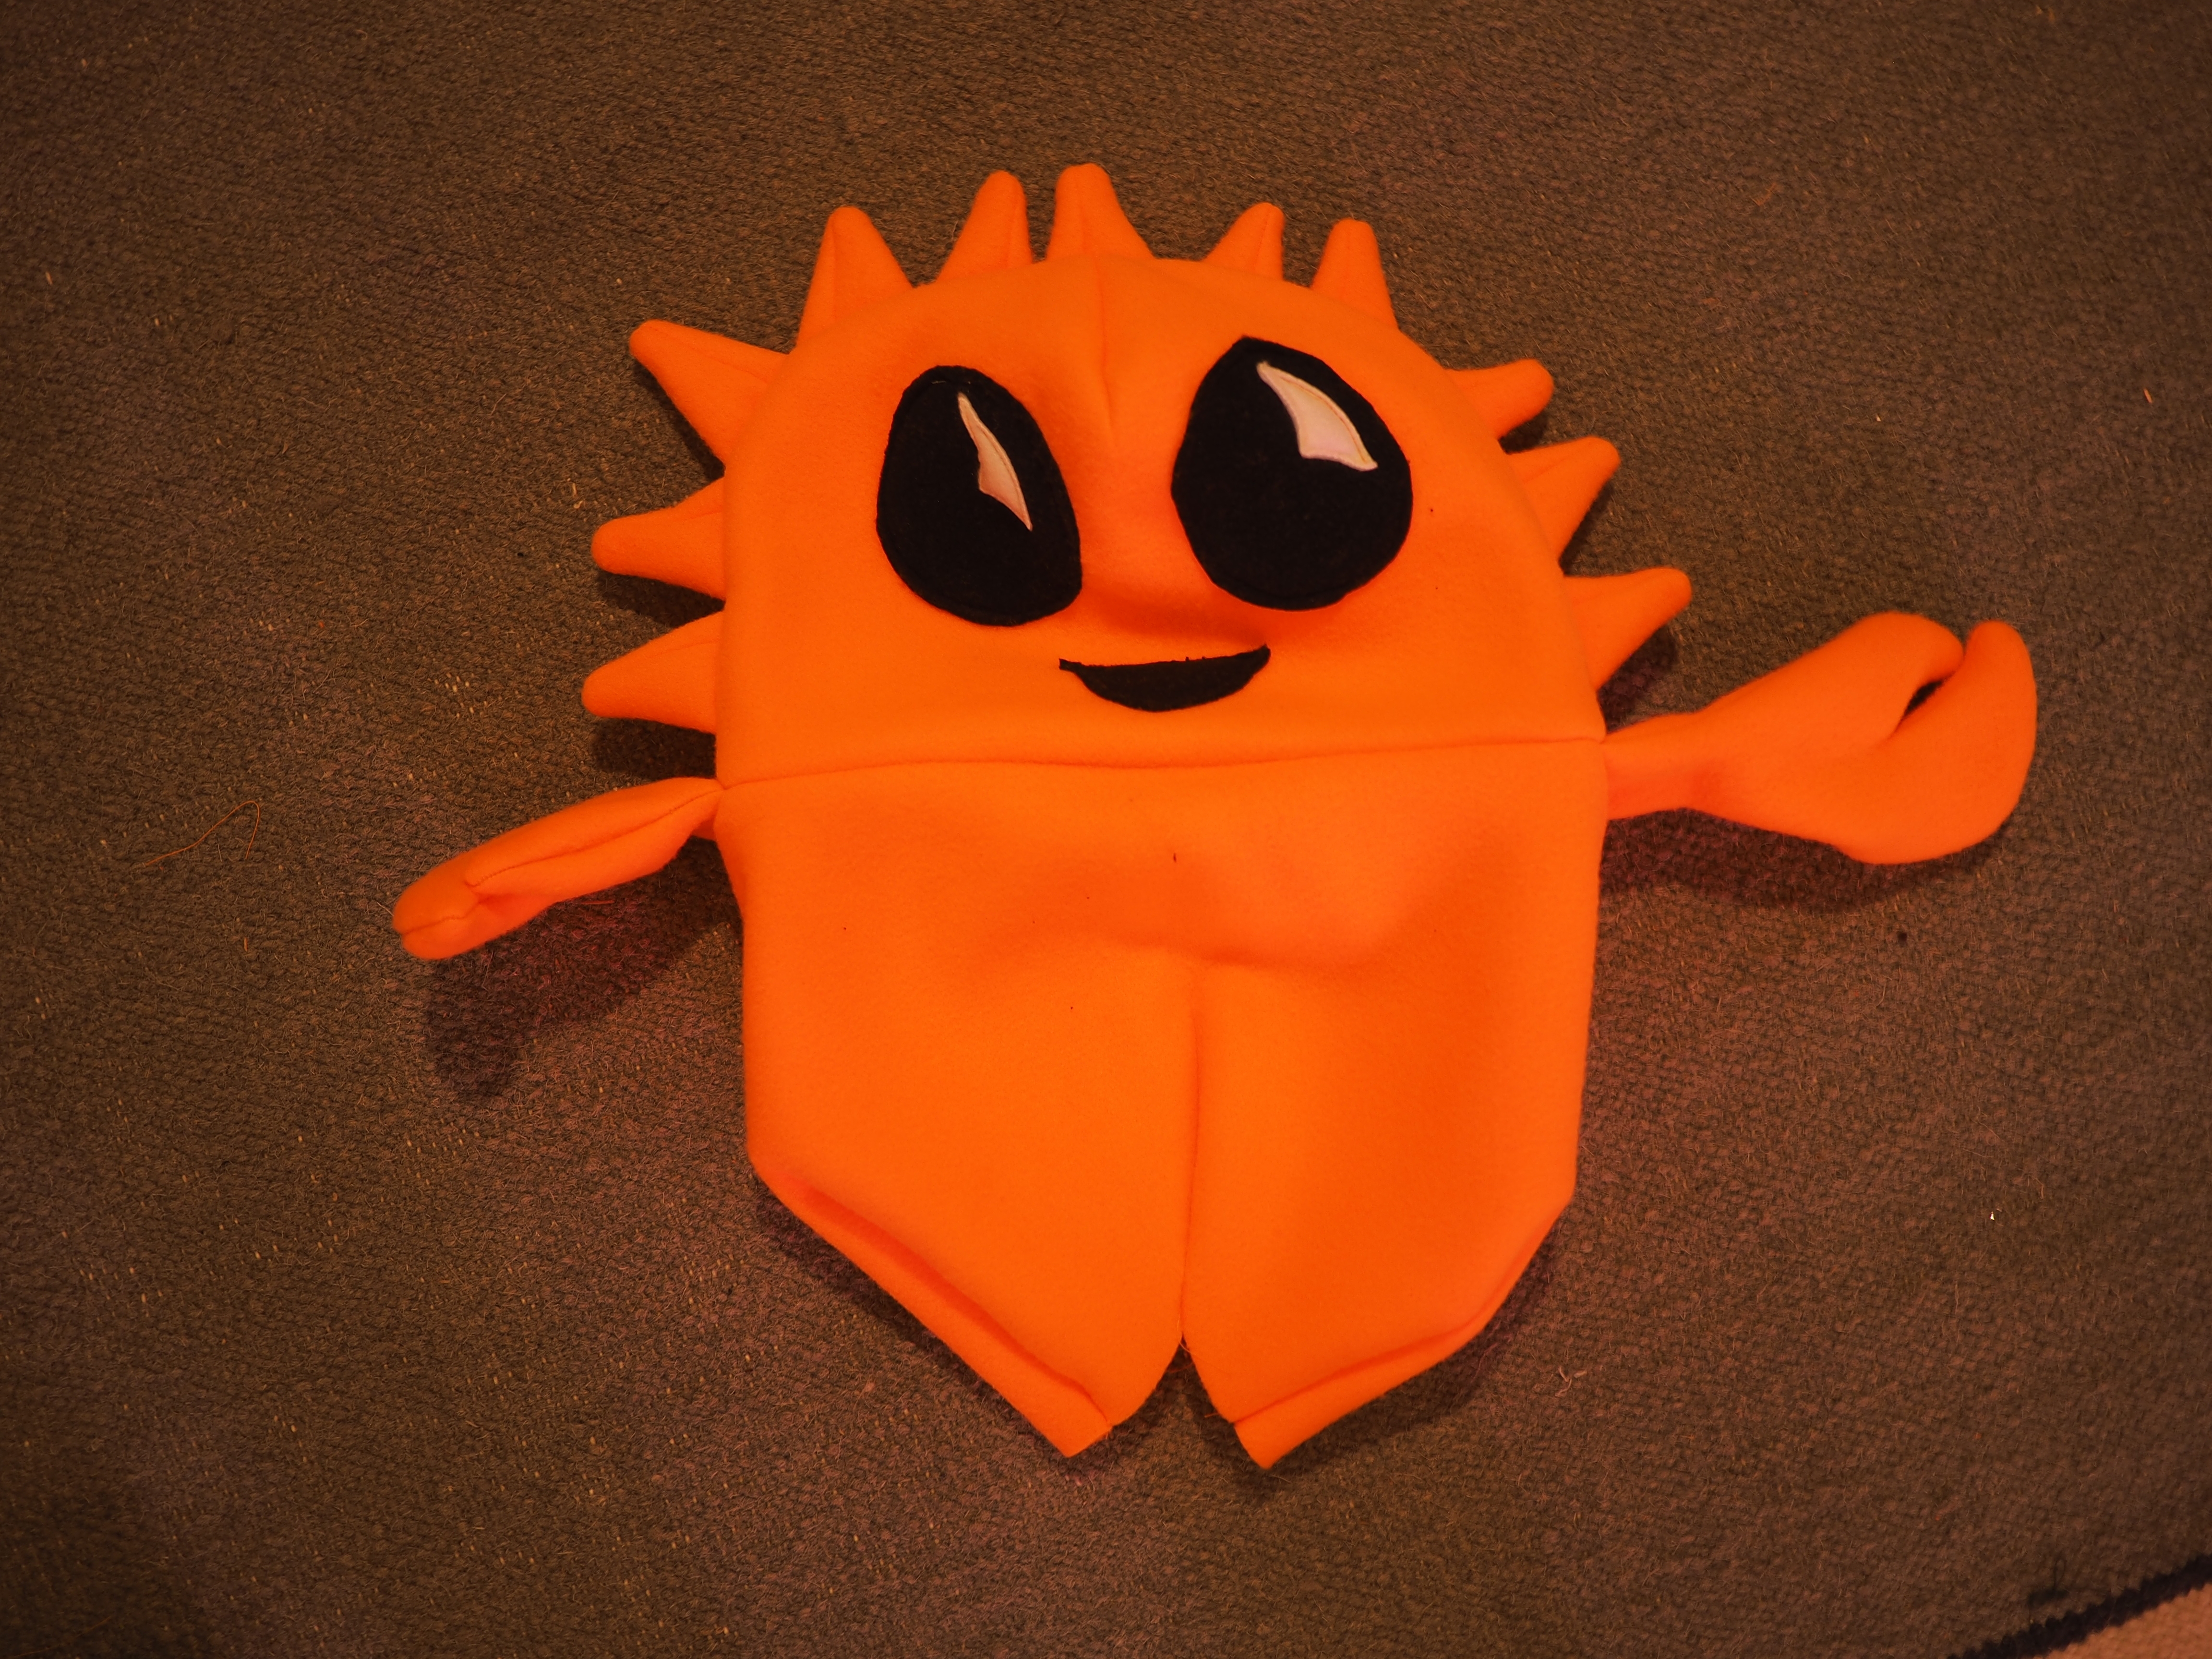
Stuff that lining into the hat, to make the whole thing hat-shaped, and you're done!