Plushie Rustacean Pattern
I made a Rustacean. He’s cute. You can make one too.
You’ll Need
- A couple square feet of orange polar fleece, or any other orange fabric that won’t stretch or fray too much
- A handful of stuffing. I cannibalized a throw pillow.
- A needle and some orange thread
- Black and white fabric scraps and thread, or black and white embroidery floss, for making the face.
- Intermediate sewing skills
- This pattern
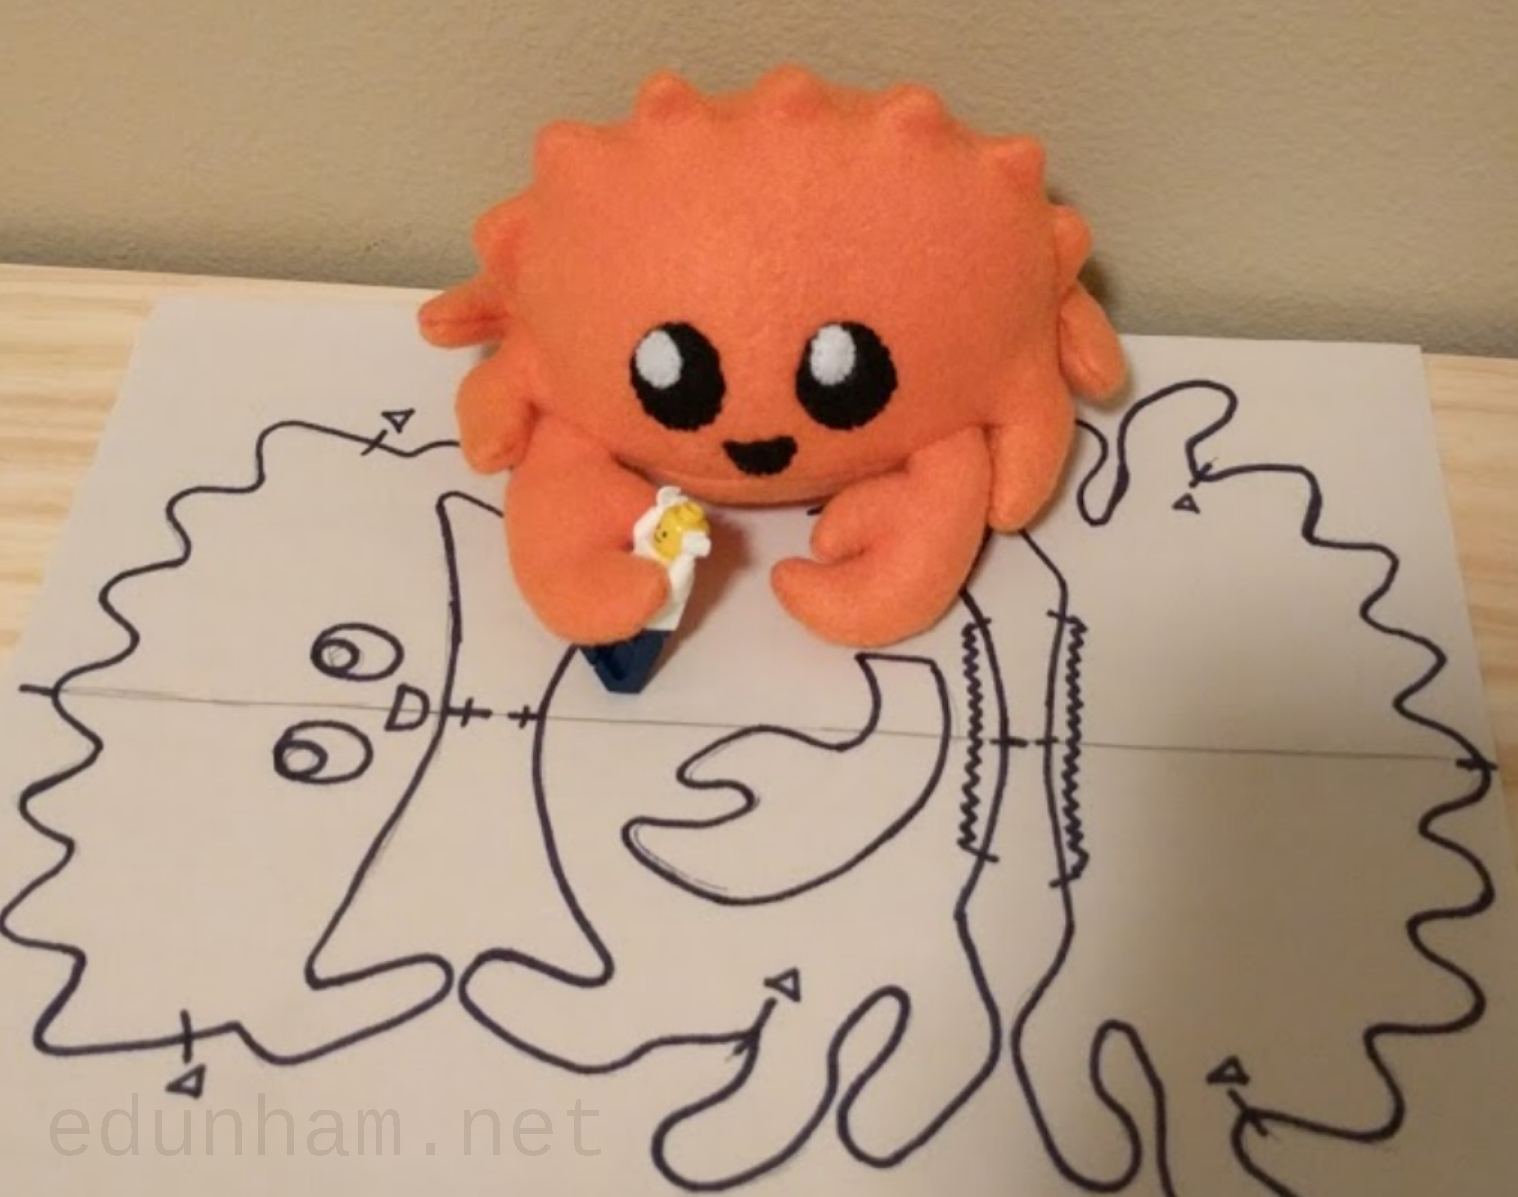
The Pattern
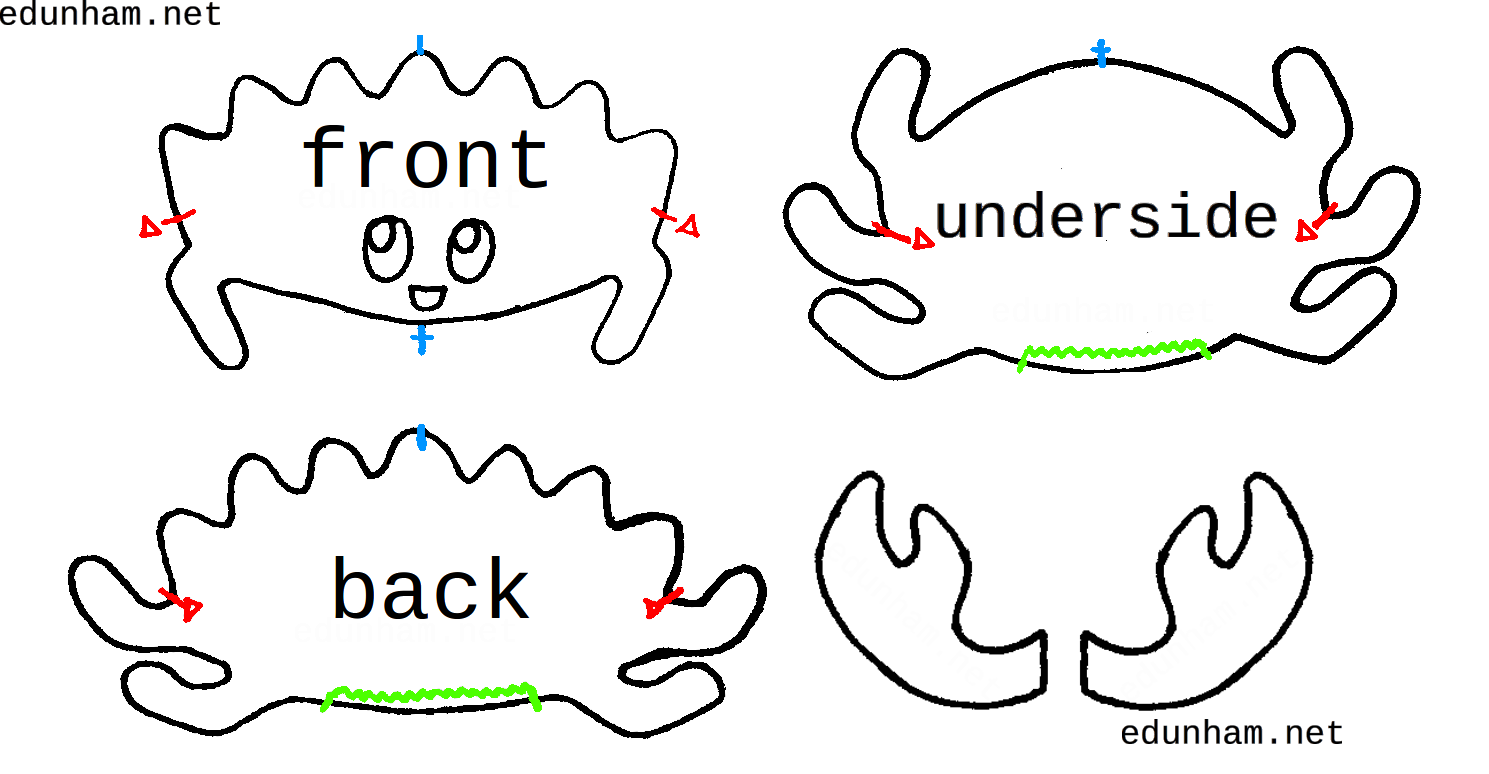
Get yourself a front, back, underside, and claw drawn on paper, either by printing them out or tracing from a screen. The front, back, and underside should have horizontal symmetry, except for the face placement. Make sure the points marked in red and blue on this pattern are noted on your paper.
Mine measure about 6” wide between the points marked in red.
Sewing vocabulary
- The right side of a fabric is what ends up on the outside of the finished item. The wrong side ends up where you can’t see it. Some fabrics have both sides the same; in that case, the wrong side is whichever one you feel like tracing the pattern onto.
- seam allowance is some extra fabric that ends up on the inside of the item when you’re done. The pattern above does not include seam allowance. This means that if you cut the fabric along the lines in the pattern, your finished rustacean will be tiny and sad and shaped wrong. You cut the paper along the lines, then trace it onto the fabric, then sew along the lines.
- applique is where you sew one piece of fabric onto the surface of another to make a design.
- There are a bunch of great youtube videos on basic sewing skills. Watch whichever ones you need.
Assembly
- Trace a front, a back, an underside, and the 2 claws onto the wrong side of your fabric with whatever will write on it without bleeding through. Make sure to transfer the blue centerline marks and the red three-point join marks.
- Cut out the shapes you just traced, leaving about 1” of margin around them. We’ll trim the seams properly later, so don’t worry about getting it exact.
- Find a couple claw-sized chunks of leftover fabric and pin one to the back of each claw (right sides together, of course).
- Sew around both claws, leaving the arm ends open so you can turn them. I find it’s easiest to backstitch, and you can get away with stitches up to about 1.5mm apart with normal weight polar fleece.
- Trim around the outside of the seams on the claws to leave about 1/4” seam allowance, and clip right up to the stitches in the concave spot. If you backstitched, make sure flip them over before trimming the seams so you don’t accidentally cut through the longer stitches.
- Turn the claws so the right side of the fabric is out and the seams are on the inside, and stuff them with stuffing or fabric scraps. A pair of wooden chopsticks from a fast food place are a great tool for turning and stuffing.
- Put the front and back pieces right sides together so the points marked in red and blue on the pattern line up. Pin them together.
- Sew from one red mark to the other along Ferris’s spiky back.
- Trim around the spikes leaving about 1/4” seam allowance, clipping right up to the seam in the concave spots.
- Figure out which side is front (hint, it has only 2 legs rather than 4). Imagine where Ferris’s little face will go when he’s finished. Now, pin both claws onto the right side of the front piece, so they’ll be oriented correctly when he’s done. If in doubt, pin the bottom front in place and turn the whole thing inside out to make sure the claws are right.
- Match the center front of the underside with the center of Ferris’s front (both have a blue + on the pattern). Be sure the pieces have their right sides together and the claws are sandwiched between them.
- Match the points marked with red triangles on each side of the front and underside together and pin them. If the claws are sticking out at this point, go back to step 10 and try again
- Sew from one red mark to the other to join Ferris’s front to the front of his underside. Put a few extra stitches in the part of the seam where his “arms”/claws are attached, to make sure they can’t be pulled out.
- Trim around the 2 tiny legs that you’ve sewn so far, with about 1/8” seam allowance.
- Now you can applique his face onto the right side of his front. Or embroider it if you know how. Cut the black and white felt scraps into face-shaped pieces and sew them down, giving Ferris whatever expression you want.
- Line up the 4 back legs on the underside and back pieces, and pin them right sides toether. Sew everything except the part marked in green – that’s the hole through which you’ll turn him inside out.
- Trim around those last 4 legs, leaving at least 1/8” seam allowance. Don’t cut away any more fabric from the bit marked in green. If you leave a bit of extra fabric around the leg seams, they’ll be harder to turn but require less stuffing.
- Turn Ferris right side out. Again, chopsticks or the non-pointy end of a barbeque skewer are useful for getting the pointy bits to do the right thing.
- Stuff Ferris with the filling. I filled mine quite loosely, because it makes him softer and more huggable. If you overfill his body, his spikes will look silly. If you overfill his legs, they’ll stick out in funny directions and not bend right.
- Tuck the seam allowance back into the hole through which you stuffed Ferris and sew it shut. Congratulations, you have your own toy crab!
The Finished Product
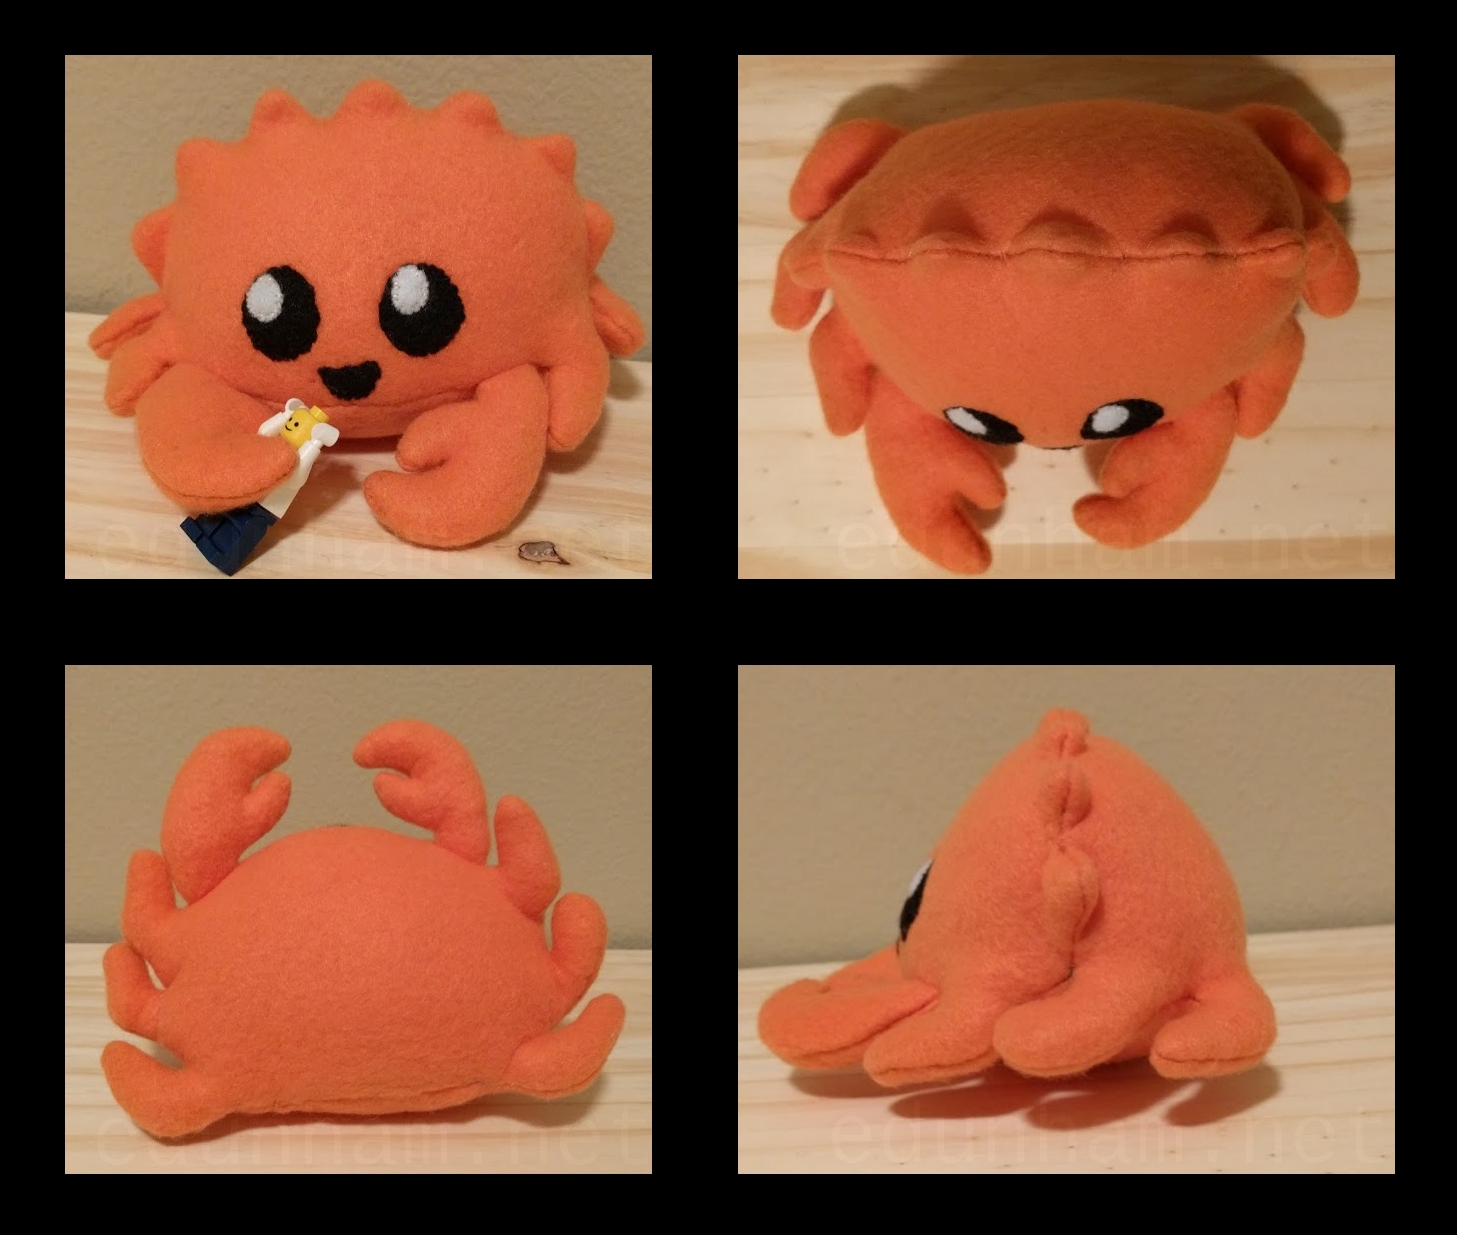
He’s cute, cuddly, and palm-sized. Lego dude for scale.