Toy hypercube construction
I think hypercubes are neat, so I tried to make one out of string to play with. In the process, I discovered that there are surprisingly many ways to fail to trace every edge of a drawing of a hypercube exactly once with a single continuous line.
This puzzle felt like the sort of problem that some nerd had probably solved before, so I searched the web and discovered that the shape I was trying to configure the string into is called an Eulerian Cycle.
I learned that any graph in which every vertex attaches to an even number of edges has such a cycle, which is useful for my craft project because the euler cycle is literally the path that the string needs to take to make a model of the object represented by the graph.
Mathematical materials
To construct a toy hypercube or any other graph, you need the graph. To make it from a single piece of string, every vertex should have an even number of edges.
Knowing the number of edges in the graph will be useful later, when marking the string.
Physical materials
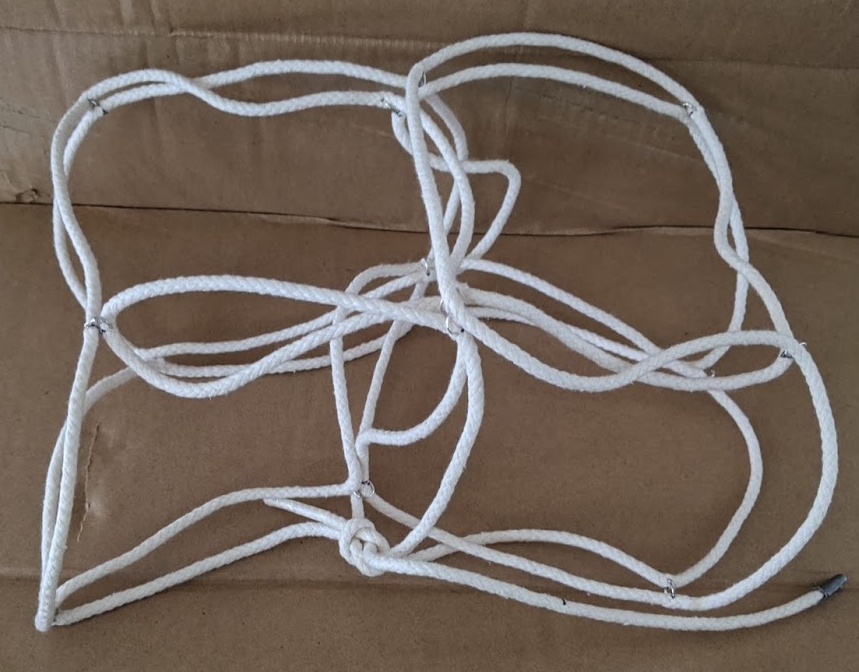
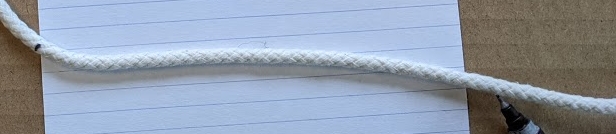
For the edges of the toy, I wanted something that’s a bit flexible but can sort of stand up on its own. I found that cotton clothesline rope worked well: it’s easy to mark, easy to pin vertex numbers onto, and sturdy but still flexible. I realized after completing the construction that it would have been clever to string items like beads onto the edges to make the toy prettier and identify which edge is which.
For the vertices, I pierced jump rings through the rope, then soldered them shut, to create flexible attachment points. This worked better than a previous prototype in which I used flimsier string and made the vertices from beads.
Vertices could be knotted, glued, sewn, or safety pinned. A bookbinding awl came in handy for making holes in the rope for the rings to go through.
Mathematical construction
First, I drew the graph of the shape I was trying to make – in this case, a hypercube. I counted its edges per vertex, 4. I made sure to draw each vertex with spots to write numbers in, half as many numbers as there are edges, because each time the string passes through the vertex it makes 2 edges. So in this case, every vertex needs room to write 2 numbers on it.
Here’s the graph I started with. I drew the edges in a lighter color so I could see which had already been visited when drawing in the euler cycle.
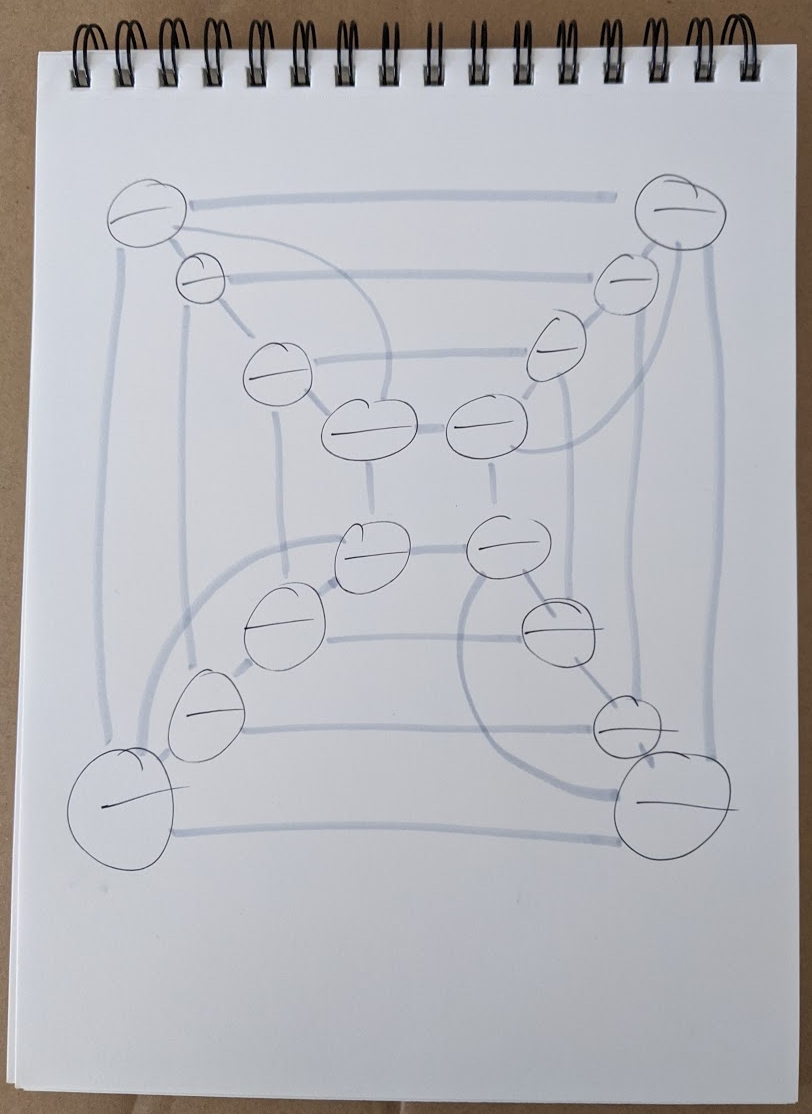
Then I started from an arbitrary vertex and drew in the line. Any algorithm for finding euler paths will suffice to draw the line. The important part of tracing the line on the graph is to mark each vertex it encounters, sequentially. So the vertex I start at is 1, the first vertex I visit is 2, and so forth.
Since the euler path visits every vertex of my particular hypercube twice, every vertex will have 2 numbers (the one I started at will have 3) when I finish the math puzzle. These pairs of numbers are what tell me which part of the string to attach to which other part.
Here’s what my graph looked like once I found an euler cycle in it and numbered the vertices that the cycle visited:

Physical construction
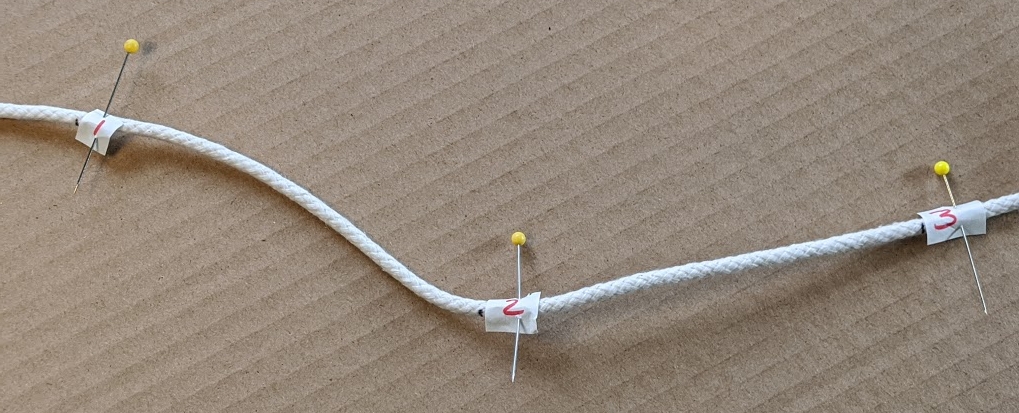
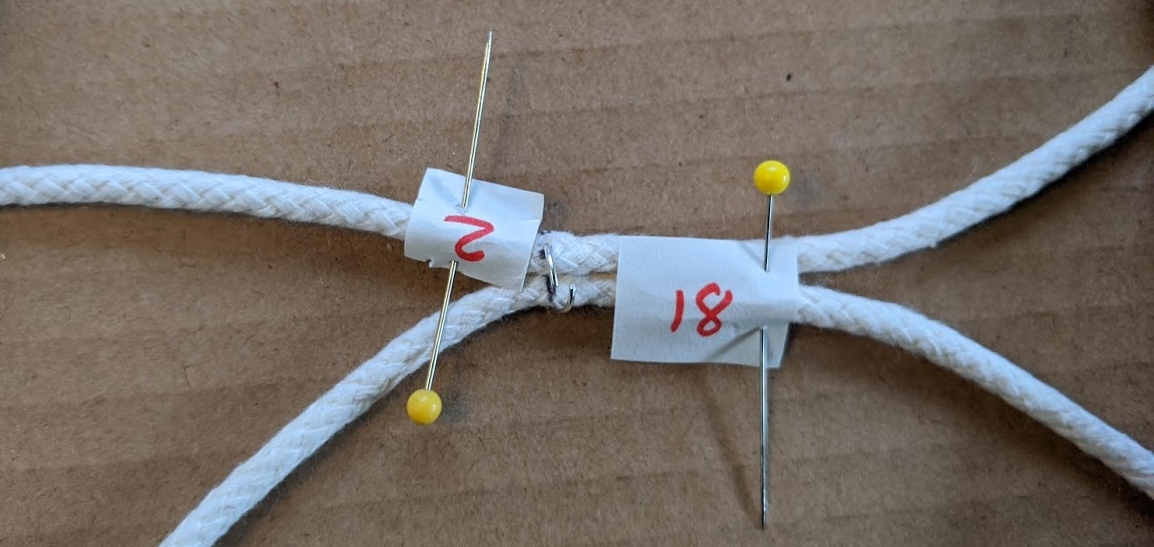
Since my graph has 32 edges, I made 33 evenly spaced marks on the string. I used an index card to measure them because that seemed like an ok size, but in retrospect it would have been fine if I’d made it smaller.
I then numbered each mark in sequence, from 1 to 33. I numbered them by writing the numbers on slips of paper and pinning the papers to the rope, but if I was using a ribbon or larger rope, the numbers could have been written directly on it. If you’re doing this at home, you could mark the numbers on masking tape on the rope just as well.
The really tedious step is applying the vertices. I just went through the graph, one vertex at a time, and attached the right points on the string together for it.
The first vertex had numbers 1, 25, and 33 on it for the euler cycle I drew and numbered on the graph, so I attached the string’s points 1, 25, and 33 together with a jump ring. The next vertex on the drawing had the numbers 2 and 18 on it, so I pierced together the points on the string that were labeled 2 and 18.
I don’t think it matters what order the vertices are assembled in, as long as the process ultimately results in all the vertices on the graph being represented by rings affixing the corresponding points on the string together.
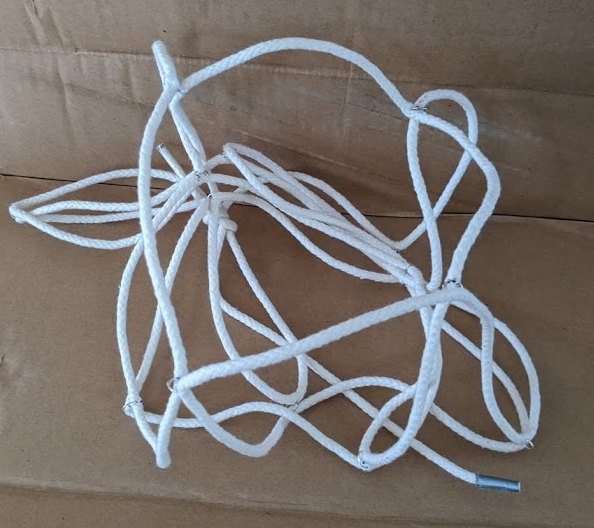
I also soldered the rings shut, because after all that work I don’t want them falling out.
That’s all there is to it!
I’m going to have to find a faster way to apply the vertices before attempting a 6D hypercube. An ideal vertex would allow all edges to rotate and reposition themselves freely, but failing that, a lighter weight string and crimp fasteners large enough to hold 6 pieces of that string might do the trick.
The finished toy is not much to look at, but quite amusing to try to flatten into 3-space.